All Images
Navigation
Figure 1
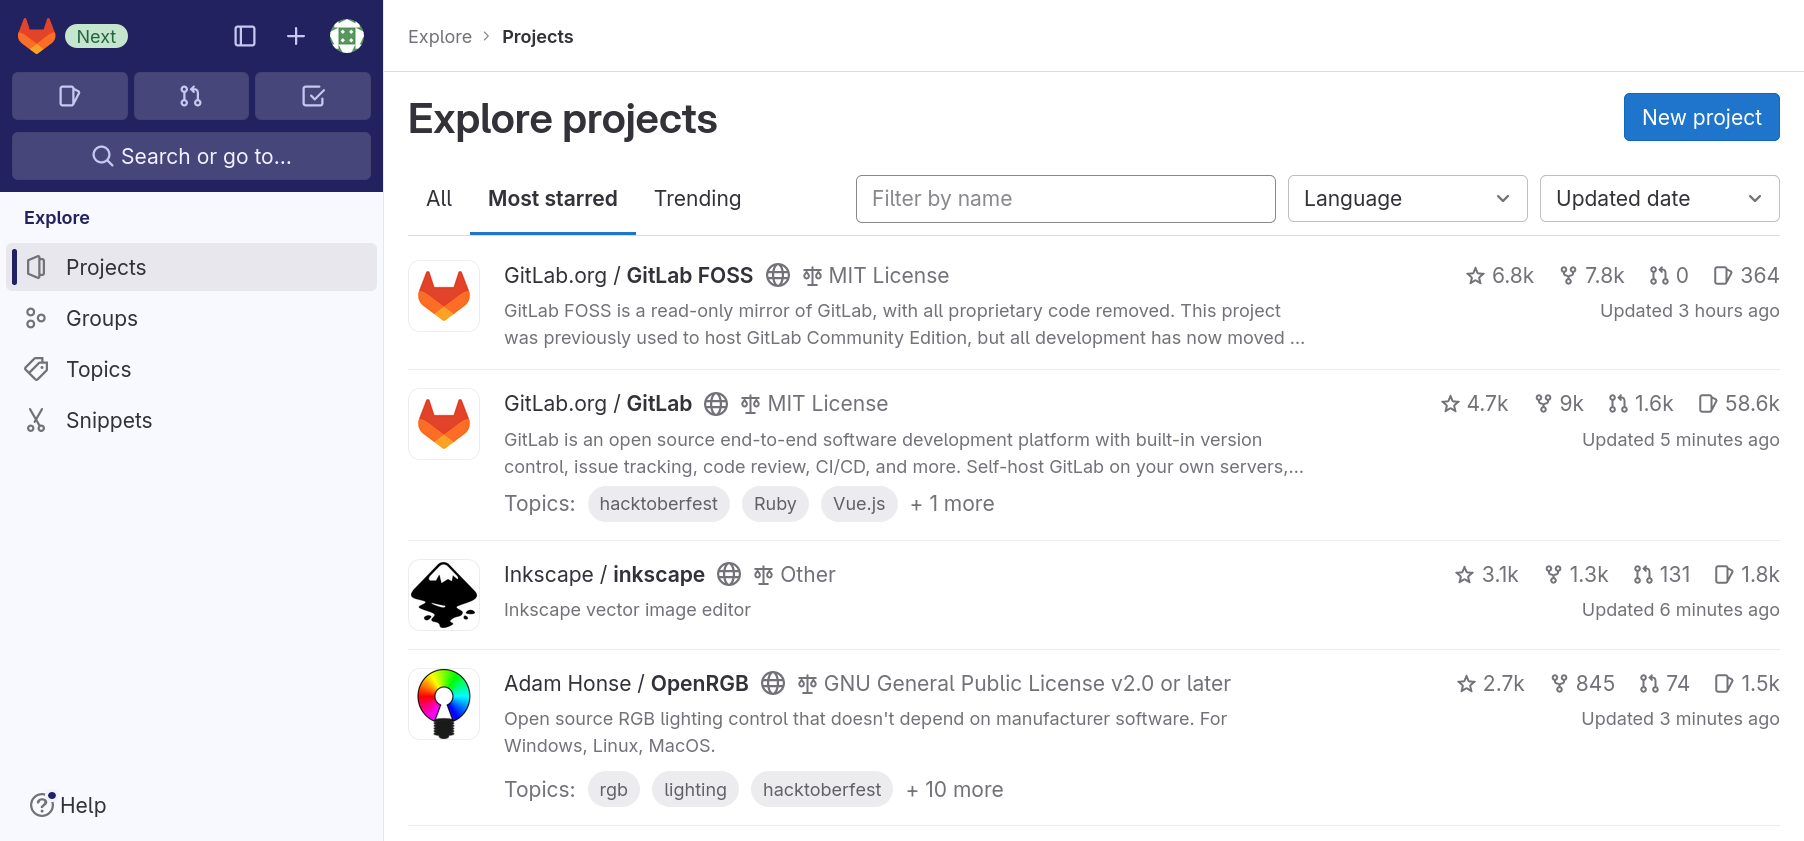
Image 1 of 1: ‘Explore projects page with tab “Most starred” open. The tab shows a list of projects with icon, name, descriptions, and four statistical values for each entry.’
GitLab Projects
Figure 1
Image 1 of 1: ‘Create blank project form with text input fields labeled “Project name”, “Project URL”, “Project slug”, “Project deployment target (optional)”, a radio button element labeled “Visibility Level” with options “Private” and “Public”, and two checkboxes labeled “Initialize repository with a README” and “Enable Static Application Security Testing (SAST)”.’
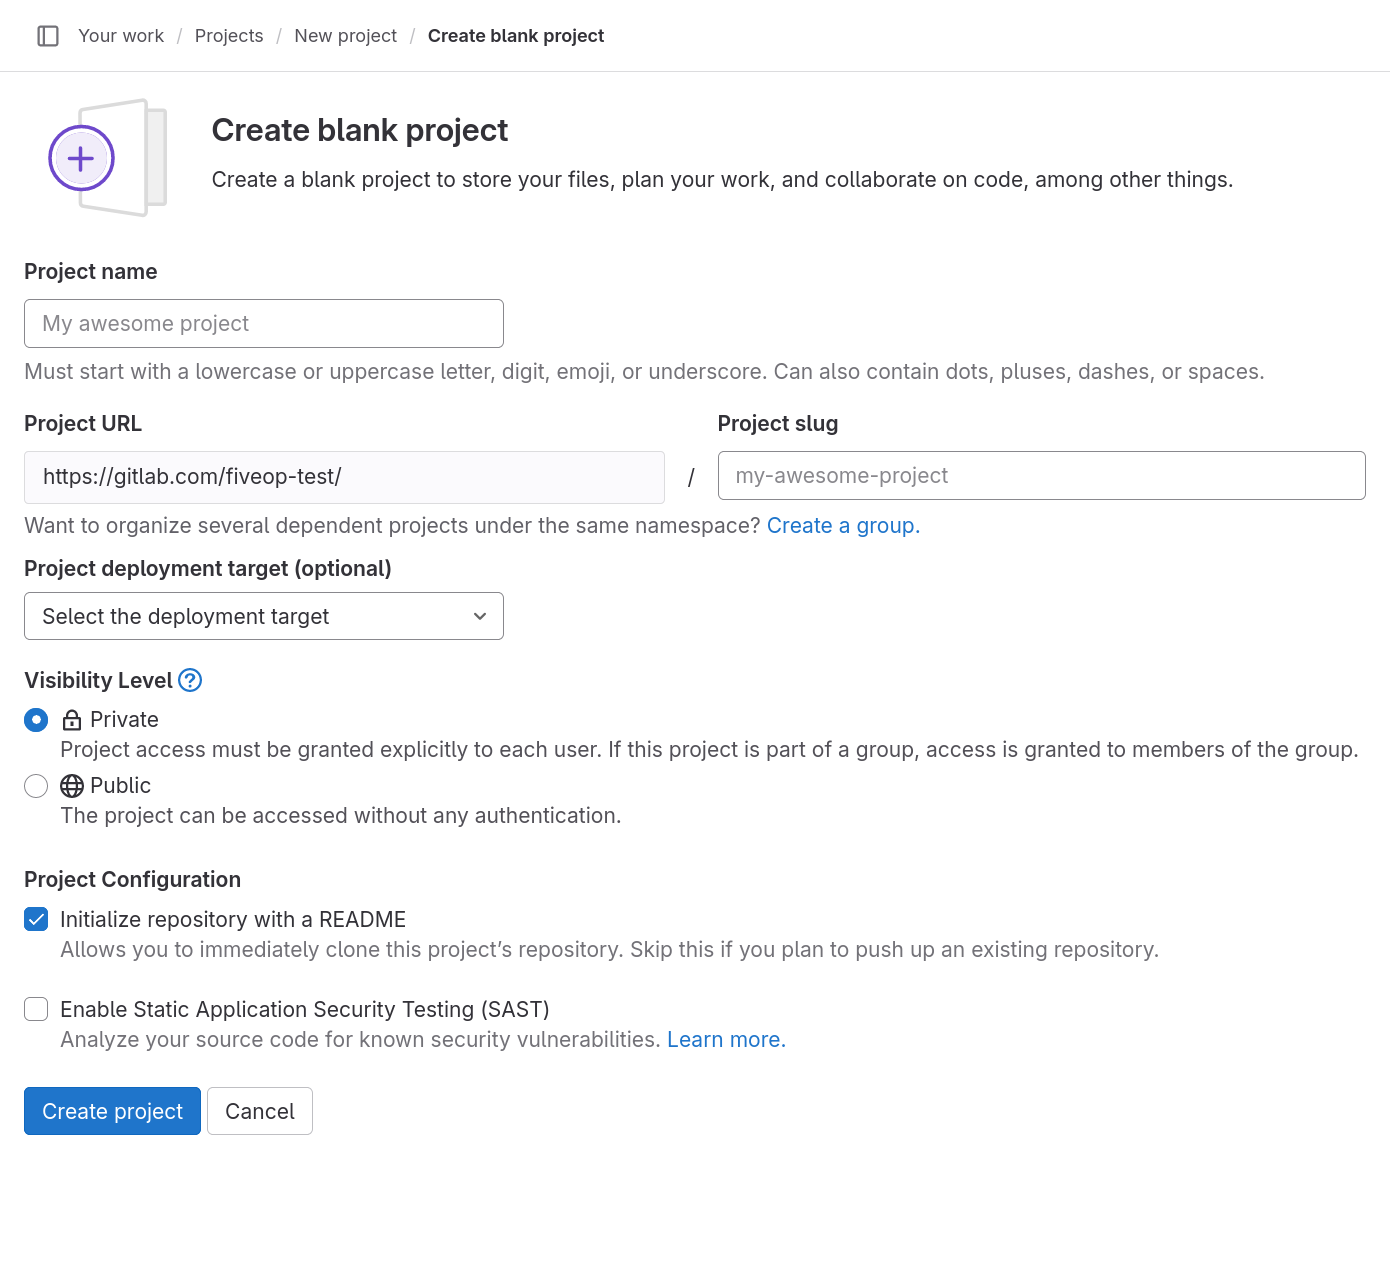
Figure 2
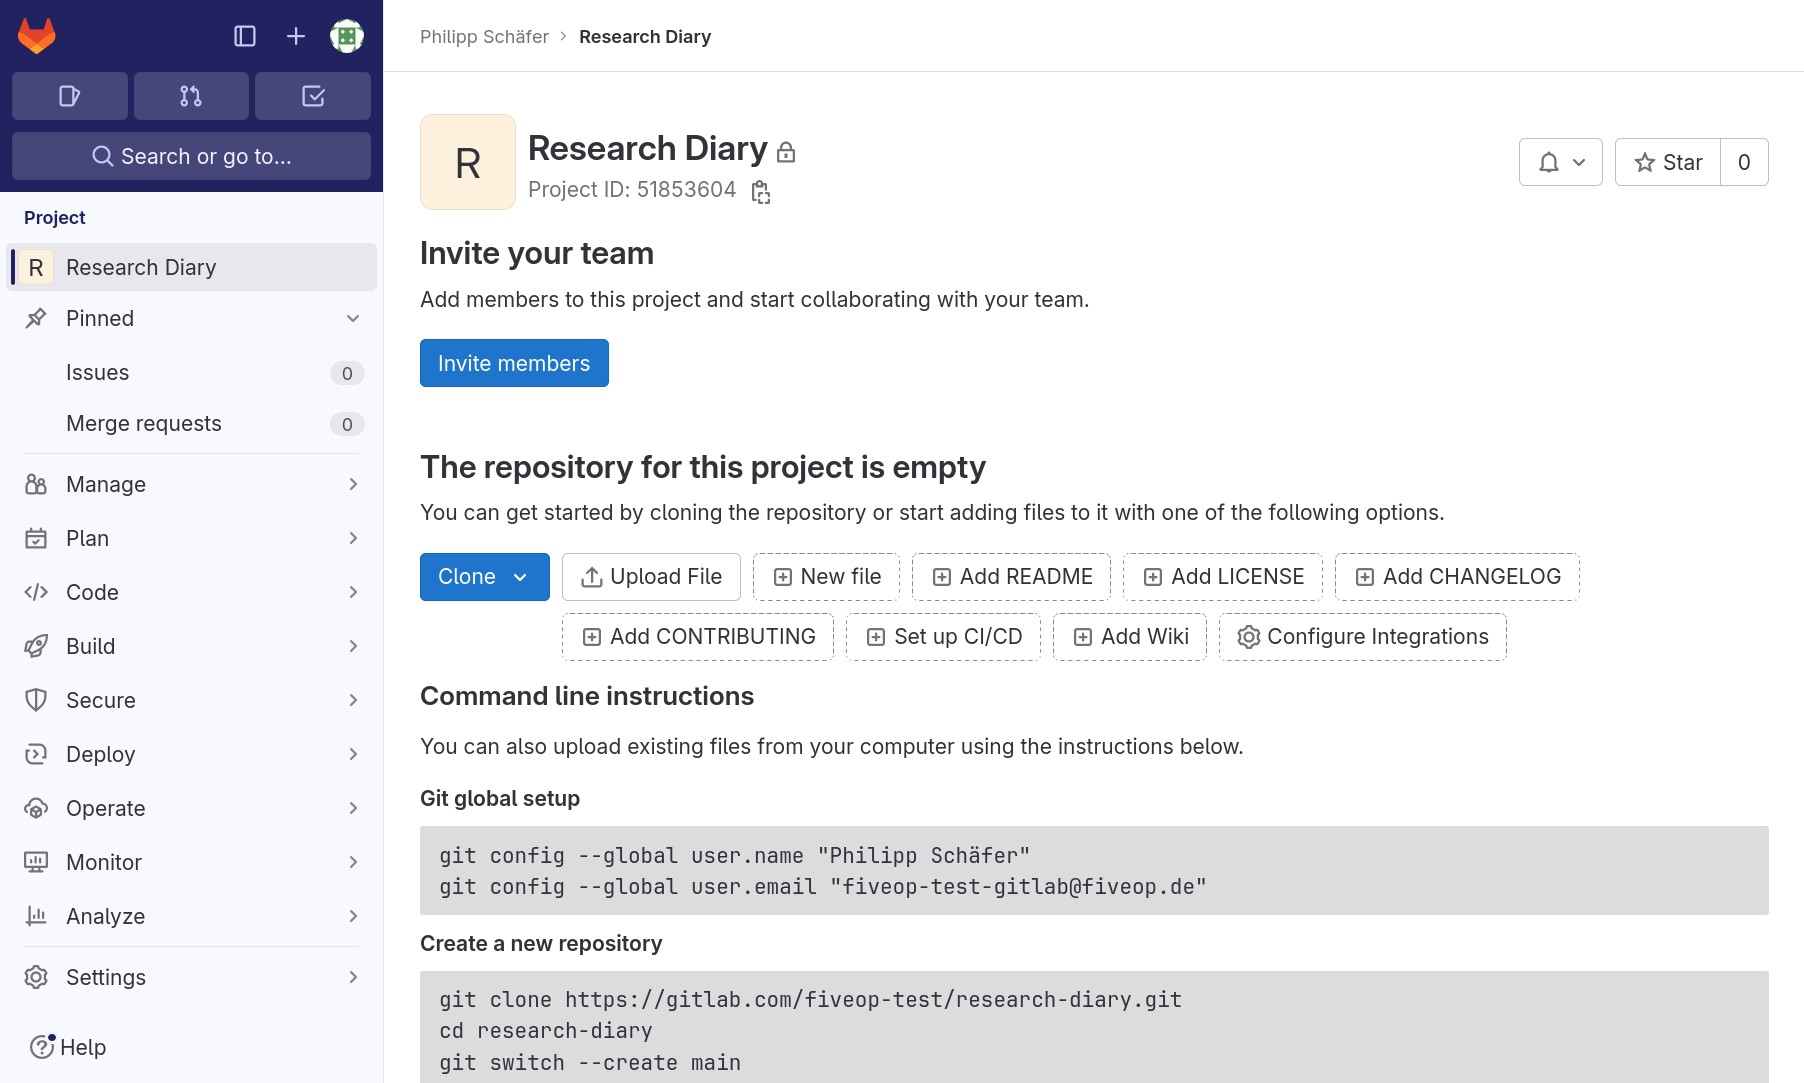
Image 1 of 1: ‘Project homepage for a new project. On the left, a menu starting with three buttons for issues, merge requests, and to-do lists, as well as a search field. Those are followed by a list of links and sub-menus: the project name, open sub-menu Pinned with items Issues and Merge requests, sub-menus Manage, Plan, Code, Build, Secure, Deploy, Operate, Monitor, Analyze, Settings, and Help. On the right, taking up the major part of the page width, the project page: Starting at the top, the project’s name “Research Diary“, an encouragement to “Invite your team” with a button “Invite members”, the statement that “The repository for this project is empty” with various buttons for getting initial content into the repository. At the bottom, the beginning of instructions on how to push an existing repository are visible, but cut off.’
Adding Files to a Project Repository
Figure 1
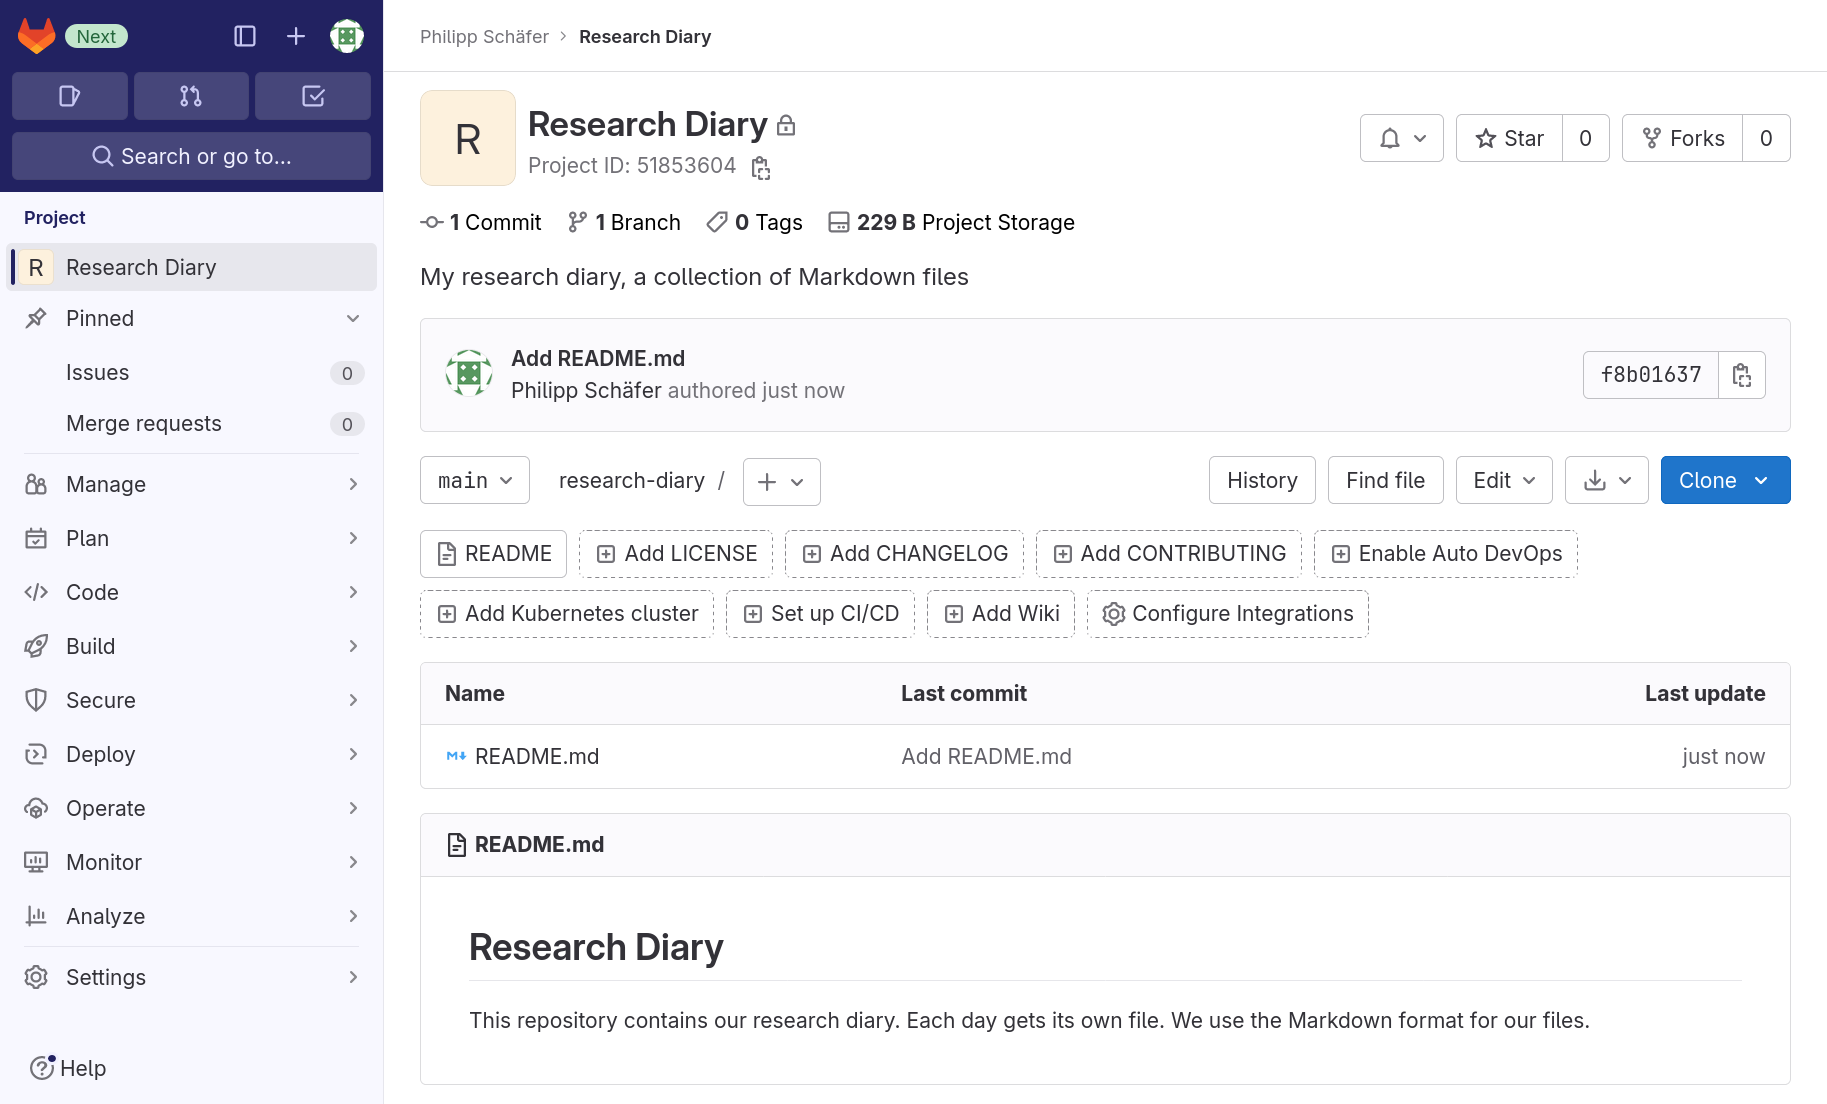
Image 1 of 1: ‘Project homepage of a project. On the left, a menu leading to other project pages. On the right, taking up most of the width, the project homepage. Starting from the top, we first have the project title, Research Diary, followed by a line of statistical values (1 Commit, 1 Branch, 0 Tags, 209B Project Storage). Under these we see the description: “My research diary, a collection of Markdown files”. This is followed by a box giving information on the last commit of the current branch: the commit message “Add README.md”, the authors name and how far in the past the commit was authored, as well as prefix of the commit’s hash with a copy-to-clipboard button. In the next line we see a drop-down field for branches showing “main”, the project slug¸“test”, a drop-down button labeled “+”, and buttons labeled “History”, “Find file”, “Web IDE”, a download symbol, and ”Clone”. This is followed by some buttons that allow to add or upload new files or setup some of GitLab features for the project. Next is a list of files, in this case only `README.md`, with information when it was last updated and through which commit. Finally, we see a rendering of `README.md`.’
Collaboration
Figure 1
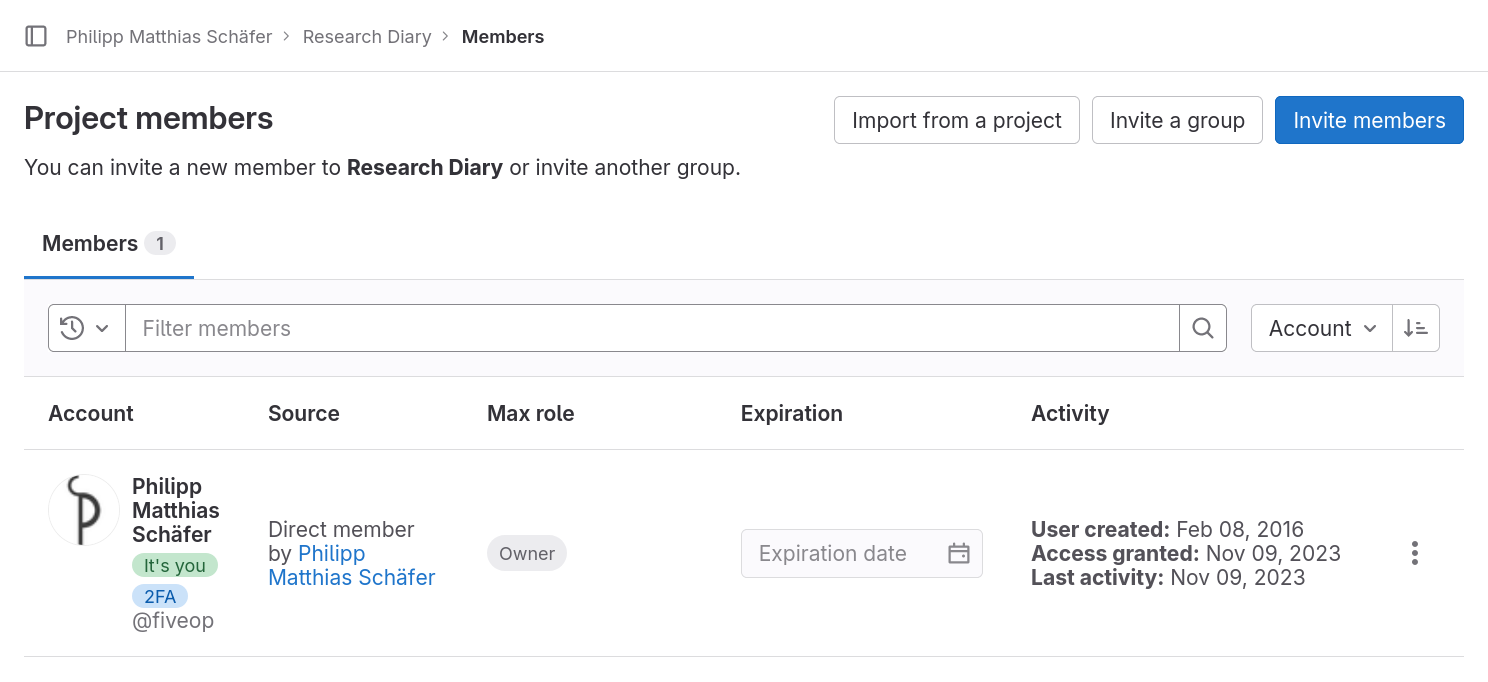
Image 1 of 1: ‘Webpage coutout titled “Project Members” with three buttons next to the title: “Import from a project”, “Invite a group”, and “Invite members”. Below a table listing the project’s members, showing account holder‘s name with account name, the membership source, the member’s maximum role, the membership expiration date, and three activity timestamps: User created, Access granted, and Last activity. The table contains one column: ”Philipp Matthias Schäfer, @fiveop, Direct member Philipp Matthias Schäfer, Owner, no expiration date, and three dates for the activity timestamps.’
Groups
Figure 1
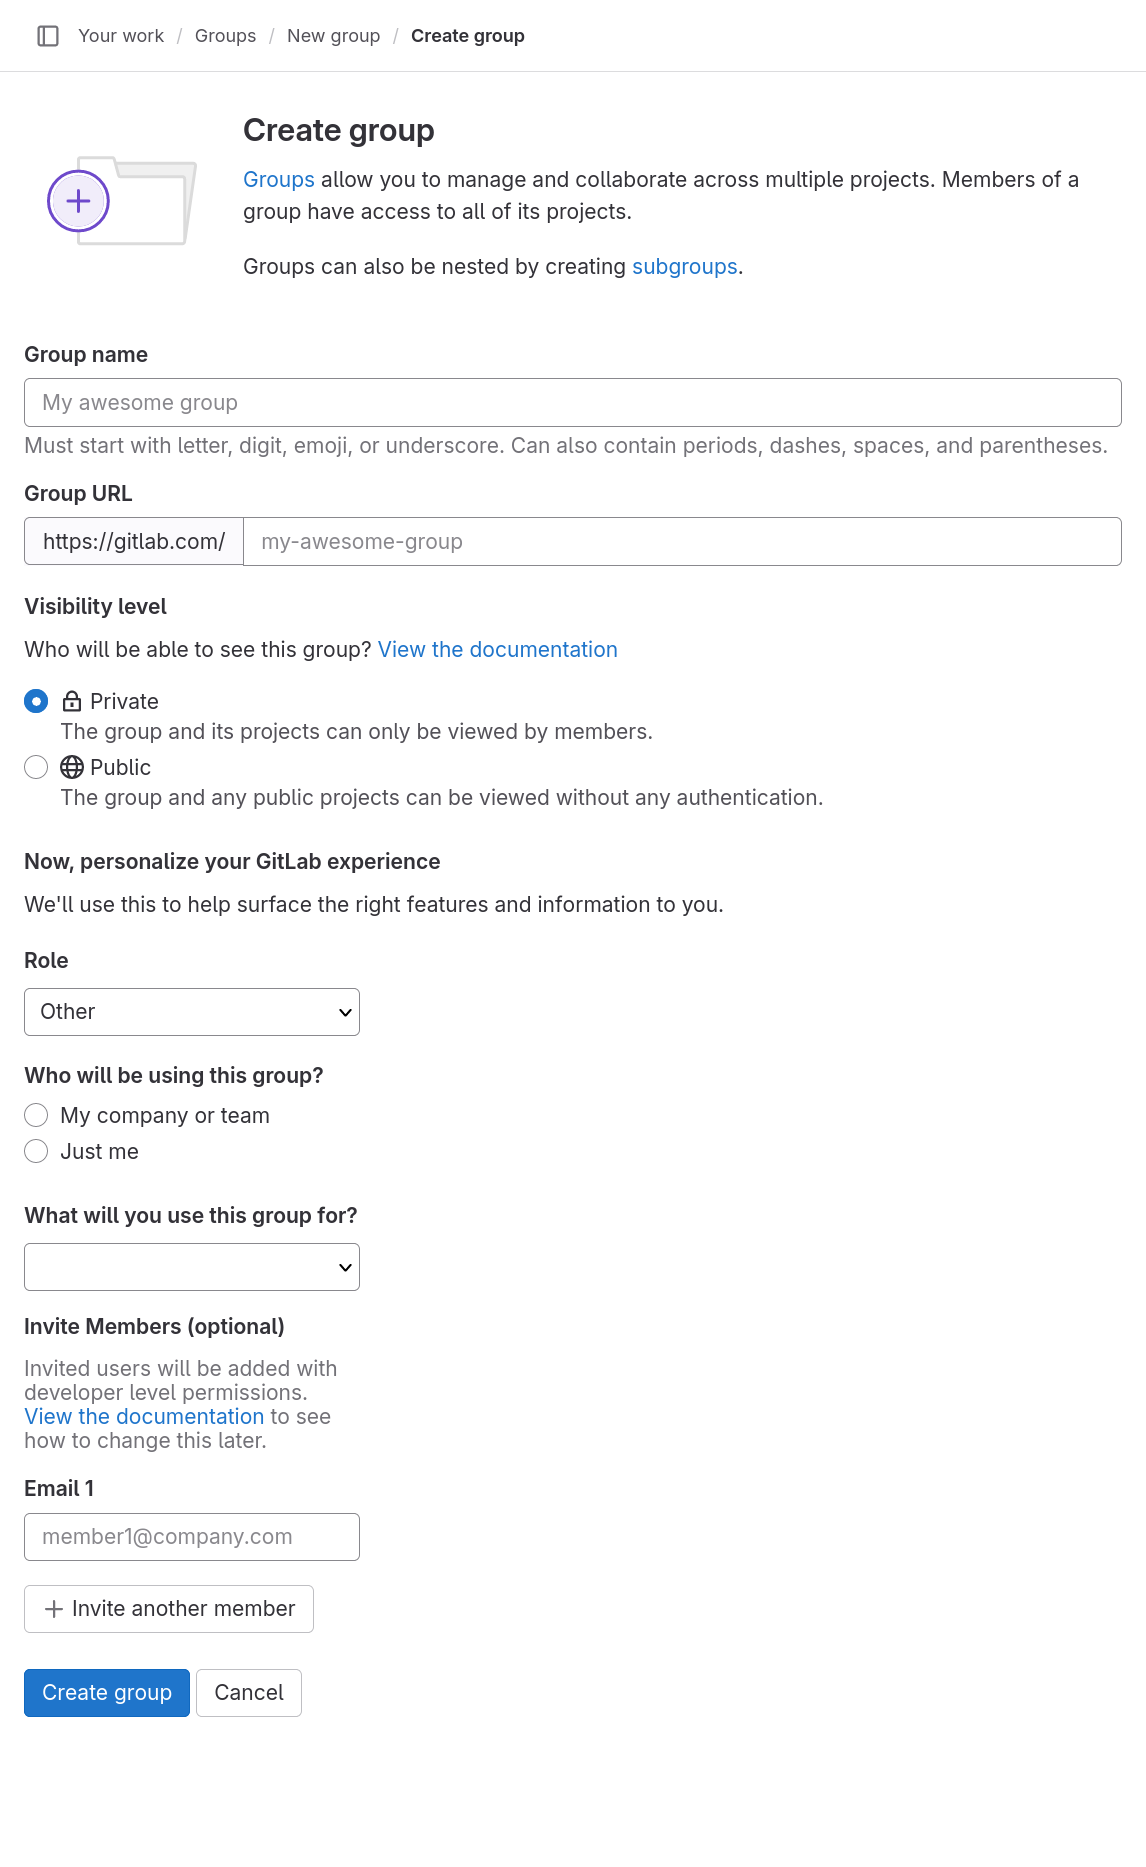
Image 1 of 1: ‘Create group form with text input fields labeled “Group name”, “Group URL”, a radio button element labeled “Visibility Level” with options “Private” and “Public”, a drop-down field labeled “Role”, a radio button element labeled “Who will be using this group?” with options “My company or team” and “Just me”, a drop-down field labeled “What will you use this group for?” and an text input field labeled “Email 1” with a button to add more under the heading “Invite members (optional)”, and finally two buttons labeled “Create group” and “Cancel”.’
Issues
Figure 1
Image 1 of 1: ‘New issue form with a text input field labeled “Title”, a drop-down field labeled “Type” showing the word “Issue“, a multi-line text input field with buttons for text formatting labeled “Description” with subscript “Add description templates to help your contributors communicate effectively!”, an unchecked check box labeled “This issue is confidential and should only be visible to team members with at least Reporter access.”, drop-down fields labeled “Assignee“, “Milestone”, and “Label” showing “Unassigned“, “Milestone”, and “Labels”, respectively, a date input field labeled “Due date”, and two buttons labeled “Create Issue” and “Cancel”.’
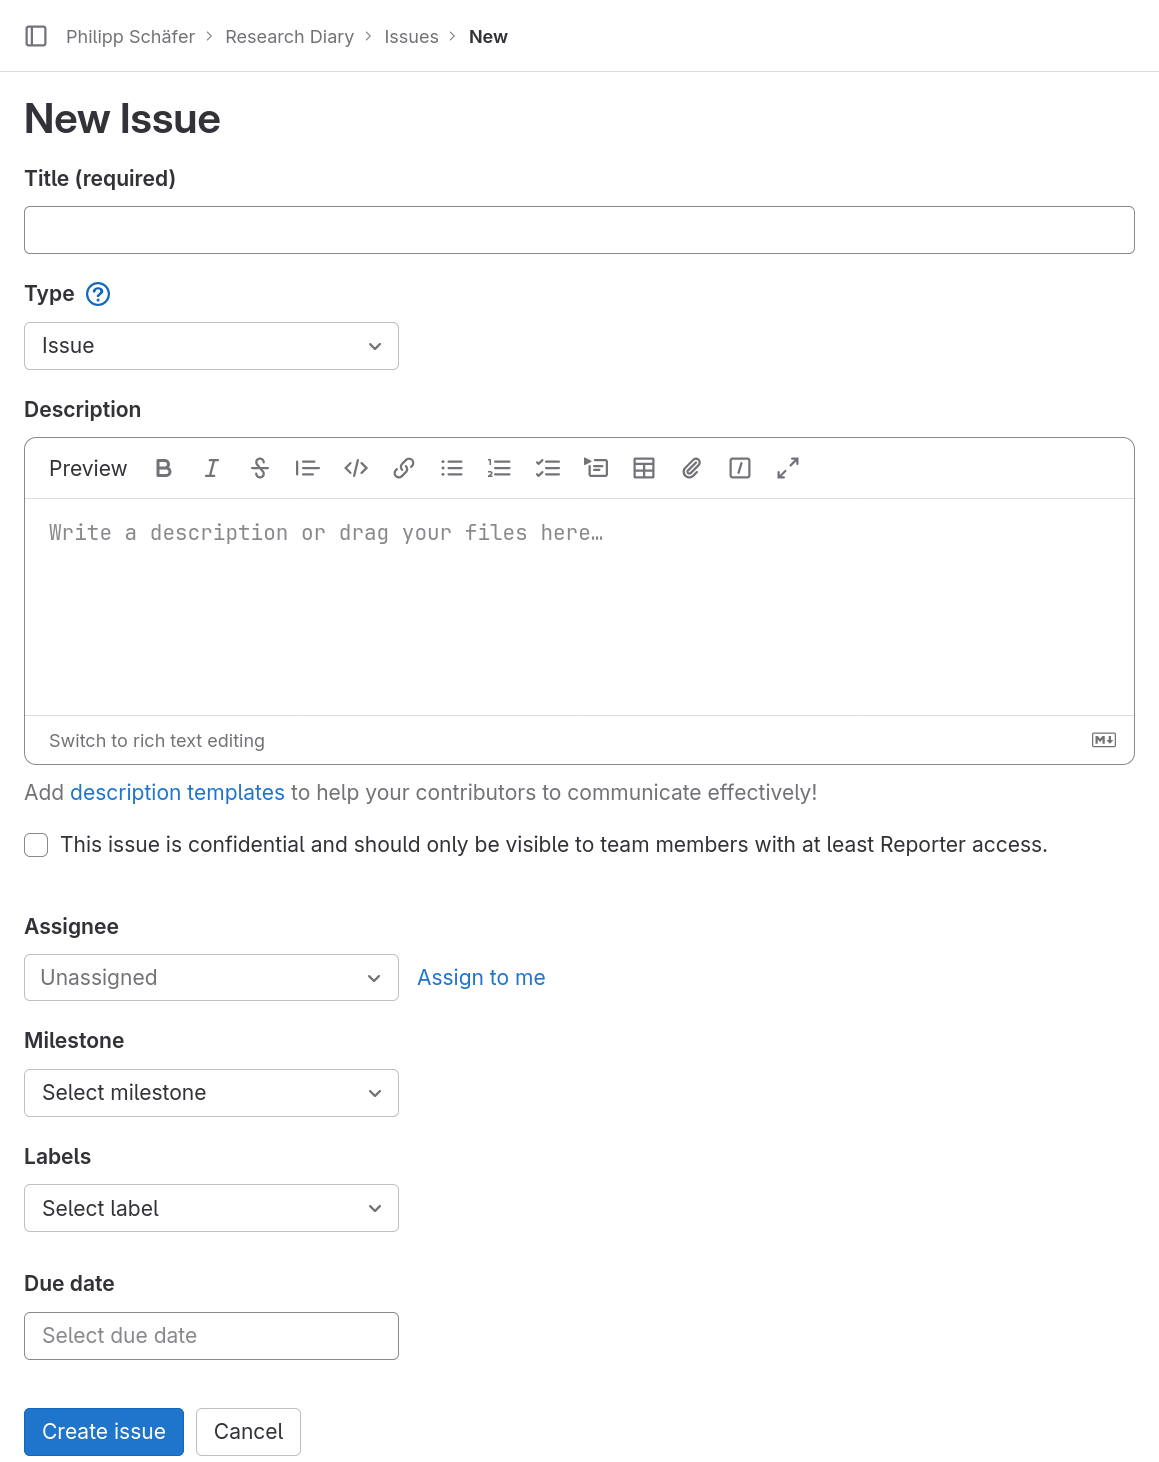
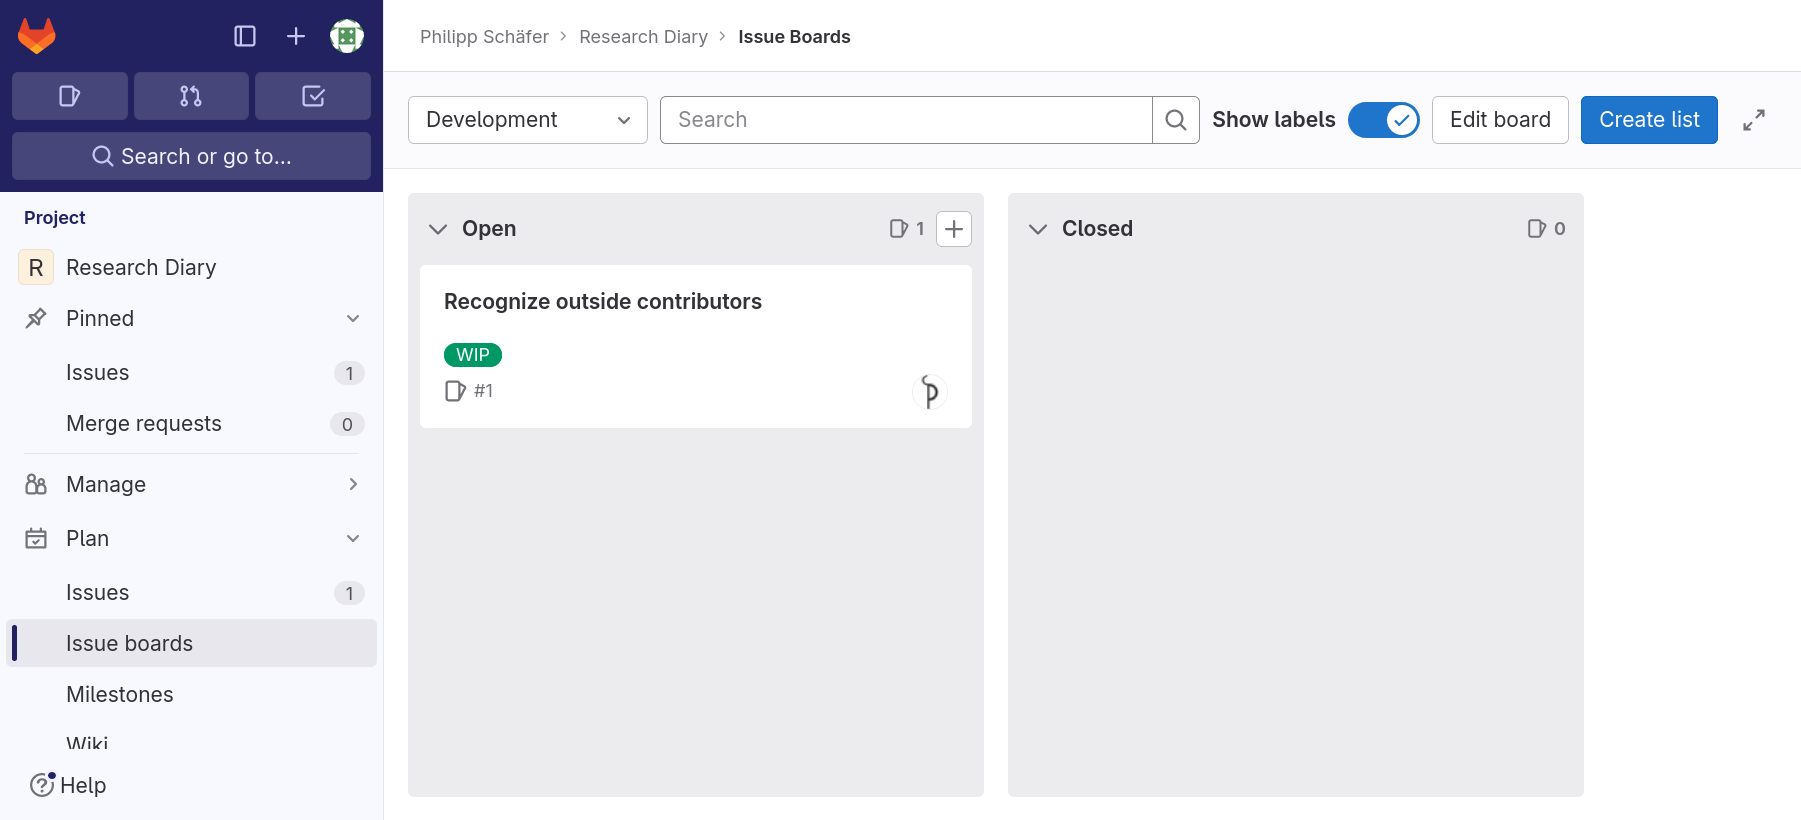
Figure 2
Image 1 of 1: ‘Issue board page with a menu bar on the left and content on the right. At the top of the content area is a drop-down field with “Development” selected followed by a search field, a check box labeled “Show labels”, and two buttons the first labeled “Edit board”, the second “Create list”. Below these elements are two columns, each with a title bar, one titled “Open”, the other “Closed”. In the “Open” column there is a box representing an issue, showing its title “Recognize outside contributors”, a label “WIP”, the issue number “#1” and an avatar of a user.’
Merge Requests
Figure 1
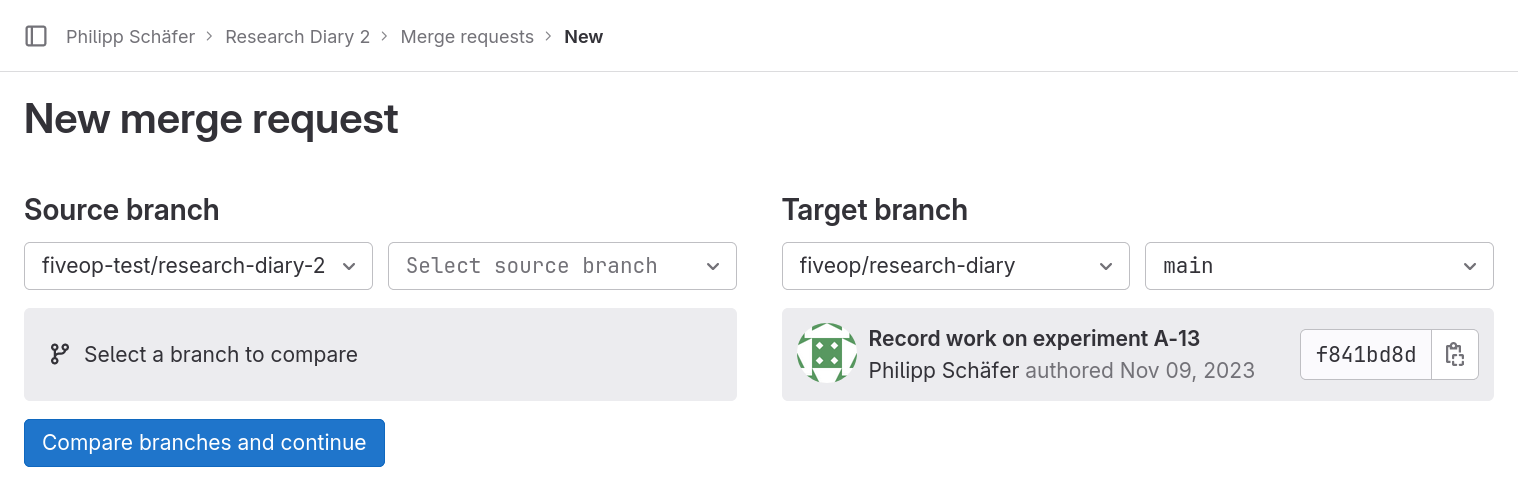
Image 1 of 1: ‘New merge request page. Below the page title, “New merge request”, there are two UI elements side-by-side. The one on the left, titled ”Source branch”, has two drop-down fields, one to select the project, the other to select the branch. The former reads “fiveop-test/research-diary-2”, the latter “Select source branch”. Below the two drop-down files is a box stating “Select a branch to compare” The UI element on the right, titled “Target branch”, has the same two drop-down fields. In this case the former reads “fiveop/research-diary” and the latter ”main”. Below the two drop-down fields is a box with information about the last commit on the “main” branch: message, author, date and identifier prefix. At the bottom of the page is a button labeled “Compare branches and continue”. ’