GitLab Projects
Last updated on 2026-07-14 | Edit this page
Estimated time: 36 minutes
Overview
Questions
- How can I create, modify and archive a GitLab project?
Objectives
- Create a project.
- Change name, description, visibility, and avatar of a project.
- Archive (or delete) a project.
Creating a Project
After knowing how to find groups and projects we want to go from passively browsing GitLab to actively using it. We are going to create a project and connect a local Git repository to it.
To create a project, we click on the button with the “+” symbol near the top of the side menu on the right and select “New project/repository”.
Multiple options are presented for how to create the new project. In this lesson we will only look at, and use, the first option: “Create blank project”. So click on that.
This leads to the following page:
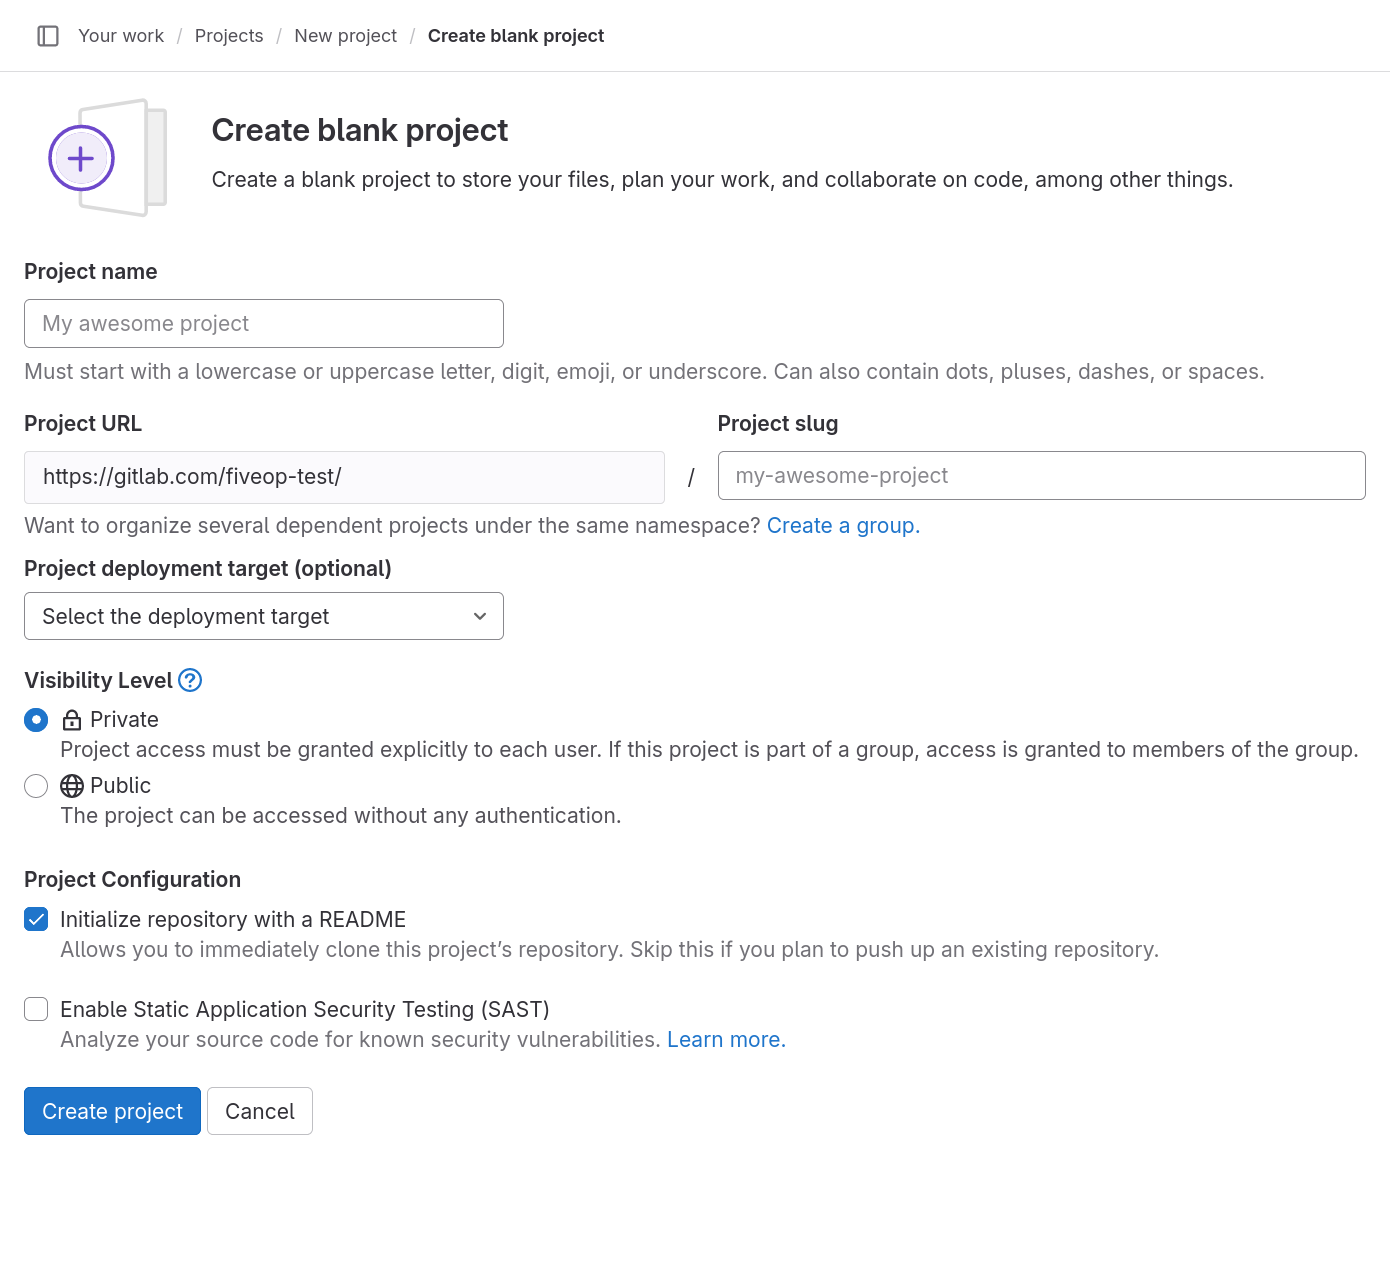
The “Project name” field is for just that, the project name. Its value has no other purpose and can be changed at anytime without indirect consequences (the direct consequence being, that its name will be different). We will call it “Research Diary”.
As we fill in the project name, a project slug gets suggested in the respective field. The project slug is the last part of the project’s, and the associated Git repository’s, URL or web address.
If the user belongs to at least one group, the URL’s middle part can be chosen in the drop-down field labeled “Project URL”, which defaults to the current user’s username. The default, indicated by the user’s name, is the location for a user’s projects (and groups). Other options in the drop-down list are the groups in which the current user may create projects.
Project URL and Project Slug
The two fields under labels “Project URL” and “Project slug” are the only fields in this form for which changing the value later might cause problems. They determine the URL under which the project’s pages and the project’s Git repository can be found, so changing them later might brake links and bookmarks as well as connections from Git repositories on other systems, for example on contributors’ machines.
We ignore the field labeled “Project deployment target (optional)”.
The choice under label “Visibility Level” determines the project’s visibility.
Visiblity
GitLab offers three settings for the visibility of a project: public, internal, and private. Publicly visible projects can be looked at by anyone that can access the GitLab instance, projects with internal visibility can be looked at by anyone logged in to the instance, while projects with private visibility can only be looked at by its members.
On GitLab.com the visibility “internal” is disabled. Everyone can create an account, log in to the instance, and thus could look at any project of internal visibility anyway.
Self-hosted instances might also disable some visibility types. For example, the public visibility might be disabled, to prevent users from publishing something to the whole internet.
We choose “Private” for our project’s visibility.
If, as per default, the checkbox “Initialize repository with a
README” is checked, the project’s repository will be initialized with a
commit that adds a file called README.md. Otherwise, the
project will start with an empty repository. We will add such a file
later ourselves, so we uncheck the box.
README
A project’s README file usually contains basic information about the project: what it contains, how it can be used (for example built or installed, if it is a software project), how to contribute, how to get help, and licensing information.
It is common to write README files in Markdown format, indicated by
the filename suffix .md.
Platforms like GitLab show the contents of a project’s README file on its homepage; if it is in Markdown format, in its rendered form.
We will ignore any other fields that may be visible depending on the GitLab instances configuration.
After clicking the “Create project” button, GitLab creates the project and redirects us to the project’s homepage, which looks similar to this:
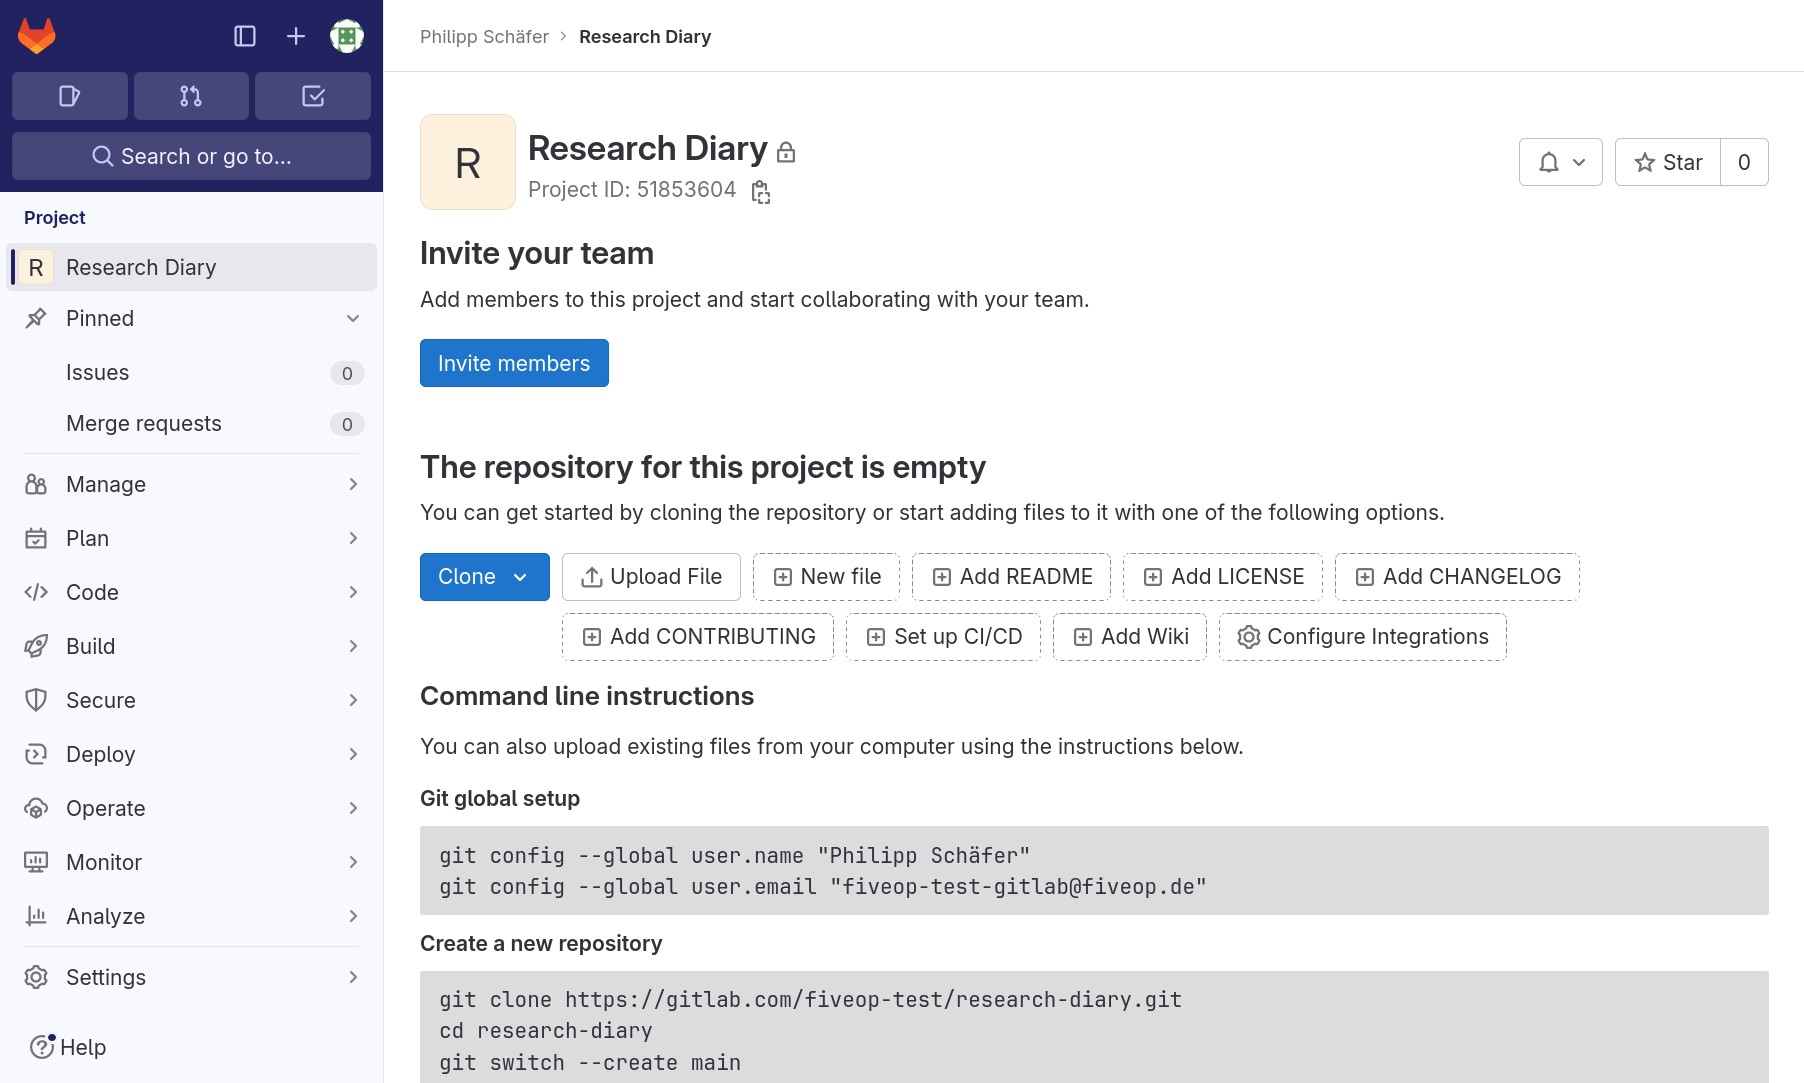
The page is split into the menu on the left and the project overview on the right.
The menu leads to pages related to various properties, processes, and content of the project. It is visible on each of these pages. The number of menu entries may seem overwhelming, in particular when one notices that the entries have subentries. However, it is not necessary to know what hides behind all these entries to use GitLab. Following this lesson, we will get to know parts of what lies behind the entries “Manage”, “Plan”, “Code”, “Build”, and “Settings”.
The project overview shows (from the top): The project’s avatar (or icon) and name; a prompt to invite team members (we will cover members later on); a statement that our repository is currently empty with buttons for several options to add content to it; and finally the beginning of the instructions on how to push a local repository to this project’s repository to fill it with content. We will follow them in just a bit.
The project overview page will look slightly different, once we have content in its repository. We will have another look at the page then.
Change Name, Description, Visibility, or Avatar
Click on the “Settings” sub-menu and select its “General” entry. Set the description to “My research diary, a collection of Markdown files”.
The project description appears in many lists and on some pages under the project’s name.
Then change any of the project’s name, visibility, or avatar. Do not forget to click the “Save changes” button once you are done.
This exercise should take about 5 minutes.
Markdown
Markdown is a markup language like HTML, on which the World Wide Web is based, or wikitext, which is used to write Wikipedia’s content. Its markup directives, indicating for example that something is a headline or a list item, are such that they serve their purpose even in the plain text form.
There are many variants (or flavors) of Markdown and GitLab has its own. Other than for rendering Markdown files in repositories on its web interface, GitLab allows for Markdown input in many of its interface’s text fields, such as issue descriptions or comments.
This will be pointed out as we get to use these fields during the lesson.
The project overview page presents us with many options to add content to the project’s repository directly in GitLab. We will add our first file to the project repository in the next episode.
Archiving a Project
We just went through the beginning of a GitLab project’s life cycle. At its end, if it has one, a project gets archived (or deleted). We will now go through the process of archiving a project, without completing the procedure.
Using the menu on the left, we navigate to the project’s “General” settings.
At the bottom of the page, we find a section named “Advanced”. We click on the “Expand” button right next to it and scroll down the page.
Notice that some of buttons here are not the usual blue or white, but rather red. This indicates that we should be careful about clicking them. Things might break or get deleted.
Scrolling back up, we find a section labeled “Archive Project”. Clicking the button will not delete the project. Instead it will be placed in a read-only mode. Everything will be preserved but nothing can be changed anymore. In addition, the project no longer shows up in search results and on the page for exploring projects.
Most of the time archiving a project is preferable to deleting it, in particular when it comes to research projects. Do not archive the project now! We will work with it throughout this lesson.
At the bottom of the page is also a section for deleting a project, in case you ever think that is the right thing to do.
- Creating a GitLab project requires not more than a few clicks and providing a name.
- Changing the name or description of a GitLab project after creation has no indirect consequences.
- A project’s visibility can be set to either private, internal, or public.
- You can archive a project (and you can delete a project, but often should not.)