First targets Workflow
Last updated on 2026-05-12 | Edit this page
Overview
Questions
- What are best practices for organizing analyses?
- What is a
_targets.Rfile for? - What is the content of the
_targets.Rfile? - How do you run a workflow?
Objectives
- Create a project in RStudio
- Explain the purpose of the
_targets.Rfile - Write a basic
_targets.Rfile - Use a
_targets.Rfile to run a workflow
Create a project
About projects
targets uses the “project” concept for organizing
analyses: all of the files needed for a given project are put in a
single folder, the project folder. The project folder has additional
subfolders for organization, such as folders for data, code, and
results.
By using projects, it makes it straightforward to re-orient yourself if you return to an analysis after time spent elsewhere. This wouldn’t be a problem if we only ever work on one thing at a time until completion, but that is almost never the case. It is hard to remember what you were doing when you come back to a project after working on something else (a phenomenon called “context switching”). By using a standardized organization system, you will reduce confusion and lost time… in other words, you are increasing reproducibility!
This workshop will use RStudio, since it also works well with the project organization concept.
Create a project in RStudio
Let’s start a new project using RStudio.
Click “File”, then select “New Project”.
This will open the New Project Wizard, a set of menus to help you set up the project.
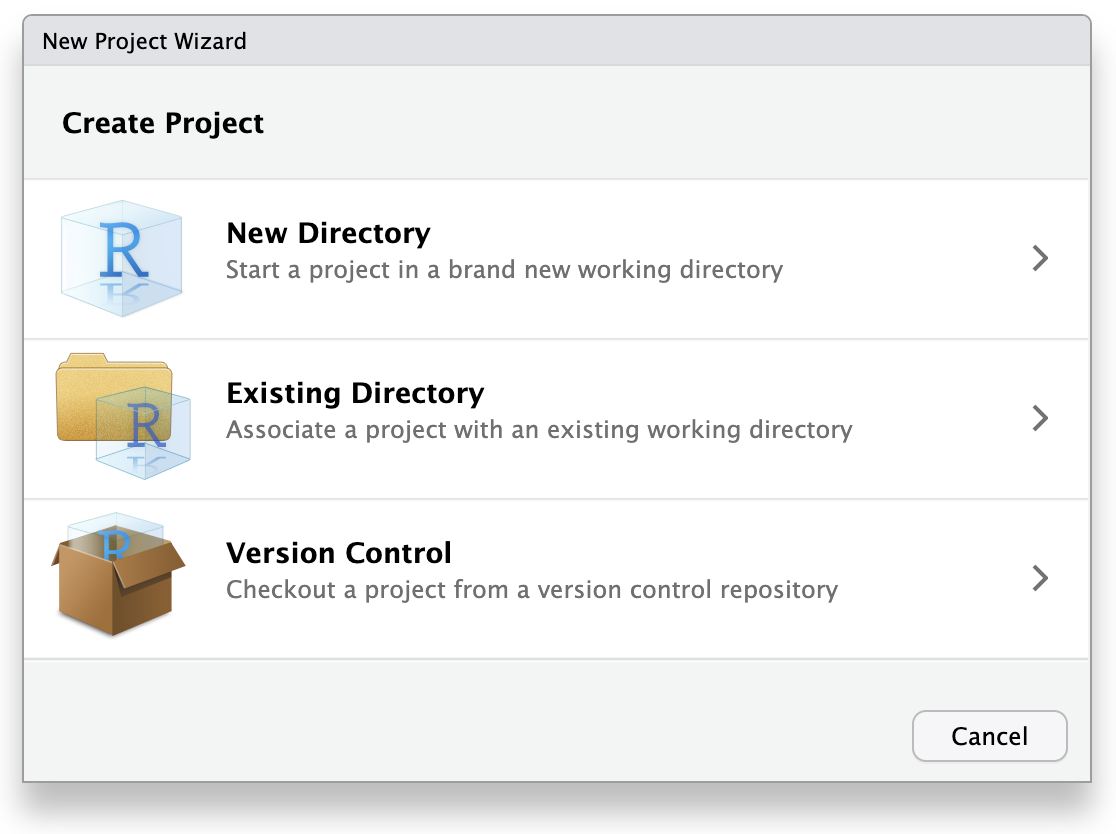
In the Wizard, click the first option, “New Directory”, since we are making a brand-new project from scratch. Click “New Project” in the next menu. In “Directory name”, enter a name that helps you remember the purpose of the project, such as “targets-demo” (follow best practices for naming files and folders). Under “Create project as a subdirectory of…”, click the “Browse” button to select a directory to put the project. We recommend putting it on your Desktop so you can easily find it.
You can leave “Create a git repository” and “Use renv with this project” unchecked, but these are both excellent tools to improve reproducibility, and you should consider learning them and using them in the future, if you don’t already. They can be enabled at any later time, so you don’t need to worry about trying to use them immediately.
Once you work through these steps, your RStudio session should look like this:
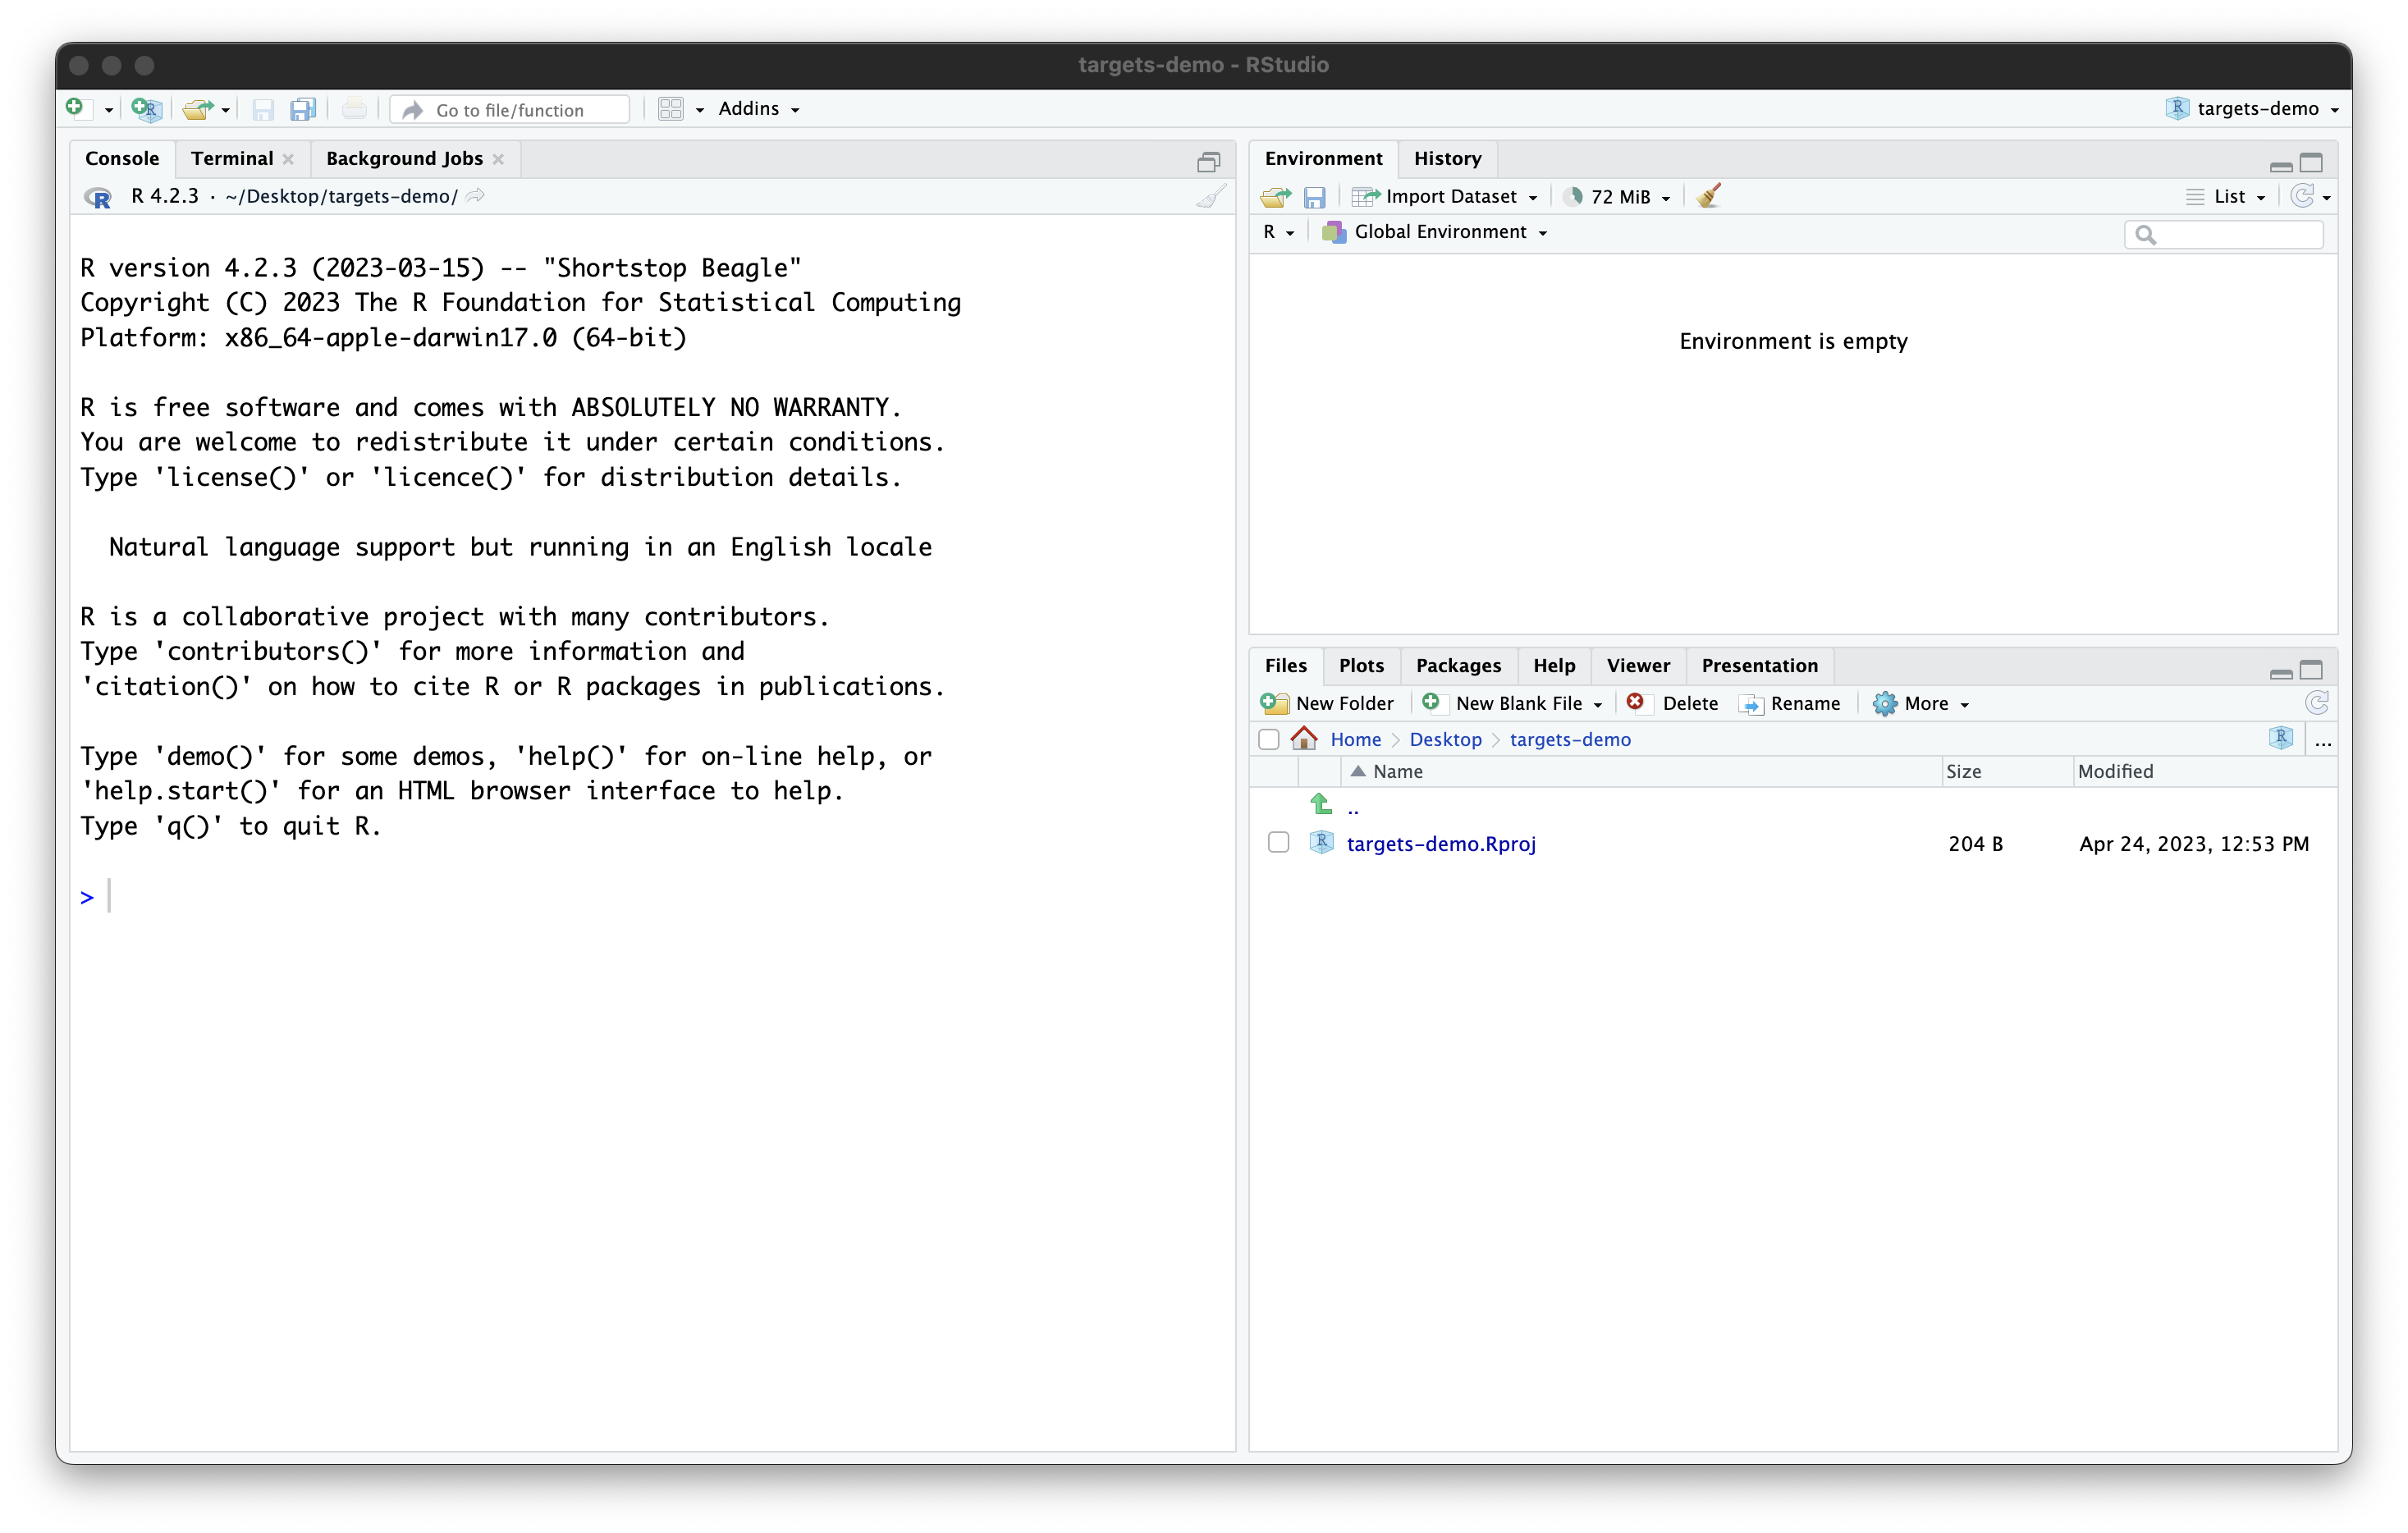
Our project now contains a single file, created by RStudio:
targets-demo.Rproj. You should not edit this file by hand.
Its purpose is to tell RStudio that this is a project folder and to
store some RStudio settings (if you use version-control software, it is
OK to commit this file). Also, you can open the project by double
clicking on the .Rproj file in your file explorer (try it
by quitting RStudio then navigating in your file browser to your
Desktop, opening the “targets-demo” folder, and double clicking
targets-demo.Rproj).
OK, now that our project is set up, we are (almost) ready to start
using targets!
Background: non-targets version
First though, to get familiar with the functions and packages we’ll
use, let’s run the code like you would in a “normal” R script without
using targets.
Recall that we are using the palmerpenguins R package to
obtain the data. This package actually includes two variations of the
dataset: one is an external CSV file with the raw data, and another is
the cleaned data loaded into R. In real life you are probably have
externally stored raw data, so let’s use the raw penguin
data as the starting point for our analysis too.
The path_to_file() function in
palmerpenguins provides the path to the raw data CSV file
(it is inside the palmerpenguins R package source code that
you downloaded to your computer when you installed the package).
R
library(palmerpenguins)
OUTPUT
Attaching package: 'palmerpenguins'OUTPUT
The following objects are masked from 'package:datasets':

    penguins, penguins_raw
R
# Get path to CSV file
penguins_csv_file <- path_to_file("penguins_raw.csv")

penguins_csv_file
OUTPUT
[1] "/home/runner/.local/share/renv/cache/v5/linux-ubuntu-jammy/R-4.5/x86_64-pc-linux-gnu/palmerpenguins/0.1.1/6c6861efbc13c1d543749e9c7be4a592/palmerpenguins/extdata/penguins_raw.csv"We will use the tidyverse set of packages for loading
and manipulating the data. We don’t have time to cover all the details
about using tidyverse now, but if you want to learn more
about it, please see the “Manipulating,
analyzing and exporting data with tidyverse” lesson, or the
Carpentry incubator lesson R
and the tidyverse for working with datasets.
Let’s load the data with read_csv().
R
library(tidyverse)

# Read CSV file into R
penguins_data_raw <- read_csv(penguins_csv_file)

penguins_data_raw
OUTPUT
Rows: 344 Columns: 17
── Column specification ────────────────────────────────────────────────────────
Delimiter: ","
chr  (9): studyName, Species, Region, Island, Stage, Individual ID, Clutch C...
dbl  (7): Sample Number, Culmen Length (mm), Culmen Depth (mm), Flipper Leng...
date (1): Date Egg

ℹ Use `spec()` to retrieve the full column specification for this data.
ℹ Specify the column types or set `show_col_types = FALSE` to quiet this message.
OUTPUT
# A tibble: 344 × 17
studyName `Sample Number` Species Region Island Stage `Individual ID`
<chr> <dbl> <chr> <chr> <chr> <chr> <chr>
1 PAL0708 1 Adelie Penguin… Anvers Torge… Adul… N1A1
2 PAL0708 2 Adelie Penguin… Anvers Torge… Adul… N1A2
3 PAL0708 3 Adelie Penguin… Anvers Torge… Adul… N2A1
4 PAL0708 4 Adelie Penguin… Anvers Torge… Adul… N2A2
5 PAL0708 5 Adelie Penguin… Anvers Torge… Adul… N3A1
6 PAL0708 6 Adelie Penguin… Anvers Torge… Adul… N3A2
7 PAL0708 7 Adelie Penguin… Anvers Torge… Adul… N4A1
8 PAL0708 8 Adelie Penguin… Anvers Torge… Adul… N4A2
9 PAL0708 9 Adelie Penguin… Anvers Torge… Adul… N5A1
10 PAL0708 10 Adelie Penguin… Anvers Torge… Adul… N5A2
# ℹ 334 more rows
# ℹ 10 more variables: `Clutch Completion` <chr>, `Date Egg` <date>,
# `Culmen Length (mm)` <dbl>, `Culmen Depth (mm)` <dbl>,
# `Flipper Length (mm)` <dbl>, `Body Mass (g)` <dbl>, Sex <chr>,
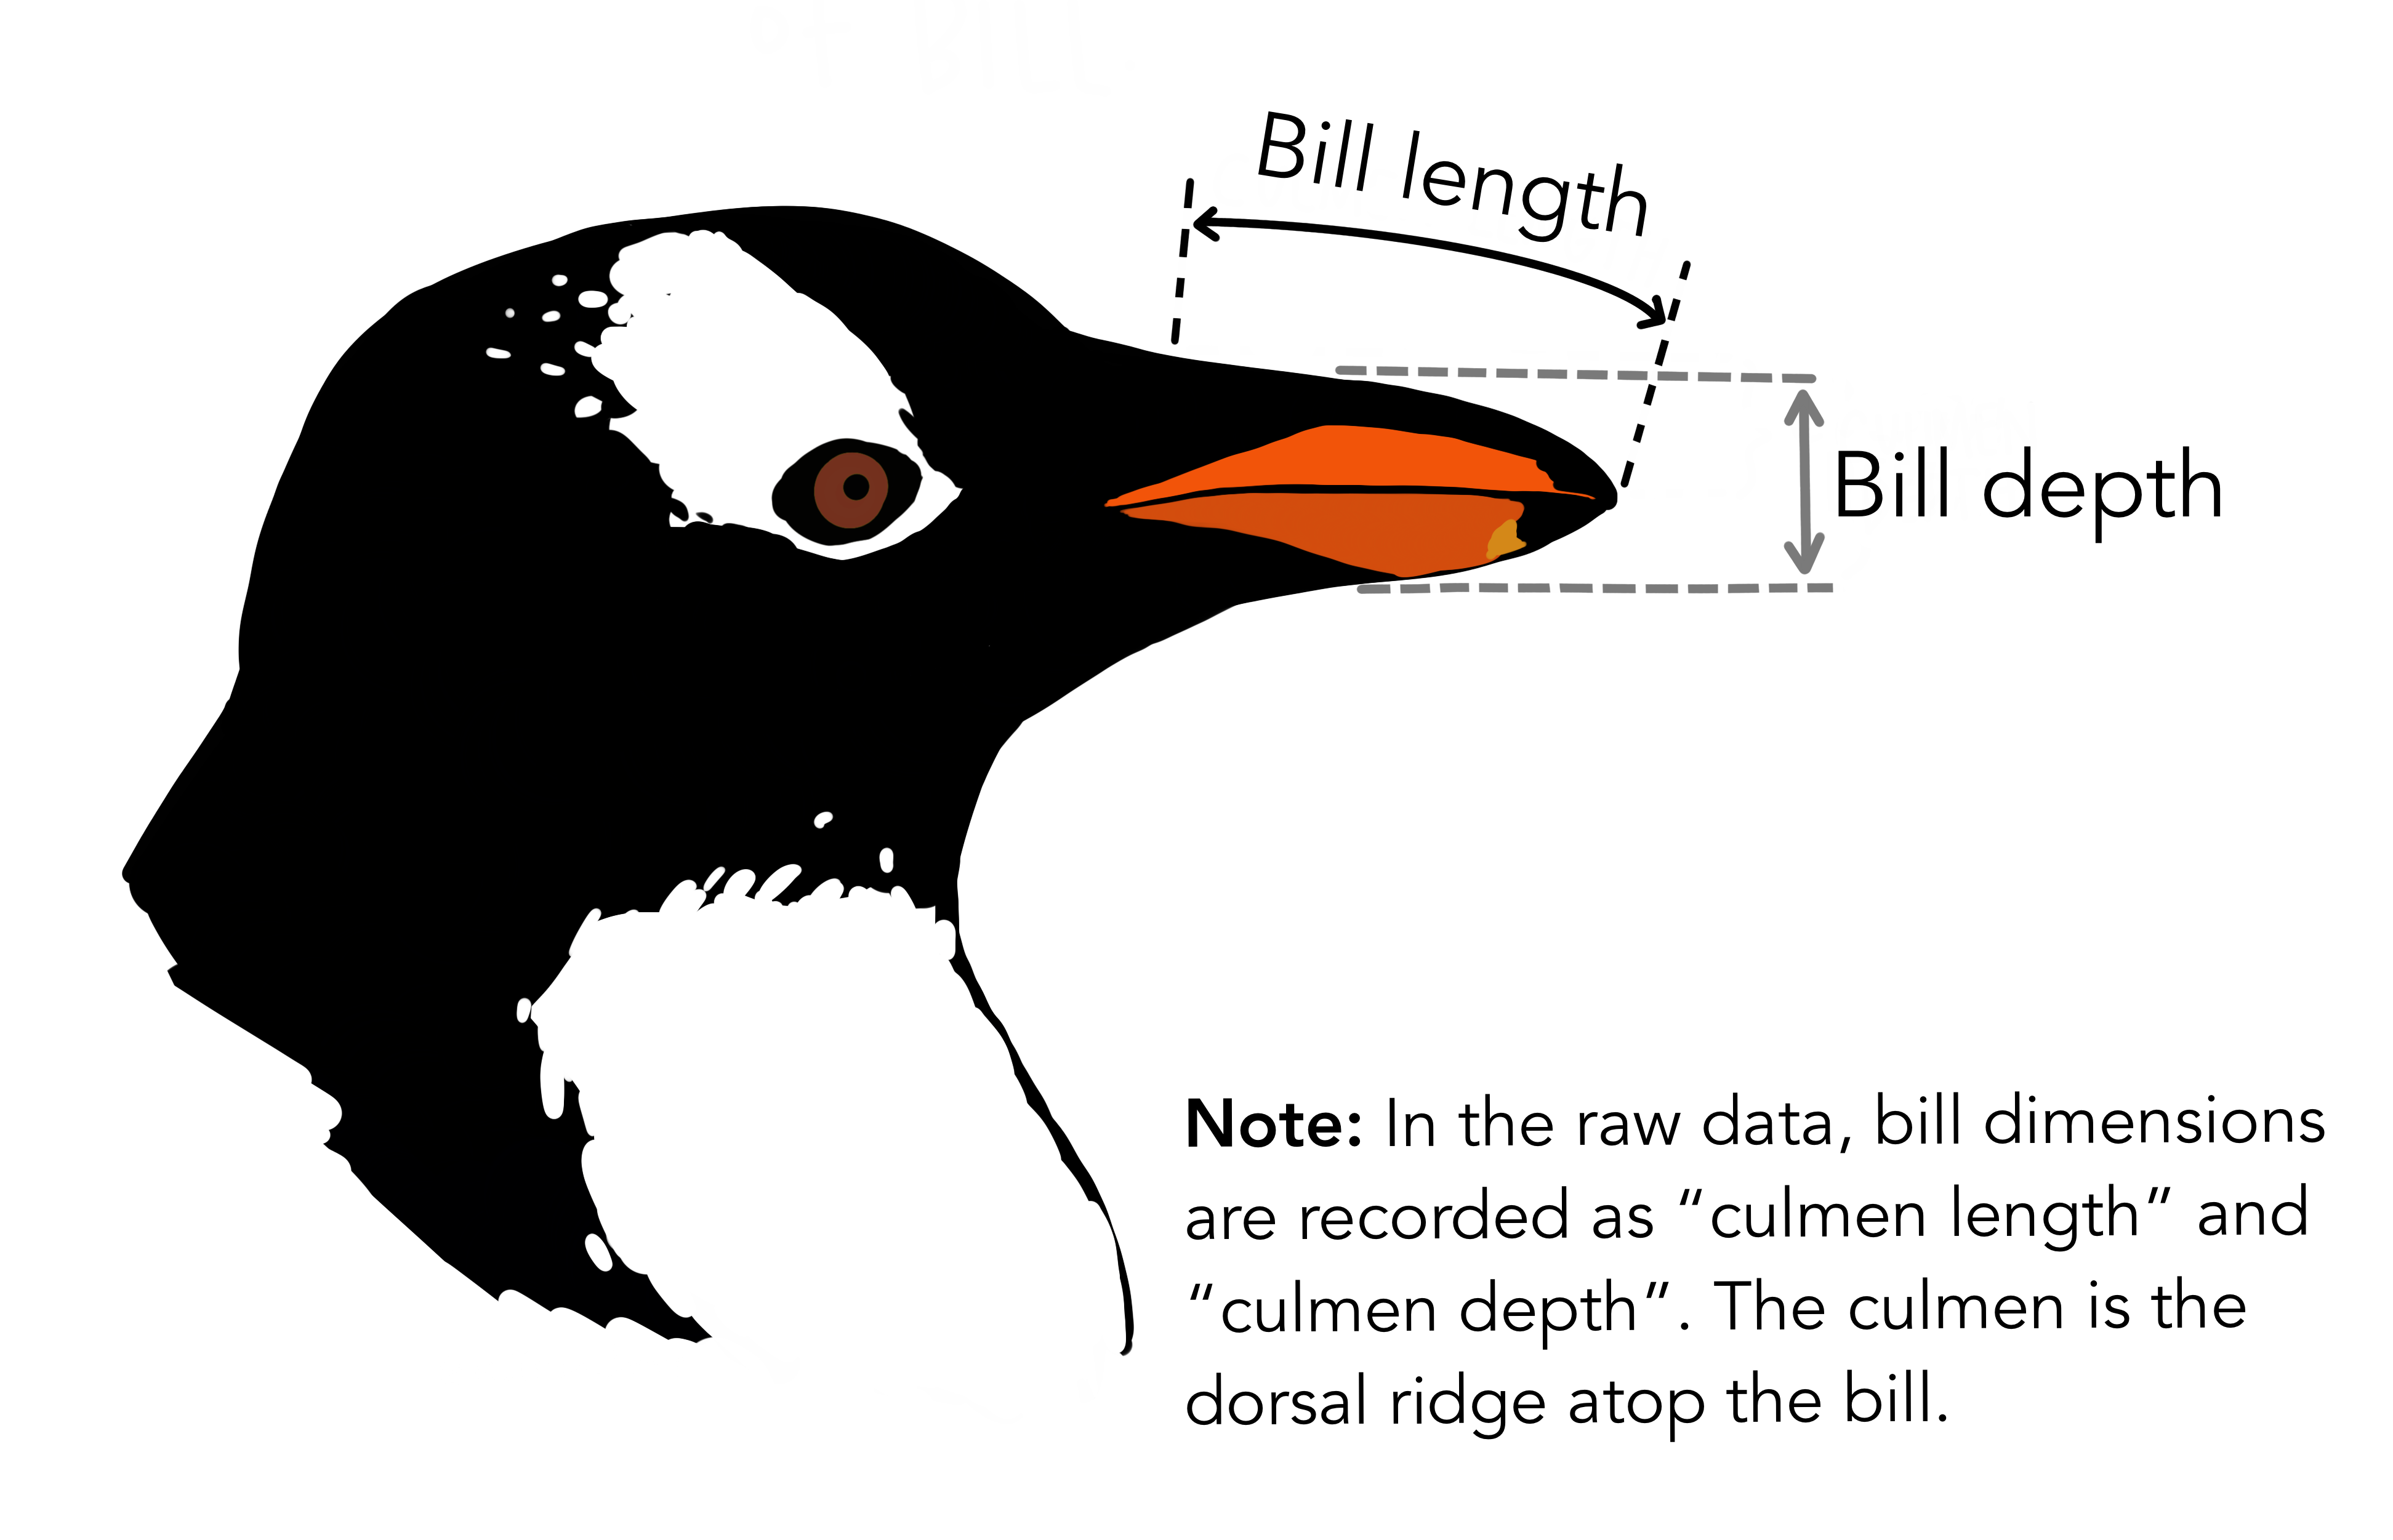
# `Delta 15 N (o/oo)` <dbl>, `Delta 13 C (o/oo)` <dbl>, Comments <chr>We see the raw data has some awkward column names with spaces (these are hard to type out and can easily lead to mistakes in the code), and far more columns than we need. For the purposes of this analysis, we only need species name, bill length, and bill depth. In the raw data, the rather technical term “culmen” is used to refer to the bill.
Let’s clean up the data to make it easier to use for downstream analyses. We will also remove any rows with missing data, because this could cause errors for some functions later.
R
# Clean up raw data
penguins_data <- penguins_data_raw |>
  # Rename columns for easier typing and
  # subset to only the columns needed for analysis
  select(
    species = Species,
    bill_length_mm = `Culmen Length (mm)`,
    bill_depth_mm = `Culmen Depth (mm)`
  ) |>
  # Delete rows with missing data
  drop_na()

penguins_data
OUTPUT
# A tibble: 342 × 3
   species                             bill_length_mm bill_depth_mm
   <chr>                                        <dbl>         <dbl>
 1 Adelie Penguin (Pygoscelis adeliae)           39.1          18.7
 2 Adelie Penguin (Pygoscelis adeliae)           39.5          17.4
 3 Adelie Penguin (Pygoscelis adeliae)           40.3          18
 4 Adelie Penguin (Pygoscelis adeliae)           36.7          19.3
 5 Adelie Penguin (Pygoscelis adeliae)           39.3          20.6
 6 Adelie Penguin (Pygoscelis adeliae)           38.9          17.8
 7 Adelie Penguin (Pygoscelis adeliae)           39.2          19.6
 8 Adelie Penguin (Pygoscelis adeliae)           34.1          18.1
 9 Adelie Penguin (Pygoscelis adeliae)           42            20.2
10 Adelie Penguin (Pygoscelis adeliae)           37.8          17.1
# ℹ 332 more rows
We have not run the full analysis yet, but this is enough to get us
started with the transition to using targets.
targets version
About the _targets.R file
One major difference between a typical R data analysis and a
targets project is that the latter must include a special
file, called _targets.R in the main project folder (the
“project root”).
The _targets.R file includes the specification of the
workflow: these are the directions for R to run your analysis, kind of
like a recipe. By using the _targets.R file, you
won’t have to remember to run specific scripts in a certain
order; instead, R will do it for you! This is a huge
win, both for your future self and anybody else trying to
reproduce your analysis.
Writing the initial _targets.R file
We will now start to write a _targets.R file.
Fortunately, targets comes with a function to help us do
this.
In the R console, first load the targets package with
library(targets), then run the command
tar_script().
R
library(targets)
tar_script()
Nothing will happen in the console, but in the file viewer, you
should see a new file, _targets.R appear. Open it using the
File menu or by clicking on it.
R
library(targets)
# This is an example _targets.R file. Every
# {targets} pipeline needs one.
# Use tar_script() to create _targets.R and tar_edit()
# to open it again for editing.
# Then, run tar_make() to run the pipeline
# and tar_read(data_summary) to view the results.

# Define custom functions and other global objects.
# This is where you write source(\"R/functions.R\")
# if you keep your functions in external scripts.
summarize_data <- function(dataset) {
  colMeans(dataset)
}

# Set target-specific options such as packages:
# tar_option_set(packages = "utils") # nolint

# End this file with a list of target objects.
list(
  tar_target(data, data.frame(x = sample.int(100), y = sample.int(100))),
  tar_target(data_summary, summarize_data(data)) # Call your custom functions.
)
Don’t worry about the details of this file. Instead, notice that that it includes three main parts:
- Loading packages with
library() - Defining a custom function with
function() - Defining a list with
list().
You may not have used function() before. If not, that’s
OK; we will cover this in more detail in the next episode, so we will ignore it for
now.
The last part, the list, is the most important part
of the _targets.R file. It defines the steps in the
workflow. The _targets.R file must always end with
this list.
Furthermore, each item in the list is a call of the
tar_target() function. The first argument of
tar_target() is name of the target to build, and the second
argument is the command used to build it. Note that the name of the
target is unquoted, that is, it is written without any
surrounding quotation marks.
Modifying _targets.R to run the example analysis
First, let’s load all of the packages we need for our workflow. Add
library(tidyverse) and library(palmerpenguins)
to the top of _targets.R after
library(targets).
Next, we can delete the function() statement since we
won’t be using that just yet (we will come back to custom functions
soon!).
The last, and trickiest, part is correctly defining the workflow in the list at the end of the file.
From the
non-targets version, you can see we have three steps so
far:
- Define the path to the CSV file with the raw penguins data.
- Read the CSV file.
- Clean the raw data.
Each of these will be one item in the list. Furthermore, we need to
write each item using the tar_target() function. Recall
that we write the tar_target() function by writing the
name of the target to build first and the
command to build it second.
Choosing good target names
The name of each target could be anything you like, but it is strongly recommended to choose names that reflect what the target actually contains.
For example, penguins_data_raw for the raw data loaded
from the CSV file and not x.
Your future self will thank you!
Challenge: Use tar_target()
Can you use tar_target() to define the first step in the
workflow (setting the path to the CSV file with the penguins data)?
R
tar_target(name = penguins_csv_file, command = path_to_file("penguins_raw.csv"))
The first two arguments of tar_target() are the
name of the target, followed by the
command to build it.
These arguments are used so frequently we will typically omit the argument names, instead writing it like this:
R
tar_target(penguins_csv_file, path_to_file("penguins_raw.csv"))
Now that we’ve seen how to define the first target, let’s continue and add the rest.
Once you’ve done that, this is how _targets.R should
look:
R
library(targets)
library(tidyverse)
library(palmerpenguins)

list(
  tar_target(penguins_csv_file, path_to_file("penguins_raw.csv")),
  tar_target(
    penguins_data_raw,
    read_csv(penguins_csv_file, show_col_types = FALSE)
  ),
  tar_target(
    penguins_data,
    penguins_data_raw |>
      select(
        species = Species,
        bill_length_mm = `Culmen Length (mm)`,
        bill_depth_mm = `Culmen Depth (mm)`
      ) |>
      drop_na()
  )
)
I have set show_col_types = FALSE in
read_csv() because we know from the earlier code that the
column types were set correctly by default (character for species and
numeric for bill length and depth), so we don’t need to see the warning
it would otherwise issue.
Run the workflow
Now that we have a workflow, we can run it with the
tar_make() function. Try running it, and you should see
something like this:
R
tar_make()
OUTPUT
Attaching package: ‘palmerpenguins’

The following objects are masked from ‘package:datasets’:

    penguins, penguins_raw

+ penguins_csv_file dispatched
✔ penguins_csv_file completed [1ms, 190 B]
+ penguins_data_raw dispatched
✔ penguins_data_raw completed [102ms, 10.40 kB]
+ penguins_data dispatched
✔ penguins_data completed [14ms, 1.61 kB]
✔ ended pipeline [342ms, 3 completed, 0 skipped]
Congratulations, you’ve run your first workflow with
targets!
The workflow cannot be run interactively
You may be used to running R code interactively by selecting lines and pressing the “Run” button (or using the keyboard shortcut) in RStudio or your IDE of choice.
You could run the list at the of _targets.R
this way, but it will not execute the workflow (it will return a list
instead).
The only way to run the workflow is with
tar_make().
You do not need to select and run anything interactively in
_targets.R. In fact, you do not even need to have the
_targets.R file open to run the workflow with
tar_make()—try it for yourself!
Similarly, you must not write tar_make() in the
_targets.R file; you should only use
tar_make() as a direct command at the R console.
Remember, now that we are using targets, the
only thing you need to do to replicate your analysis is run
tar_make().
This is true no matter how long or complicated your analysis becomes.
- Projects help keep our analyses organized so we can easily re-run them later
- Use the RStudio Project Wizard to create projects
- The
_targets.Rfile is a special file that must be included in alltargetsprojects, and defines the worklow - Use
tar_script()to create a default_targets.Rfile - Use
tar_make()to run the workflow