Managing Virtual Environments
Overview
Teaching: 0 min
Exercises: 0 minQuestions
How can I make sure the whole team (or lab) gets the same results?
How can I simplify setup and dependencies for people to use my code or reproduce my results?
Objectives
Identify an environment, dependencies, and an environment manager.
Install an older version of Python.
Use
virtualenvand/orcondato create an environment per project.Store a project’s dependencies.
Install dependencies for a project.
Major Python versions
Let’s assume that you are using a certain package in your data analysis project. That package may be required to run a very specialized algorithm or to process some file format that is specific of your study domain. However, upon trying to install the package (with a tool such as Pip, for example), you discover some sort of error. This error may be upon the import, or even during the installation process.
This can be a common occurrence when working on programming projects, regardless of which language is being used. In Python, errors can come up because of version conflicts, that is, two or more packages require different versions of the same dependency. A dependency is an independent package that another package requires to run. By logic, the base dependency of all Python packages is the Python language itself. In order to run a Python project, we need Python to be installed. However, there are important differences between major versions of Python, specially between versions 2 and 3. From January 2020, Python 2 has been deprecated in favour of Python 3, and there is even an official guide and package for porting code from one version to the other.
There are plenty of systems running Python 2 in the wild, specially Python 2.7. It is common to have a “system-level” installation of the Python language in an older version. Most modern Python packages, however, may only support Python 3, as it is the current (and recommended) version of the language. In contrast, there are also older Python packages that only run on Python 2, and thus may not run on our system if we are currently using Python 3.
How can we deal with that?
Virtual environments
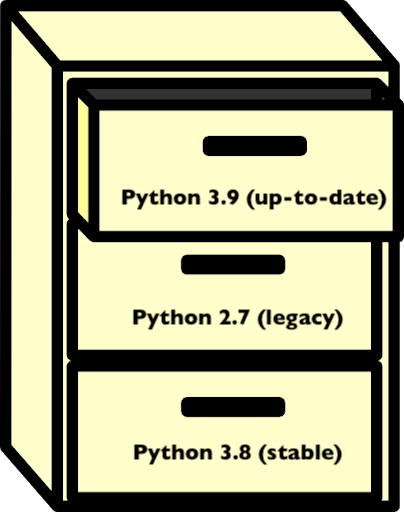
The answer to that is using virtual environments. We can think of an environment like a filing cabinet inside our computer: for each drawer, we have an installation of Python, plus a number of additional packages.
Packages that are installed in an environment are restricted to that environment, and will not affect system-level installs. Being able to isolate the installation of a specific version of Python or of a certain set of Python packages is very important to organise our programming environment and to prevent conflicts.
Whenever we activate a virtual environment, our system will start using that version of Python and packages installed in that environment will become available. Environments can also be saved so that you can install all of the packages and replicate the environment on a new system.
Why use virtual environments?
When we are unfamiliar with virtual environments, they may seem like an unnecessary hurdle. If the code runs on our current environment, why bother with the extra work of creating or using a different one? There are many reasons to use a virtual environment:
- to prevent conflicts with system-level installations;
- to ensure consistency in the code that we deliver, i.e.: keep it compatible with the same versions;
- to install our code in different environments, such as a server or cloud platform;
- to be able to share our environment with others (and prevent “works on my machine” errors).
Having isolated environments for each project greatly improves the organisation of our development environment. If something goes wrong in an environment (for example, the installation of a package breaks, or there is a version conflict between distinct dependencies), we can simply delete that environment and recreate it. The rest of our system is not affected or compromised. This can be critical in multi-user environments.
Overall, we only need to learn the basics about virtual environments to be able to use them effectively. So, there is great benefit with relatively low effort.
We can use the command-line to see which Python version is currently being used. This is the Python version that is used to execute any scripts or Python files that we run from the command-line. There are many ways to do that, but a simple one is to run:
which python
on Mac or LINUX, or:
where python
In Windows machines. The which and where commands point to the Python executable that is currently active.
If we are using a virtual environment, that file will be inside our environment directory. If we see something like
/usr/bin/python, it is likely that we are using a system-level version of Python. If you are using an Anaconda
distribution of Python, it is likely that you will see <path to your anaconda install>/bin/python.
Note: these commands can also be used to locate other executables.
Dependencies
We’ve seen that dependencies are independent packages that are required for another package to run. Think of a particular package, either one that you want to create or one that you often use:
- what dependencies does it have?
- why is it important to keep track of these dependencies?
- what may happen if a dependency goes through a major version update?
Solution
- All Python packages obviously have the Python language as a dependency. For data analysis and scientific Python projects, a very common dependency is the NumPy package, that provides the basis for numerical computing in Python, and additionally other common libraries of the scientific Python stack, such as Pandas and Matplotlib.
- Keeping track of dependencies matters because our project depends on them to run correctly. If we are trying use a function or method from a dependency that behaves differently in different versions, we may get unexpected results. Also, it’s important to know our dependencies’ dependencies, which may sound like a lot, but it’s something occurs very often. If our dependency requires a package, then we also require that package.
- If a dependency goes through a major version update, such as Python 2 to Python 3, there may be breaking changes in downstream packages. If this happens for our package, we should test the package accordingly to see if everything works as expected. Testing software is a vast topic and we can leave it for now, but it is important to have that in mind when working with dependencies.
Environment and package managers
There are different strategies to deal with Python environments. We are going to focus on two of them: virtualenv and conda.
-
virtualenvis a tool to create isolated Python environments. It is so widespread that a subset of it has been integrated into the Python standard library under the venv module.virtualenvusespip, that we’ve discussed previously, to install and manage packages inside an environment. Therefore,virtualenvis an environment manager that is compatible withpip, a package manager. -
condais a tool from the Anaconda distribution that is both an environment and package manager. Packages can be installed in Conda environments using bothpipandconda. There are a fews advantages of using Conda for installations, such as support for third-party packages (that aren’t available on PyPI) and automatic dependency solving. This comes at the disadvantage of being heavier and usually slower thanvirtualenv.
Because we are already familiar with pip, we can start off by using virtualenv to learn how environments work in
practice. We’ll have a look at Conda environments later on.
Installing
virtualenvIf you do not have
virtualenvinstalled, you can quickly install it withpip:pip install virtualenv
Create an environment
Before we create an environment, let’s see what happens when we import one of our favorite packages. In a Python interpreter:
import numpy
That should work, because we have the package installed on our system. If not, use a package you know you have installed, or install NumPy.
Next, we’ll create an environment named myenv:
virtualenv myenv -p python3
We could simply run virtualenv myenv, but the -p python3 flag ensures that we create it with Python 3.
You will notice that a myenv/ folder has been created in the working directory. We can then activate
our environment by running:
source myenv/bin/activate
Now we see that the CLI changes to show the environment name! We can also run the
where or which command again to see that our Python executable has been changed.
which python # or 'where python' for Windows.
The output should look something like <working directory>/myenv/bin/python.
Let’s start another Python interpreter (simply type python) and try to import NumPy again:
import numpy
It does not work! This is expected, because we have just created this environment from scratch. It only contains the
base Python installation. To install NumPy in this environment, we must use pip:
pip install numpy
If we open a new Python interpreter, NumPy can now be imported.
Listing packages and the requirements file.
We can check which packages are installed in our current environment using the pip freeze command. If we
wish to save that list in a file for later use, we can use a UNIX redirect statement (>). More on those on the
SWC Shell Novice lesson.
pip freeze > requirements.txt
This saves the list of packages and respective versions in the requirements.txt file. Requirement files are very
common in Python projects, as they are a simple way of specifying the project’s dependencies.
Deactivate an environment
When you’re done with an environment, you can exit with the deactivate command.
deactivate
Not how the environment name disappears from the Shell prompt.
Default environment
Note that an environment is only activated in the current Terminal window. If you open a new Terminal, you’ll be back to your default environment. This could be, for example, the
baseenvironment if you have Anaconda installed, or your system’s default Python environment.
Using virtual environments
To use what we’ve learned so far, try doing the following:
- Find a project that interests you.
- Download or clone the project’s repository.
- Create a new virtual environment for the project.
- Use the project’s
requirements.txtfile to install the dependencies.Hint: use
pip install -hto see the possible options for thepip installcommand.Solution
We can use the example-python-project from Episode 02 to demonstrate this:
git clone https://github.com/vinisalazar/example-python-project.git
cd example-python-project
virtualenv example-env
source example-env/bin/activate
The
-rflag in thepip installcommand allows installing a project’s requirements from a text file:pip install -r requirements.txt
These are the basics of using virtualenv to create virtual environments. Alternatively, we could also use conda,
which is a more advanced package and environment manager. conda has several advantages over virtualenv, at the cost
of being heavier and slower.
Conda environments
conda works similarly to virtualenv, but we use the conda command for managing both packages and environments
(with different subcommands, such as conda create, conda install, etc). If you are using Python for data analysis,
chances are that you have it installed through Anaconda or Miniconda, as they are very popular distributions
of Python. Both Anaconda and Miniconda come with the conda environment manager, that can be used
from the command-line (if you have (base) in your Shell prompt, that means it’s likely using the base,
or default, conda environment). Try typing conda in your Terminal. You should see something like the following:
usage: conda [-h] [-V] command ...

conda is a tool for managing and deploying applications, environments and packages.

Options:

positional arguments:
  command
    clean        Remove unused packages and caches.
    compare      Compare packages between conda environments.
    config       Modify configuration values in .condarc. This is modeled
                 after the git config command. Writes to the user .condarc
                 file (/Users/vini/.condarc) by default.
    create       Create a new conda environment from a list of specified
                 packages.
    help         Displays a list of available conda commands and their help
                 strings.
    info         Display information about current conda install.
    init         Initialize conda for shell interaction. [Experimental]
    install      Installs a list of packages into a specified conda
                 environment.
    list         List linked packages in a conda environment.
    package      Low-level conda package utility. (EXPERIMENTAL)
    remove       Remove a list of packages from a specified conda environment.
    uninstall    Alias for conda remove.
    run          Run an executable in a conda environment. [Experimental]
    search       Search for packages and display associated information. The
                 input is a MatchSpec, a query language for conda packages.
                 See examples below.
    update       Updates conda packages to the latest compatible version.
    upgrade      Alias for conda update.

optional arguments:
  -h, --help     Show this help message and exit.
  -V, --version  Show the conda version number and exit.
Differently than virtualenv, when we create a new environment with Conda, the folder containing the environment
is not created in the working directory, but rather in the envs/ directory in thefolder where Anaconda or Miniconda is
installed. Let’s create a Conda environment from scratch to demonstrate this.
Creating and managing Conda environments
First, check out your current Python interpreter using which python or where python. If you are still using an
environment created with virtualenv, deactivate it using the deactivate command. Now, create a new environment
using conda create:
conda create -n example-env python=3.9
After a while, a prompt should appear confirming if you want to create the environment. Simply type y and press Enter.
In this command, the -n flag specifies the name of our environment, and can be set to anything we like.
After the environment’s name, we specify any packages that we want to install. In the example above, our command
specifies that we want the example-env to have Python and the Python version should be 3.9.
We could also specify python=3 if we didn’t care for the minor version number.
To activate our newly created Conda environment, we use conda activate:
conda activate example-env
Similar to virtualenv, we should see (example-env) in our prompt, meaning the environment is active. If we run
which python again, it should point for a Python installation inside the envs/ directory in our Anaconda folder:
which python
<path to anaconda folder>/envs/example-env/bin/python
Installing packages from Conda channels
Now that we’ve activated our example environment, we can use the conda install command to install packages. If we
consider the same example-python-project used in the previous examples, we can check the requirements file and
see that it has four dependencies: Pandas, NumPy, Matplotlib, and Seaborn. We could install the dependencies
like this:
conda install pandas seaborn -c conda-forge
Now, there are a couple of details to unpack in this simple command. First, why did we only include Pandas and
Seaborn in our command? Why didn’t we include Matplotlib and NumPy? Second, what does the -c conda-forge option
do?
The answer to the first question is one of the cool things about using Conda: it automatically downloads dependencies
of packages we are attempting to install. In this case, NumPy is a dependency of Pandas and Matplotlib is a
dependency of Seaborn. Thus, we only need to install Pandas and Seaborn and the other two packages will automatically
be downloaded. pip also accounts for dependencies when installing new packages, but Conda’s dependency solver is
much more sophisticated, and ensures compatibility across all packages in our environment.
The second question is because of channels in Conda. Here, we are using the conda-forge
channel. Channels are repositories of packages, much like PyPI is the repository used by pip.
Conda-forge is a well-stablished and community-driven repository for Conda packages (or
recipes, as they are called). Conda-forge has an
advanced infrastructure to automatically maintain and update Conda recipes, and is a reliable source for installing
packages through Conda. Check out their docs for more information. Other known
Conda channels include Bioconda, which specializes in bioinformatics software, and
the R channel, that provides packages for the R programming language.
Searching for Conda packages
To check if a package can be installed with Conda, go to https://anaconda.org/ and use the search bar to search for the package’s name. If the package is available through a Conda channel, it’ll be listed here. By clicking on the package name, you can see the exact
condacommand to install it.
After running the conda install command, we will get a prompt to confirm the installation, much like we did the
conda create command. These prompts can be skipped by adding a -y flag to either commands.
Listing packages and exporting a Conda environment
To list available packages in a Conda environment, we can run:
conda list
Note that the output of conda list is more detailed than pip freeze. It also includes build specification IDs and
channel information. To export that list to a file, we can use the conda env export command:
conda env export -f environment.yml --no-builds
Where the -f flag specifies the name of our output file and the --no-builds command specifies that we don’t
wish to include the build specification numbers in our output (although it can be omitted). If we inspect that file,
we can note that it contains some extra information than the output of pip freeze, such as the environment name and
Conda channels that are included in the export (these two parameters can be configured with the conda env export
command.)
The resulting YAML file can be used to recreate the environment in other systems, much like
the pip install -r requirements.txt command. For that, we can run:
conda env create -f environment.yml
And the environment will be recreated from the specified dependencies.
Conclusion
Wow, that was a lot of commands in a single episode. And those were only the basics of using virtual environments!
However, we mustn’t fret. It doesn’t matter if we use conda or virtualenv, and different situations will call for
different tools, the important thing to remember is to understand the importance of using virtual environments.
Having our environment isolated from the rest of our system is really good to prevent version conflicts, and “pinning”
our dependencies in a requirements.txt or environment.yml can be very helpful for other users to install the
necessary packages to run our code.
Official docs
For more information on
condaandvirtualenv, check out the official documentation pages:
Key Points
A Python dependency is an independent package that a given project requires to be able to run.
An environment is a directory that contains a Python installation, plus a number of additional packages.
An environment manager enables one-step installing and documentation of dependencies, including versions.
virtualenvis a tool to create lightweight Python virtual environments.
condais a more advanced environment and package manager that is included with Anaconda.Isolating our environment can be helpful to keep our system organized.
Dependencies can be ‘pinned’ to files such as
requirements.txtorenvironment.yml.