In order to start using version control in Rstudio, we have to do some configuration the first time. You only need to do this configuration once.
Github account
In order to to the tutorial, you’ll need a Github account.
Installations
Link Git and Rstudio
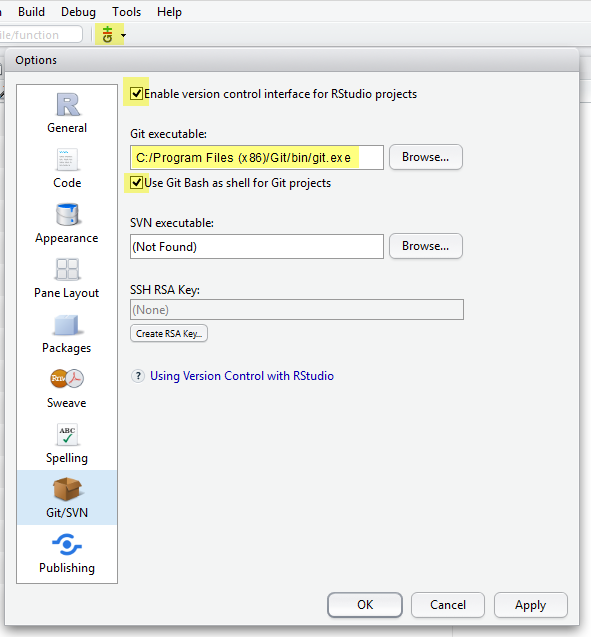
First of all, tell RStudio where to find the Git installation.
- Go to
Tools > Global Options - Click on
Git/SVN. - Check Enable version control interface for RStudio projects
- Set the path to the Git executable that you installed
- Check use Git bash as shell for Git projects
Git installation path
If you do not know where Git is installed, open your command line (
cmdin Start for Windows user). When the cmd is open, typewhere gitand hit enter. The path should be something like:C:/Program Files (x86)/Git/bin/git.exe. Still in trouble? Check this out.
Github configuration
Next, we have to tell Github who we actually are, in order to make the connection to the online account. To do so, Git requires the configuration of your Github (!) username and GitHub email:
-
Go to
Tools > Shellto open the Git Shell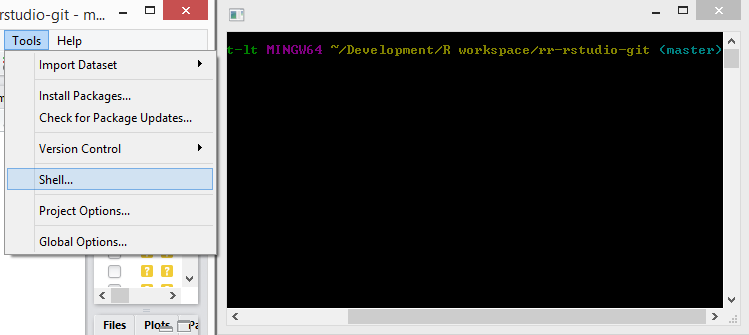
- In the shell, type the following command and enter:
git config --global user.name "mygithubusername" - Still in the shell, type the following command and enter:
git config --global user.email "my.name@inbo.be"
Github configuration check
Use your GitHub username! You can check if you’re set up correctly by typing in the same shell:
git config --global --listWhen successful, the configuration is done. Congratulations!