Create and Setup your blog repository on GitHub
Overview
Teaching: 1 min
Exercises: 10 minQuestions
How do we set up a GitHub repository for blogging?
Objectives
Create a repository on GitHub ready for hosting a blog site
In this first episode, we will create the repository that will host our website on GitHub.
We will do this entirely in the browser and we will also assume that your GitHub account is called HelmUpgradeBot.
- Go to https://github.com and sign in to your account
- In the top, right-hand corner of the browser, click the plus
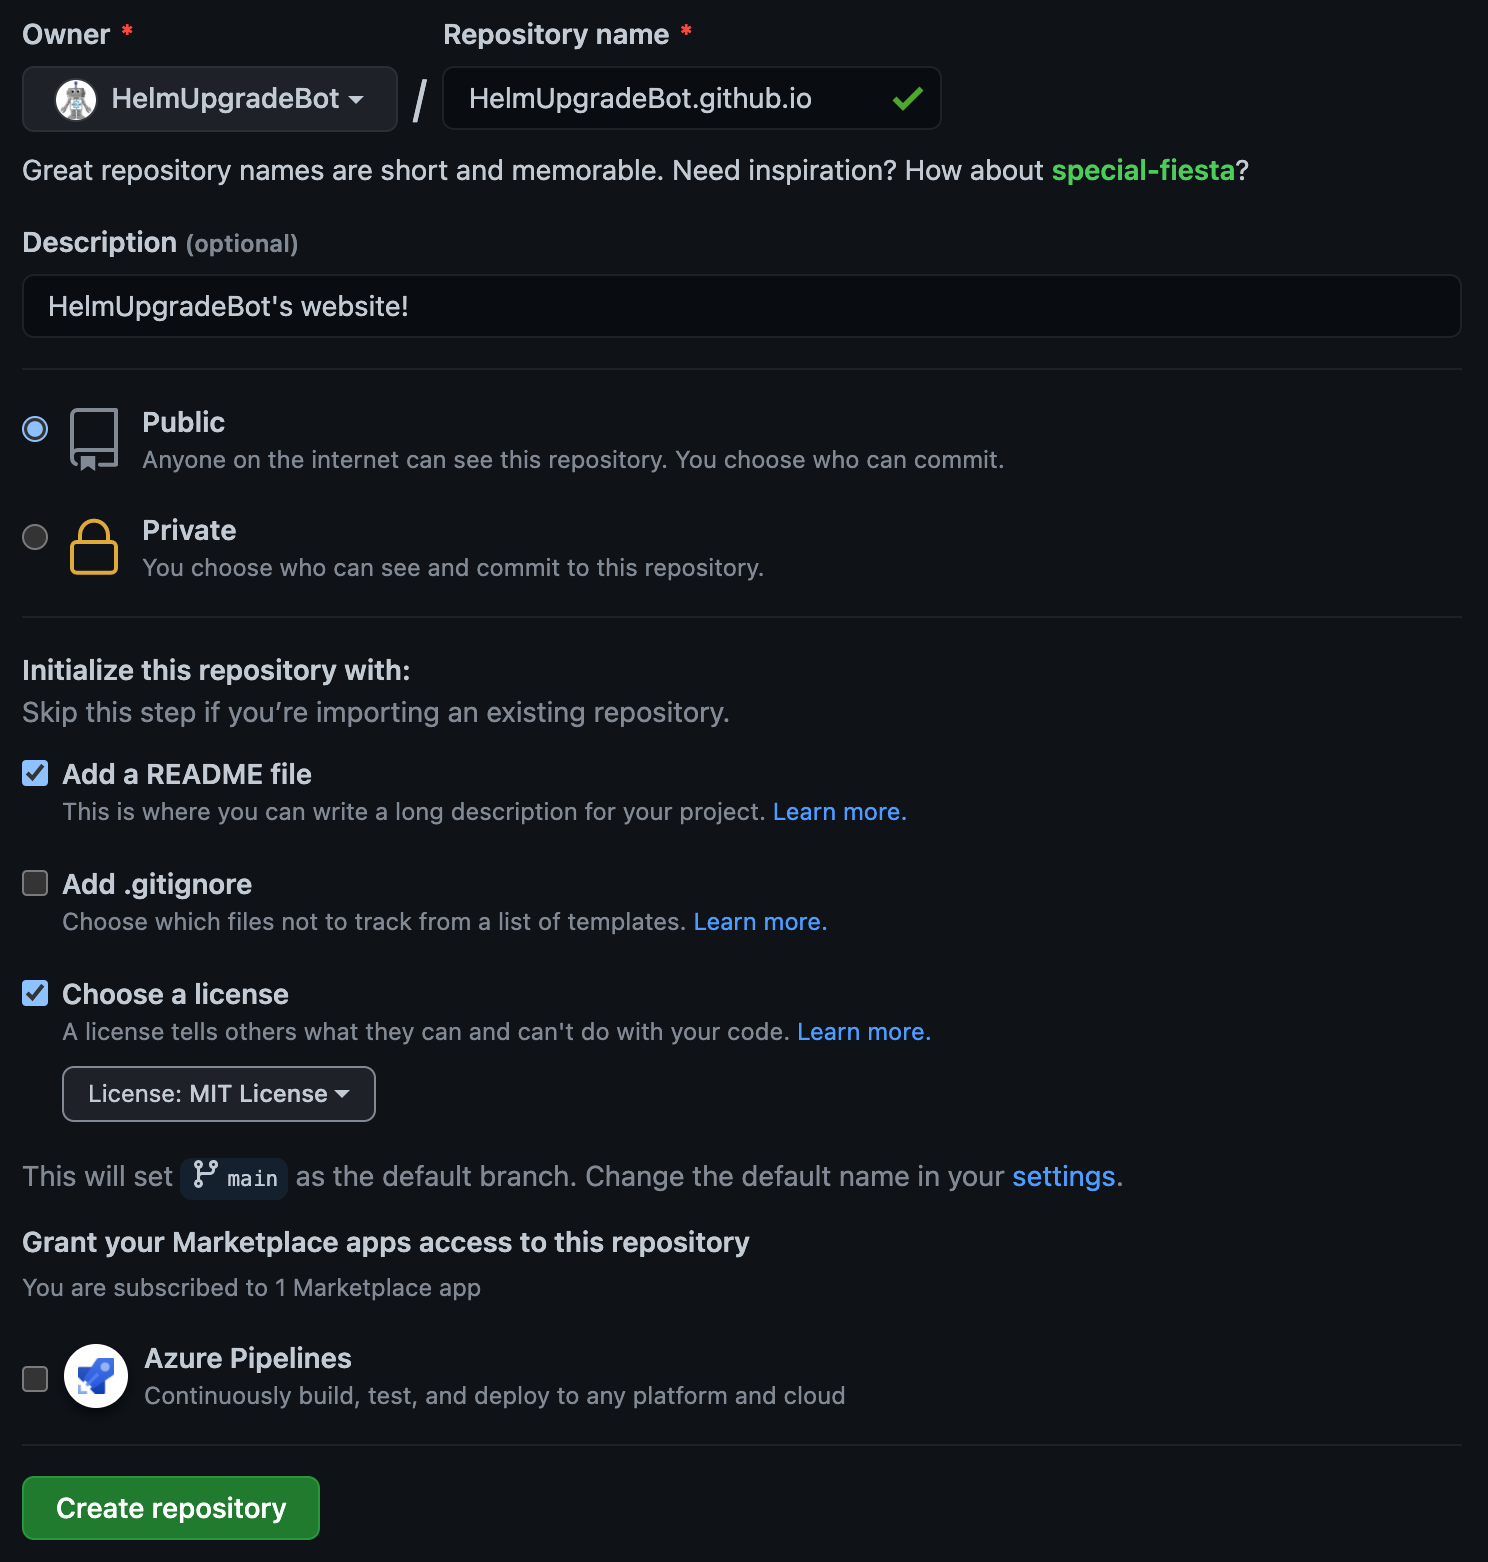
+symbol and select “New repository” from the dropdown menu. - Give your repository the name
HelmUpgradeBot.github.io. This is a special GitHub repository that will act as your website. Make sure that it is public! (You can have private GitHub Pages sites, but they cost money!)- Also add a README file to your repository and a license (the MIT license has been used in the example below but you might prefer Creative Commons).
- Once you’re happy, click “Create repository”
 |
|---|
| Example of how to fill in GitHub’s create repository form |
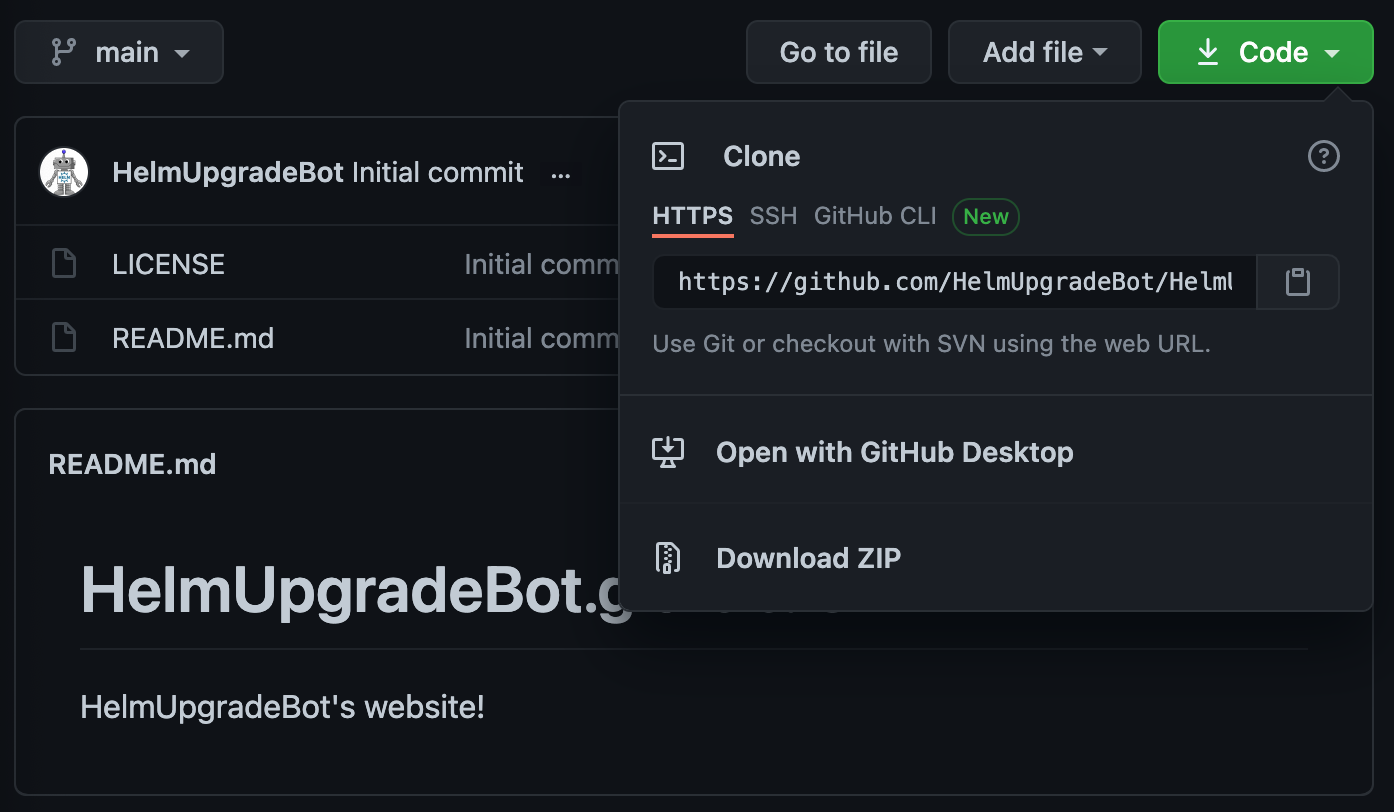
- Once your GitHub repo has been created, click the large, green “code” button in the top-right, make sure “HTTPS” is selected, and click the clipboard icon to copy the contents of the text box.
 |
|---|
| Where to find the address of your GitHub repo |
Next we will make a local copy of this repository and set it up to create a blog site with Hugo.
Key Points
Blog sites hosted on GitHub usually have the repo name
USERNAME.github.io