More on Markdown
Overview
Teaching: 0 min
Exercises: 0 minQuestions
How can I write content for my webpages?
How do I link to other pages?
Objectives
Create simple pages with formatted text
Markdown
Markdown is a lightweight markup language, i.e. a convention for adding style information to textual content. As the name Markdown indicates, the syntax elements of this language are shut down to a minimum. Having a rather minimalistic syntax, text formatted in Markdown is comparably readable. This might be one reason for Markdown having become the language of choice for formatted user input on websites like, for example:
Where to Start Writing Markdown?
A lot of tools for rendering Markdown source code exist.
Rendering is the process of generating a nice view of the content
using the style information included in the source text.
Chances are high, your editor can do this.
As we are working towards authoring websites using Jekyll and GitHub pages,
we will use GitHub straight away for learning the basics of Markdown.
The GitHub project you created in the first episode of this lesson contains a file README.md.
The picture below shows the projects default view.
This view includes a rendered view of the content inside the file README.md.
Your project should look quite similar except for the red circle around the pencil symbol.
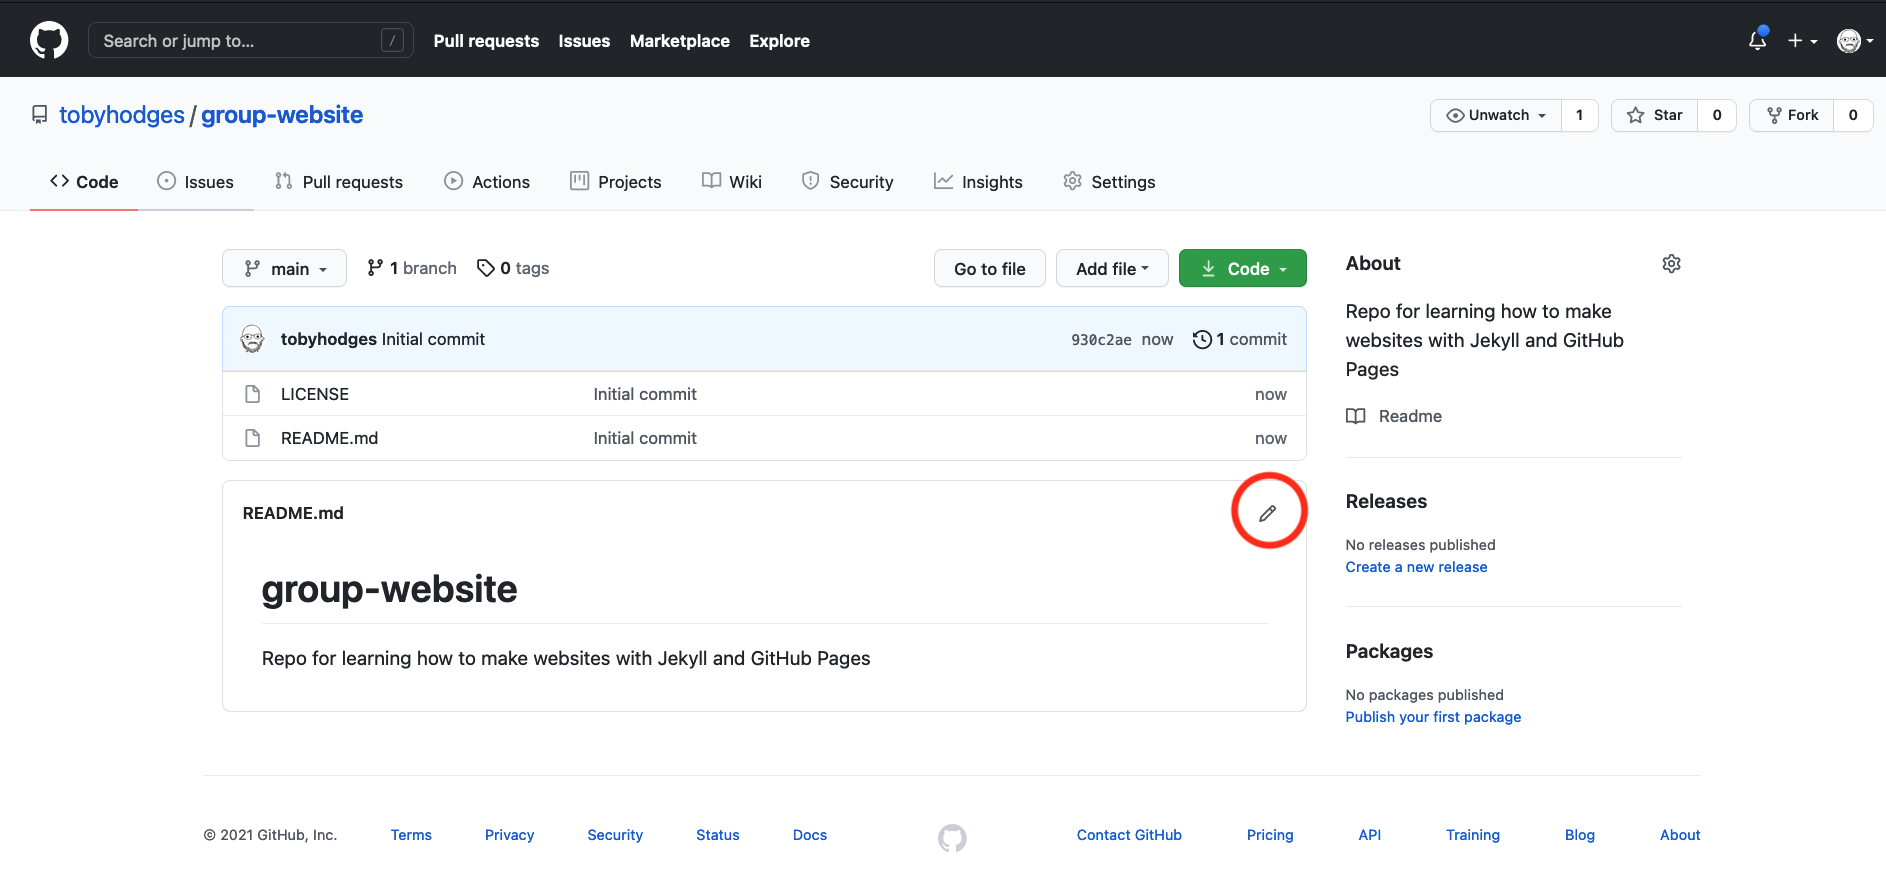
You can click on that pencil symbol to open an editing interface of your projects README.md file.
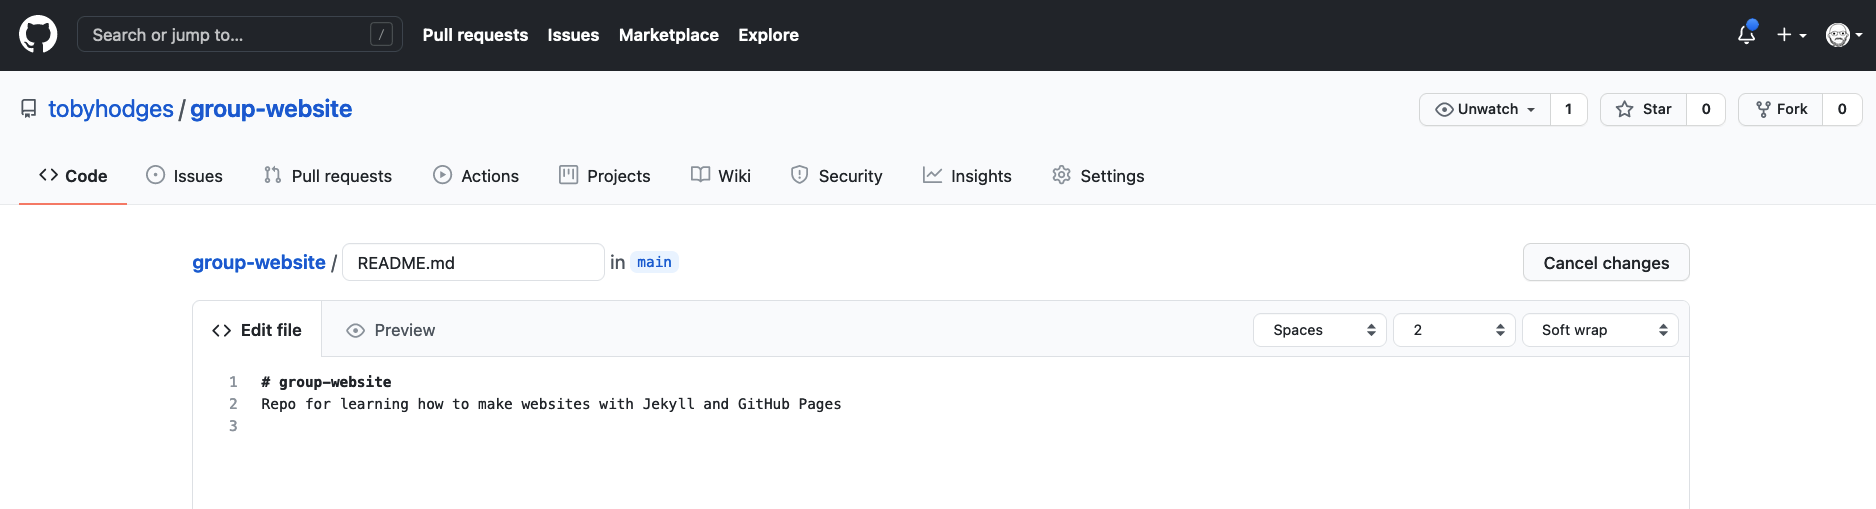
Once you’ve clicked the pencil symbol, GitHub will open that file in the editing interface.
You can change the content and have a look at the rendered view by clicking the Preview changes tab. On the right hand side, the preview shows us a vertical bar indicating how the conetent has changed from our edits. The bar is green for new lines, yellow for changed lines, and red for removed lines.
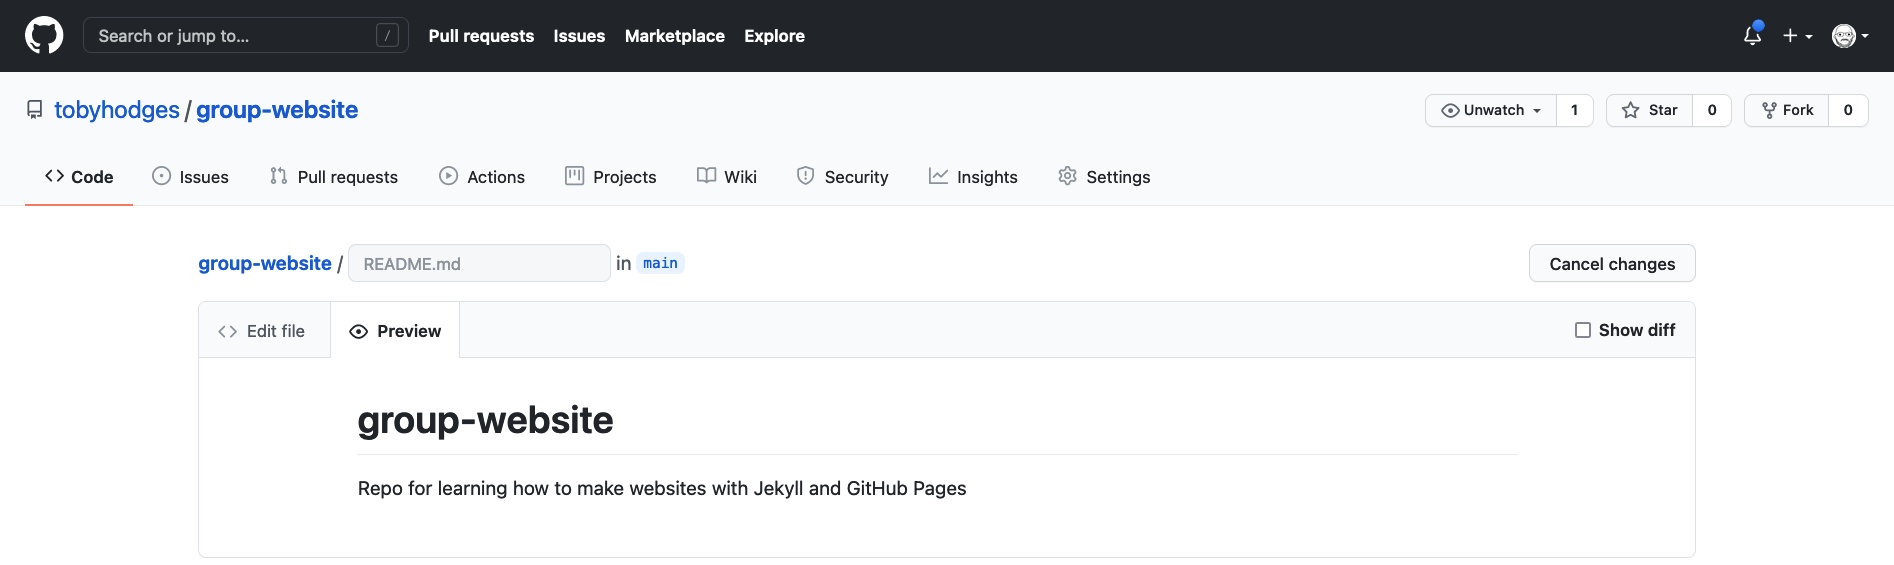
Let’s add Some **bold** font and see what happens when we preview it using the preview tab.
If new sections were added you will also find green vertical bars visually highlighting the new content.
To save the content to the file README.md, scroll down a bit and you’ll see a Commit changes menu
where you can commit your changes.
After having changed something, the commit menu looks like this:
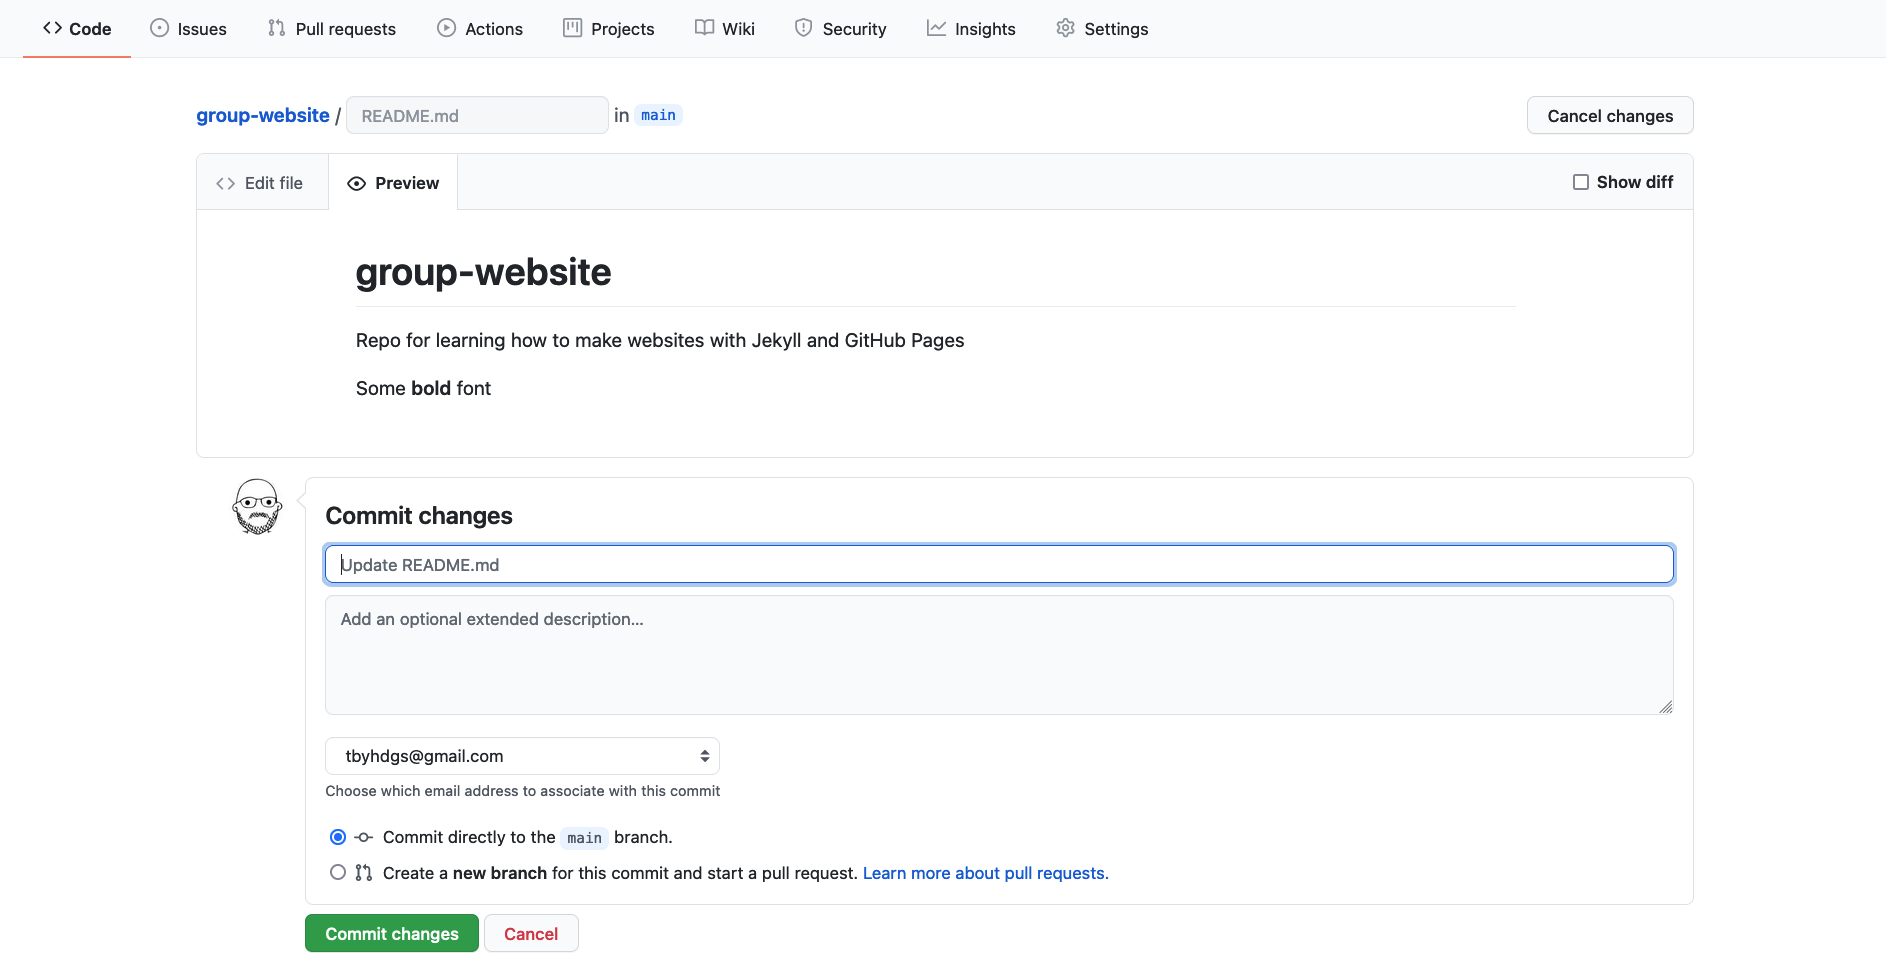
Writing a Commit Message
A commit message is a short, descriptive, and specific comment that will help us remember later on what we did and why. You find more about writing commit message in this section of the Git-novice lesson.
Writing Markdown
Now that we know about the editing interface and preview tab of our projects README.md
we can use it as a text editor and investigate selected Markdown features.
Our README.md already contains vanilla text and
two formatting features:
- Heading
# group-website - Emphasis using
**bold**.
Let’s do some exercises to learn more about structuring and emphasis.
Add a Sub Heading and Emphasised Text with Line Breaks
Try to reproduce the source code of the following view.
Hint: The new header you add should be a level two header.
Solution
# group-website
Repo for learning how to make websites with Jekyll pages

Some **bold** font

## Learning Markdown

Vanilla text may contain *italic* and **bold words**.

This paragraph is separated from the previous one by a blank line.
Line breaks
are caused by two trailing spaces at the end a line.
Displaying items in lists, sometimes increases readability.
You can create lists by preceding lines with - or a bunch of other --like characters.
Note paragraphs are separated by a blank line and by default consecutive lines will wrap around into a single paragraph. If you’d like to force a line break you need to include two spaces at the end of that line.
List today’s learning goals
Give it a try and write a short list of topics you want to learn today.
Solution
- Write Markdown
- Host my first website on GitHub
- Learn about Jekyll
- Think about how my work group could benefit from what I have learned.
If you would like to nest lists, i.e. specify a sub list as an item of another list, use indentation. Numbered enumerations are helpful for displaying sequences and the numbers may help to address individual points.
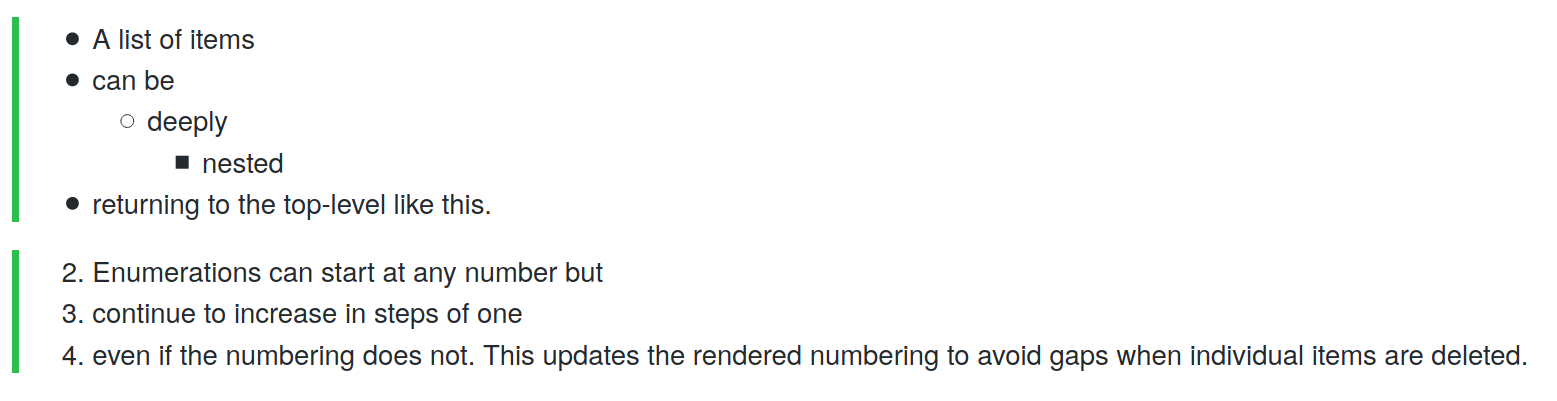
Nested Lists and Enumerations
Try to reproduce the source code of the following view.
Solution
- A list of items
- can be
  - deeply
    - nested
- returning to the top-level like this.

2. Enumerations can start at any number but
3. continue to increase in steps of one
4. even if the numbering does not. This updates the rendered numbering to avoid gaps when individual items are deleted.
Markdown Cheatsheet
Markdown offers a variety of formatting features. Have a look at this cheatsheet to get an overview or look things up.
You can surround text with single backticks (') to call out code, e.g. print('Hello world') and
use triple backticks to format larger code snippets, creating code blocks.
Add Code
Reproduce the markdown source code to create the following view:
Start from the following code and fill the blanks:
You can reference code __message='Hello World'__
or commands __git status__ inside text.
Larger code snippets look like this:
__
print('Hello World')
__
Solution
You can reference code `message='Hello World'`
or commands `git status` inside text.
Larger code snippets look like this:
```
print('Hello World')
```

Syntax highlighting of code blocks can increase readability a lot. You get nice coloured code by adding an language identifier right after the introductory triple backticks.
Let’s take an example with Python:
```python
print("Hello everyone!")
```
The code above will produce the following view:
print("Hello everyone!")
Syntax Highlighting
Try to reproduce the markdown source code to create the following view:
Here is the code so you can copy paste it instead of retyping. R code:
print(paste("How","are","you?"), quote = FALSE)Python code:s = "How are you?" print(s)HTML code:
<!DOCTYPE html>
<html>
<body>
<a href=https://carpentries.org/>This is a link</a>
</body>
</html>
Solution
```r
print(paste("How","are","you?"), quote = FALSE)
```

```python
s = "How are you?"
print(s)
```

```html
<!DOCTYPE html>
<html>
<body>
<a href=https://carpentries.org/>This is a link</a>
</body>
</html>
```
Linking other websites is an essential feature of a website.
Bare URLs like https://carpentries.org/ can be made clickable like this
https://carpentries.org/ by wrapping them into
angle brackets \< \>.
However, usually the bare URL is not very nice and displaying a clickable
alternative text is beneficial.
To specify alternative text you can surround the text with square brackets [ ].
You can then provide the URL in one of two ways:
- Inline style links - specifying the URL in line surrounded by parenthesis
( )- or - Reference style links - referencing a reusable link reference with a second set of square brackets
[ ].
Reference style links can be very useful for ongoing maintenence to avoid repeating (and later updating) the same links on many pages.
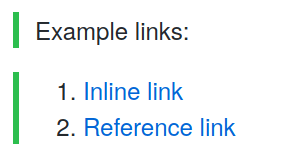
Links
Reproduce the markdown source code to create the following view, where both links point to https://carpentries.org/: Hint: Remember you can use this cheatsheet to see more about links.
Start from the following code and fill the blanks:
Example links:
1. [___](https://carpentries.org/)
2. [___]___case-InSeNsiTiVe-reference-tag___

[case-insensitive-reference-tag]: https://carpentries.org/
Solution
Example links:
1. [Inline link](https://carpentries.org/)
2. [Reference link][case-InSeNsiTiVe-reference-tag]

[case-insensitive-reference-tag]: https://carpentries.org/
Optional Exercise: Add Your Repository Details to CodiMD
If your instructors are using CodiMD to take notes during this workshop, use Markdown to add a link in that document to the repository you are using to follow along with this lesson. The link text should be your GitHub username, and the target your repository. Your instructors will direct you towards the appropriate location in the document to add your link.
Key Points
Markdown is an relatively easy way to write formatted text
Markdown and HTML tags can be used together in a single page
We recommend writing Markdown links ‘reference-style’
The landing page for a website is conventionally named
index.md