Issues
Last updated on 2026-07-21 | Edit this page
Overview
Questions
- How can I use GitLab to manage development or a whole project?
Objectives
- Create an issue.
- Comment on an issue.
- Close an issue.
- Use boards to get an overview the state of issues.
Create Issue
Before our excursion to learn about groups, we contributed lab notes to our co-learner’s repository. Having done that, we think we should be listed as contributors in the documentation of that repository. Since, we want our co-learner to do the honors, we create an issue in their repository, to document our desire.
Issues are a feature of GitLab that allows us to organize tasks by project and by group (and its descendant groups and projects). By default anyone that has read access to a project can file issues. This usually makes sense, because users can report their problems and ask their questions that way, even when they are not supposed to change anything themselves.
With our co-learner’s help, we navigate to their project. On the side bar menu on the left we click the entry labeled “Issues” and on the following page we click on the button labeled “New issue”.
This leads us to the following form:
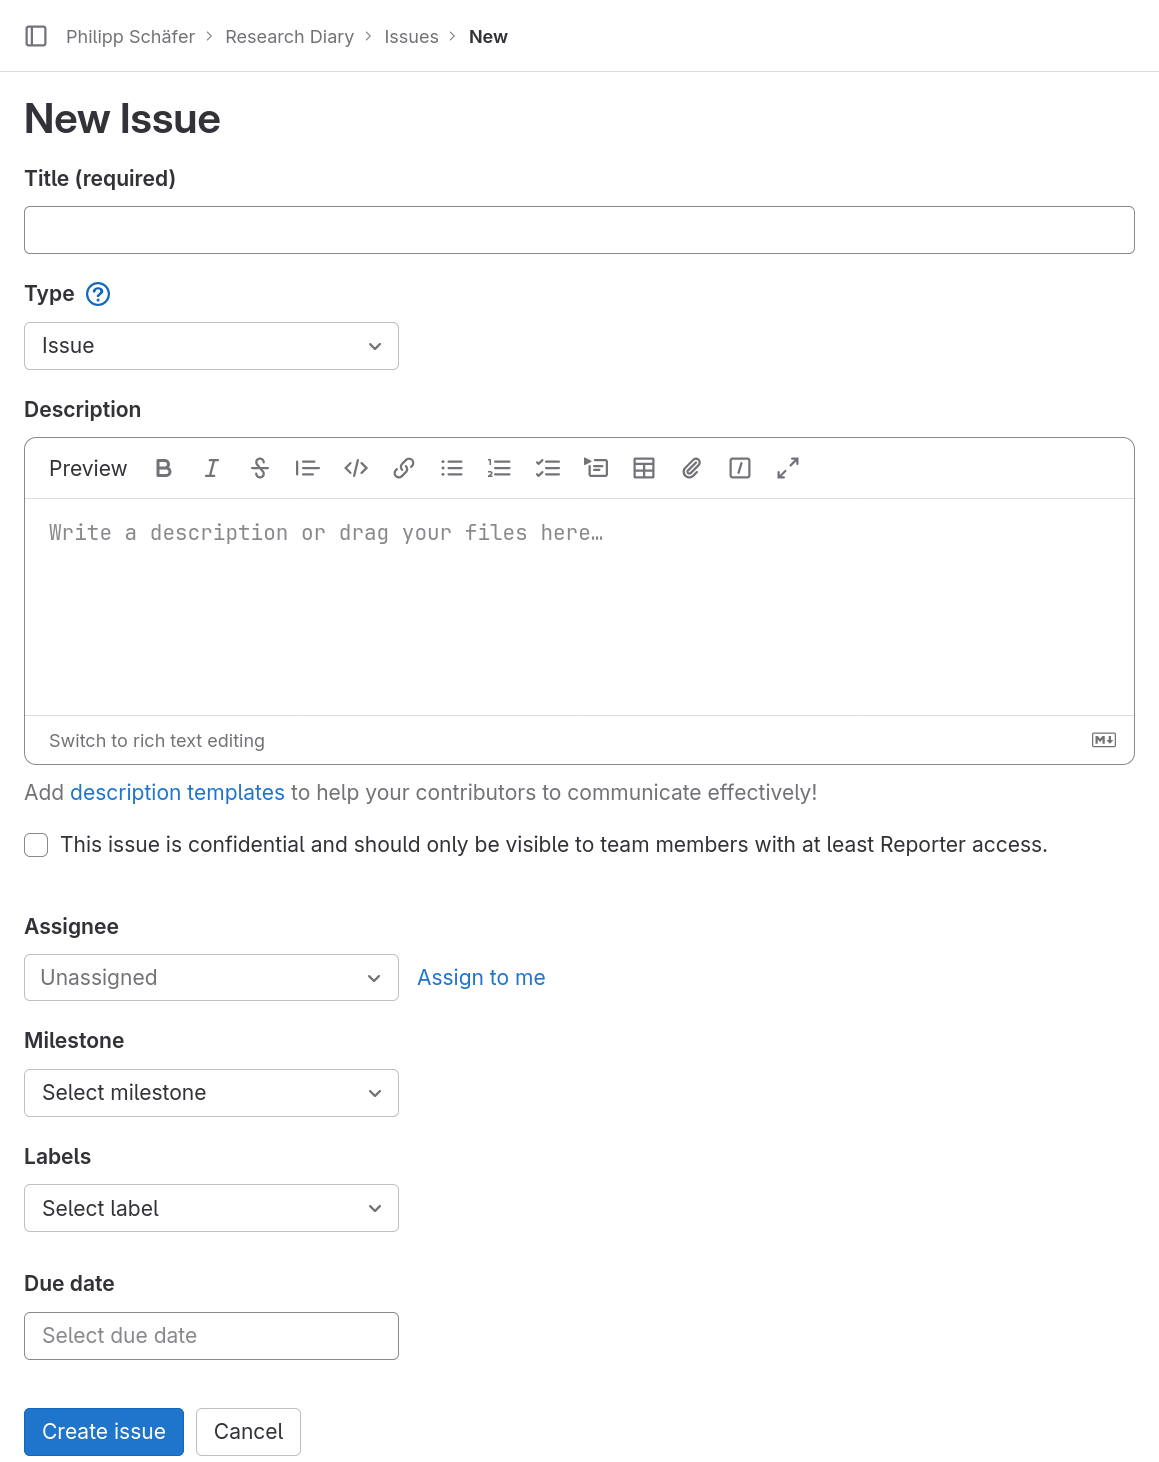
For our issue we provide a short, descriptive title, for example “Recognize outside contributors” and a description:
MARKDOWN
Outside contributors should be mentioned in the project’s documentation. Their
names could be listed in one of the following locations:

* a section in `README.md`
* a separate `CONTRIBUTORS.md` fileMarkdown Code Spans and Blocks
Markdown provides syntax for formatting text in a monospaced font, this is usually used to typeset code, because code is usually written to be readable in such fonts.
For a monospaced snippet within a normal paragraph, enclose the snippet in a single backquote (also called backtick or grave accent), for example
will be typeset as:
The filename README.md will be set in a monospaced
font.
For a whole block of monospaced text, for example some lines of code, start and end the block with a line consisting of three or more backquotes, where the number should match for start and end, for example
MARKDOWN
```
# This python code will also be set in a monospaced font, which preserves
# relative indentation between lines.
def some_function():
    pass
```
will be typeset as:
# This python code will also be set in a monospaced font, which preserves
# relative indentation between lines.
def some_function():
    pass
We assign the new issue to our co-learner by selecting their account in the drop-down field labeled “Assignee”. They need to be a member of the project, directory or indirectly, in order to be listed in that field.
Then we click the button labeled “Create issue”. This redirects us to the new issue’s page. Near top we see its title followed by its description. A text field below the description can be used to create a comment and a side bar on right lists more fields that could be used to further specify properties of that issue.
Add a Label
We will assign a value to one of the fields, the one labeled “Labels”, now.
We want to know when our co-learner starts to work on the issue. To communicate that fact through GitLab’s issue system we can use its Label feature. Issues can be defined for groups and projects. In the case of groups they are then also available to all its descendant groups and projects.
So, if we want to assign a label to the issue, we first have to create it. We click on the “Edit” link next to the “Label” field in the side bar. This opens a small dialog titled ”Assign labels”. If we had already defined labels, they would be listed here.
Since have not, we click the link “Create project label” in the small dialog. A new dialog opens titled “Create project label”. We call it “WIP” for work in progress and select our preferred color. Colors are often used to group labels, for example one color for labels referring to the subproject or subsystem the issue relates to, another color for the current progress of the issue (like our WIP label), etc. Then we click the button labeled “Create”.
This brings us back to the “Assign labels” dialog, this time with our new label listed. We select our label by clicking it and close the dialog by clicking on the x in the upper right corner.
Comment on an Issue
We provided a generic description of the issue in its description, but we want to make sure that our co-learner does not forget to include us. So we write a comment regarding our inclusion.
To support our case we want to reference our contribution. For this, we can use another feature of GitLab’s markdown: When we mention a commit of the project’s repository by its identifier, GitLab will automatically convert it to a link to the page of the commit.
First we need to know the identifier of our commit. We navigate to the project’s commit history by clicking the submenu item “Commits” of the menu item “Code” in the side menu. There we find our commit at the top with a short sequence of numbers and letters on the right. This is beginning, the prefix, of the commit’s identifier, which is also called a SHA due to how it is created. Right next to the prefix is a button with an icon that looks like a clipboard. As its tooltip tells us, clicking it will copy the commit SHA (identifier). We click on the button.
We navigate back to our issue by clicking the menu item “Issues” in the side menu and clicking on the title of our issue in the list that opened.
Using the copied commit identifier, we formulate our commit similar to
Please mention me as a contributor due to commit 4eac24cafbcebc4f0d528bd2e1246a4624265085.and click the button labeled “Comment”. A new box shows up above the comment text area showing our message. We can see that GitLab uses and shortened version of the commits identifier for the link text, which makes it slightly more readable.
Before we move on, please note the button labeled “Close issue” under the comment text field. An issue starts in the open state and can be closed by clicking this button. When we type something into the comment field the label of the button changes to “Comment & close issue”, so we can add a final comment before closing the issue.
This is a very important feature, allowing us to distinguish between issues that have yet to be dealt with and those that have already been dealt with. We do not, in general, delete issues, because they are often still useful even if closed already. For example, we can use the search to check whether a certain topic was already discussed in the past.
Issue Boards
Now, we will have a look at boards, a feature that uses labels to visually organize a project’s issues.
We navigate to our project’s issue board by clicking the submenu item “Issue boards” of the menu item “Plan” in the side menu.
The following page loads:
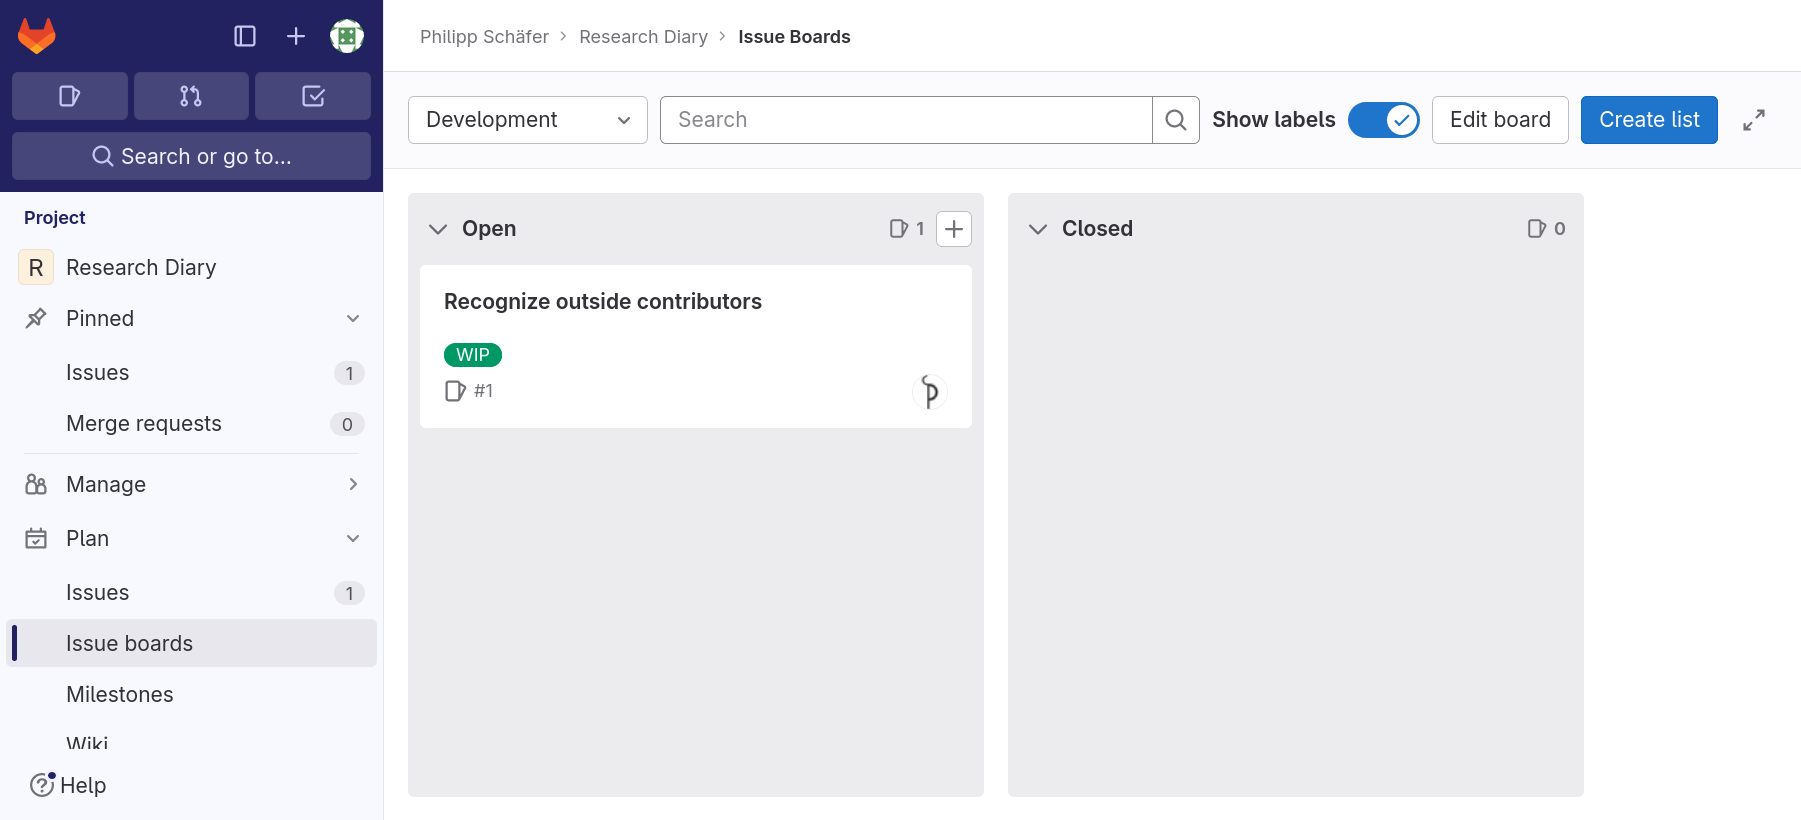
By default, GitLab creates one board, called “Development”, for each project. This is the board we see. It has two so called lists configured, labeled “Open” and “Closed”, which list all open and closed issues of the project, respectively. These two lists cannot be deleted.
We will now create another list for issues that are work in progress, that is those that are labeled “WIP”.
We click on the button labeled “Create List”. A new list appears to the right of the “Closed” list. We are prompted to select a label. We select our label “WIP” and click the button labeled “Add to board”.
The new list is created between the “Open” and “Closed” lists. Those two will always be on the left and right end, respectively. We can reorder the lists created by us however we want between these two.
Note, that our issue is initially shown in the “Open” list and our new list. When we reload the page, it disappears from the “Open” list. In general, open issues that belong to one of the custom lists, due to their labels, will not appear in the “Open” list. Closed issues, however, will always only appear in the “Closed” list.
Boards can not only be used to get an overview of a project’s issues. They can also be used to manipulate their labels. If we drag an issue from one list to another, the label of the originating list will be removed and that of the target list will be added (unless it is one of the “Open” and “Closed” lists). Moving an issue to the “Closed” list will close the issue, while moving an issue out of the “Closed” list will reopen it.
We note that we added the “WIP” label to our issue, however, that is not accurate. Our co-learner should add the label whenever they start to work on it. To remove the label we drag the issue to the “Open” list.
We click on the issue’s title to navigate to its page. Initially the comment text field was directly under the description. By now, there is a list that chronicles the changes to the issue. It starts with the assignment to our co-learner (from creating the issue), next we see that the “WIP” label was added by us, then comes our comment, and finally it lists that we removed the ”WIP” label again.
This helps keep track of who did what at which point in time.
- GitLab has a feature to manage issues of a project.
- Issues consist of titles and descriptions.
- Issues can be open or closed.
- Labels can be assigned to issues.
- Users can be assigned to issues.
- Boards can give an overview of issues and their stats.
- An issue’s state can be manipulated in the board view.