Groups
Last updated on 2026-07-07 | Edit this page
Overview
Questions
- How can I organize the projects of my (research) group and my collaborations?
Objectives
- Create a group.
- Move a project.
- Add a member to a group.
- Explain how the members of a group relate to its subgroups and projects.
- Delete a group.
In the first episode, we already learned about groups; GitLab’s way to organize projects. A group might hold projects of a research group or those of a research project with contributors from multiple institutions. Together with members and their permissions groups can be used to manage access to multiple repositories (for example, restrict access to certain repositories to staff while others may be accessed by student assistants as well).
In this episode we will create (and delete) a group, move our project, and learn how members of a group relate to its subgroups and projects.
Creating a Group
To create a group, we click on the button with the “+” symbol near the top of the side menu on the right and select “New group”. On the next page, we select “Create group”.
This leads to the following page:
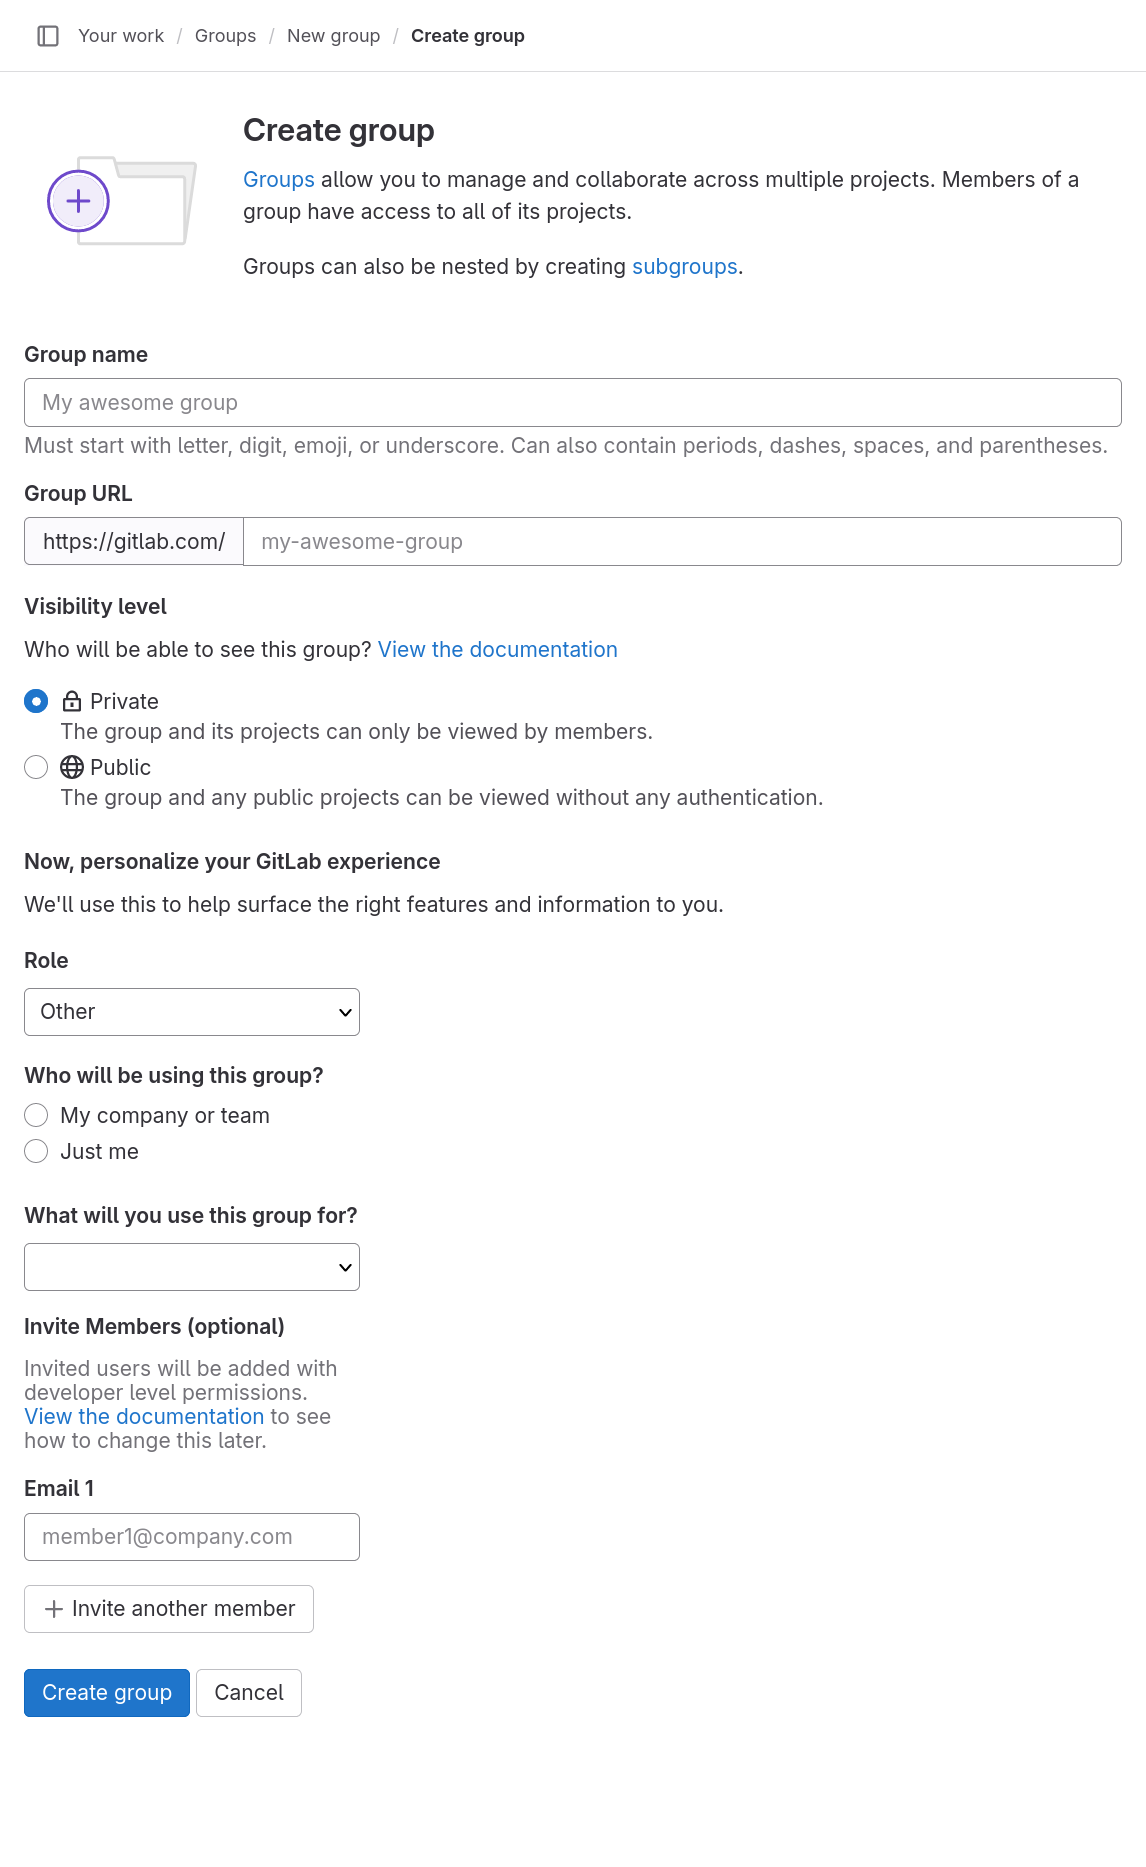
Choose any name for the group, for example a fictional research group like “Ant-Sized Elephants’ Applications Lab”. When you move the focus out of the input field, for example by pressing the tabulator key, GitLab will suggest a URL for the group. Usually, we might want to adapt it, but for now all we care about that it is available.
You can leave the group’s visibility private. The visibility of a group works like that of a project.
We will leave the remaining fields as they are and create the group by clicking the blue button labeled “Create group”. GitLab will navigate to the group home page, which usually lists the group’s subgroups and projects. Since there are currently none, it shows two big buttons for creating a new subgroup and a new project.
We will have a look at how to create a project in the new group.
We click on the button labeled “Create new project”. On the next page, we select “Create blank project”.
This leads to the create blank project form page. We do not really want to create a project. Instead we have a look at the drop-down field under the heading “Project URL”. Because of the way that we took to get to this page, it is prefilled with our group’s URL slug.
Submitting the form with our group’s URL selected would create a project in that group. But we will not do that.
Move Project to Group
Instead, we will now move our project to our group.
We start, by navigating to our project’s homepage. Once there, we select “Settings” then “General” in the side menu. On that page, we expand the section labeled “Advanced” and scroll down to the subsection labeled “Transfer Project”.
Now, please read the subsections notes, with an emphasis on the list of things to be aware of.
A few comments on the last two items of the list:
The second to last tells us that we will need to update our local repositories to point to the new location. Because we are moving the project to a group from our own projects, the URL will change. So the URL we specified when adding the remote to our local repository will no longer be valid. We will test this, but will not change the URL, because we will move the project back in a bit.
The last item on the list informs us about potential visibility changes. For example, moving a public project to a private group, will cause the project to become private.
Having carefully read and thought about the warnings, we are ready to move our project. We select the group that we previously created from the drop-down field and click the button labeled “Transfer project”.
A dialog appears and we confirm, that we are sure, by typing in the name of our project and clicking the button labeled “Confirm”.
The project will be transferred to the group.
Check that the project URL changed (only when teaching with Git)
To test that the URL changed, we switch to the shell and navigate to the directory containing our repository; Not the repository of our co-learner!
Running
git remote get-url originshould tell us that our project points to the old project URL. So, let us try to run
git pullAlready up to date.That result is unexpected. The reason for this is that GitLab will redirect the old URLs to the new ones, as long as the old URLs do not point to a new project.
Adding Members to Group
Adding Members
Add your instructor as a member of your group with the role of “Guest”. The process is the same as adding members to a project.
This exercise should take about 5 minutes.
Steps to solve the challenge:
- Navigate to the group home page.
- Select “Manage”, then “Members” from the side bar menu.
- Click the “Invite members” button.
- Fill in the dialog to invite your instructor with the “Guest” role.
- Click the “Invite” button.
After adding a member to the group, we a have look at the member list of our research diary project.
The list has three entries: ourselves, our co-learner, and our instructor. We have the “Owner” role and, as its creator, are a direct member of the project. Our co-learner has the “Maintainer” role that we assigned them and are also a direct member of the project, as we added them directly to the project.
The entry we are really interested in is that of the instructor. We added them as a “Guest” to the group. Now, they show up in the list of this project with the same role. The reason is, as the column “Source” tells us, that our project is in our group, and our instructor is a member of that group.
That means, projects and groups inherit the members of the group they belong to.
Move project
Move your project back to your username space.
This exercise should take about 5 minutes.
Delete Group
Now that our group is empty again, we will delete it, to be polite users of free resources. (If you created a group, that you actually intend to keep, do not delete it.)
Delete a Group
Delete your group. You find the deletion form at the same position in the group’s settings, as the project deletion form in a project’s settings.
This exercise should take about 5 minutes.
Steps to solve the challenge:
- Navigate to the group home page.
- Select “Settings”, then “General” from the side bar menu.
- Expand the “Advanced” section and scroll all the way down.
- Click “Remove group”.
- Fill in the dialog and click “Confirm”.
- Groups and subgroups are used to organize projects.
- Groups can have members.
- Projects and groups inherit members from the group they belong to.