
Introduction to Pixi
Last updated on 2026-10-27 | Edit this page
Estimated time: 45 minutes
Overview
Questions
- What is Pixi?
- How does Pixi enable fully reproducible software environments?
- What are Pixi’s semantics?
Objectives
- Outline Pixi’s workflow design
- Summarize the relationship between a Pixi manifest and a lock file
- Create a multi-platform and multi-environment Pixi workspace
Pixi
As described in the previous section on computational reproducibility, to have reproducible software environments we need tools that can take high level human writeable environment configuration files and produce machine-readable, digest-level lock files that exactly specify every piece of software that exists in an environment.
Pixi is a cross-platform package and environment manager that can handle complex development workflows. Importantly, Pixi automatically and non-optionally will produce or update a lock file for the software environments defined by the user whenever any actions mutate the environment. Pixi is written in Rust, and leverages the language’s speed and technologies to solve environments fast.
Pixi addresses the concept of computational reproducibility by focusing on a set of main features:
- Virtual environment management: Pixi can create environments that contain conda packages and Python packages and use or switch between environments easily.
-
Package management: Pixi enables the user to
install, update, and remove packages from these environments through the
pixicommand line interface. - Task management: Pixi has a task runner system built-in, which allows for tasks with custom logic and dependencies on other tasks to be created.
It also combines these features with robust behaviors:
- Automatic lock files: Any changes to a Pixi workspace that can mutate the environments defined in it will automatically and non-optionally result in the Pixi lock file for the workspace being updated. This ensures that any and every state of a Pixi project is trivially computationally reproducible.
- Solving environments for other platforms: Pixi allows the user to solve environments for platforms other than the current user’s machine. This allows for users to solve and share environments with any collaborator with confidence that all environments will work with no additional setup.
- Parity of conda and Python packages: Pixi allows for conda packages and Python packages to be used together seamlessly, and is unique in its ability to handle overlap in dependencies between them. Pixi will first solve all conda package requirements for the target environment, lock the environment, and then solve all the dependencies of the Python packages for the environment, determine if there are any overlaps with the existing conda environment, and then only install the missing Python dependencies. This allows for fully reproducible solves and for the two package ecosystems to complement each other rather than potentially cause conflicts.
- Efficient caching: Pixi uses an extremely efficient global caching scheme. This means that the first time a package is installed on a machine with Pixi is the slowest it will ever be to install it for any future project on the machine while the cache is still active.
Project-based workflows
Pixi uses a “project-based” workflow which scopes a workspace and the installed tooling for a project to the project’s directory tree.
Pros
- Environments in the workspace are isolated to the project and can not cause conflicts with any tools or projects outside of the project.
- A high level declarative syntax allows for users to state only what they need, making even complex environments easy to understand and share.
- Environments can be treated as transient and be fully deleted and then rebuilt within seconds without worry about breaking other projects. This allows for much greater freedom of exploration and development without fear.
Cons
- As each project has its own environments, the same package can exist in many environments on one machine, and the total amount of disk space used can be larger than with other forms of development workflows.
Disk space and the package cache
When the global package cache and the project environment are on the same file system, Pixi links most of the package files from the cache into each environment instead of copying them, taking much less extra disk space than it might appear. However, when the cache and the project environment are on different file systems (e.g. a home directory and a scratch space on an HPC system) the files are copied, and the total amount of disk space used can be much larger.
This can be avoided by setting the PIXI_CACHE_DIR
environment variable to a directory on the same file system as your
projects, and mitigated on disk limited machines by removing the
environments of projects not in use with pixi clean
(while keeping their lock files) and periodically cleaning the cache
with pixi clean cache.
- Each project is set up separately, with its own manifest, lock file, and environments that need to be solved and installed, and nothing is shared implicitly between projects.
Pixi project files and the CLI basics
Every Pixi project begins with creating a manifest file. A manifest file is a declarative configuration file that lists what the high level requirements of a project are. Pixi then takes those requirements and constraints and solves for the full dependency tree.
Let’s create our first Pixi project. First, to have a uniform
directory tree experience, clone the pixi-cuda-lesson
GitHub repository (which you made as part of the setup) under your home
directory on your machine and navigate to it.
Then use pixi init to create a new project directory and
initialize a Pixi manifest with your machine’s configuration.
OUTPUT
Created /home/<username>/pixi-cuda-lesson/example/pixi.tomlNavigate to the example directory and check the
directory structure
We see that Pixi has set up Git configuration files for the project
as well as a Pixi manifest pixi.toml file. Checking the
default manifest file, we see three TOML tables: workspace,
tasks, and dependencies.
TOML
[workspace]
authors = ["Your Name <your email from your global Git config>"]
channels = ["conda-forge"]
name = "example"
# This will be whatever your machine's platform is
platforms = ["linux-64"]
version = "0.1.0"

[tasks]

[dependencies]-
workspace: Defines metadata and properties for the entire project. -
tasks: Defines tasks for the task runner system to execute from the command line and their dependencies. -
dependencies: Defines the conda package dependencies from thechannelsin yourworkspacetable.
For the rest of the lesson we’ll ignore the authors list
in our discussions as it is optional and will be specific to you.
At the moment there are no dependencies defined in the manifest, so
let’s add Python using the pixi add
command.
OUTPUT
✔ Added python >=3.15.2,<3.16What happened? We saw that python got added, and we can
see that the pixi.toml manifest now contains
python as a dependency
TOML
[workspace]
channels = ["conda-forge"]
name = "example"
# This will be whatever your machine's platform is
platforms = ["linux-64"]
version = "0.1.0"

[tasks]

[dependencies]
python = ">=3.15.2,<3.16"
Further, we also now see that a pixi.lock lock file has
been created in the project directory as well as a .pixi/
directory.
The .pixi/ directory contains the installed
environments. We can see that at the moment there is just one
environment named default
Inside the .pixi/envs/default/ directory are all the
libraries, header files, and executables that are needed by the
environment.
The pixi.lock lock file is a YAML file that contains
three definition groups: platforms,
environments, and packages. The
platforms group lists every platform the workspace is
solved for, along with the virtual packages (e.g. the minimum
glibc version) that the solve assumes the platform
provides. The environments group lists every environment in
the workspace for every platform with a complete listing of all packages
in the environment. The packages group lists a full
definition of every package that appears in the
environments lists, including the package’s URL on the
conda package index and digests (e.g. sha256, md5).
Here’s an example of what the platforms,
environments, and packages groups look like in
the pixi.lock file we created for a linux-64
platform machine.
version: 7
platforms:
- name: linux-64
  virtual-packages:
  - __unix=0=0
  - __linux=4.18
  - __glibc=2.28
  - __archspec=0=x86_64
environments:
  default:
    channels:
    - url: https://conda.anaconda.org/conda-forge/
    packages:
      linux-64:

...

      - conda: https://conda.anaconda.org/conda-forge/linux-64/python-3.15.2-h6e52b48_100_cp315.conda
      - conda: https://conda.anaconda.org/conda-forge/linux-64/tk-8.6.13-noxft_h1df4ec4_4.conda
      - conda: https://conda.anaconda.org/conda-forge/linux-64/zstd-1.5.7-hb78ec9c_7.conda
      - conda: https://conda.anaconda.org/conda-forge/noarch/ca-certificates-2026.10.23-hbd8a1cb_0.conda
      - conda: https://conda.anaconda.org/conda-forge/noarch/python_abi-3.15-9_cp315.conda
      - conda: https://conda.anaconda.org/conda-forge/noarch/tzdata-2026e-h5d301ff_0.conda
...

packages:

...

- conda: https://conda.anaconda.org/conda-forge/linux-64/python-3.15.2-h6e52b48_100_cp315.conda
  build_number: 100
  sha256: dd6fdef748df5636029673a834ca3632ce44c86d71e4986d70bcdb2ae5607a25
  md5: 38c3edc23439db3ca383be02ae2b702e
  depends:
  - __glibc >=2.17,<3.0.a0
  - bzip2 >=1.0.8,<2.0a0
  - ld_impl_linux-64 >=2.36.1
  - libedit >=3.1.20260512,<3.2.0a0
  - libexpat >=2.8.5,<3.0a0
  - libffi >=3.7.0,<3.8.0a0
  - libgcc >=15
  - liblzma >=5.8.3,<6.0a0
  - libmpdec >=4.0.0,<5.0a0
  - libsqlite >=3.54.1,<4.0a0
  - libuuid >=2.42.4,<3.0a0
  - libzlib >=1.3.2,<2.0a0
  - ncurses >=6.6,<7.0a0
  - openssl >=3.5.9,<4.0a0
  - python_abi 3.15.* *_cp315
  - tk >=8.6.13,<8.7.0a0
  - tzdata
  - zstd >=1.5.7,<1.6.0a0
  license: Python-2.0
  run_exports:
    weak:
    - python_abi 3.15.* *_cp315
    noarch:
    - python
  size: 29327137
  timestamp: 1793015518763
  python_site_packages_path: lib/python3.15/site-packages

...
These groups provide a full description of every package described in the Pixi workspace and its dependencies and constraints on other packages. This means that for each package specified, that version, and only that version, will be downloaded and installed in the future.
Lock files and security
Locking every package in an environment to an exact version and digest has consequences for the security of the environment.
Pros
- Packages are installed at the exact versions and digests recorded in
the lock file, so new releases do not enter the environment until the
lock file is explicitly updated. This protects a locked environment from
installing malicious releases of a package published after it was
locked. For example, a lock file that contained
pytorch-lightningbefore the maliciouspytorch-lightning2.6.2 and 2.6.3 releases on PyPI that contained credential harvesting code (CVE-2026-44484) was safe from the attack.
Cons
- A locked environment also does not receive security fixes until you
update the lock file. For example, after the 2026
eMudhra certificate authority incident, users needed new versions of
certifi,ca-certificates, and potentiallypip, to stop trusting the compromised certificates, and a locked environment keeps the old versions until its lock file is updated.
We can even test that now by deleting the installed environment fully
with pixi clean
and then getting it back (bit for bit) in a few seconds with pixi install.
OUTPUT
removed /home/<username>/pixi-cuda-lesson/example/.pixi/envsOUTPUT
✔ The default environment has been installed.We can also see all the packages that were installed and are now
available for us to use with pixi list
Extending the manifest
Let’s extend this manifest to add the Python library
numpy and the Jupyter tools notebook and
jupyterlab as dependencies and add a task called
lab that will launch Jupyter Lab in the current working
directory.
Hint: Look at the Pixi manifest table structure to think how a
task might be added. It is fine to read the docs too!
Let’s start at the command line and add the additional dependencies
with pixi add
We can manually edit the pixi.toml with a text editor to
add a task named lab that when called executes
jupyter lab. This is sometimes the easiest thing to do, but
we can also use the pixi CLI.
OUTPUT
✔ Added task `lab`: jupyter lab, description = "Launch JupyterLab"The resulting pixi.toml manifest is
With our new dependencies added to the project manifest and our
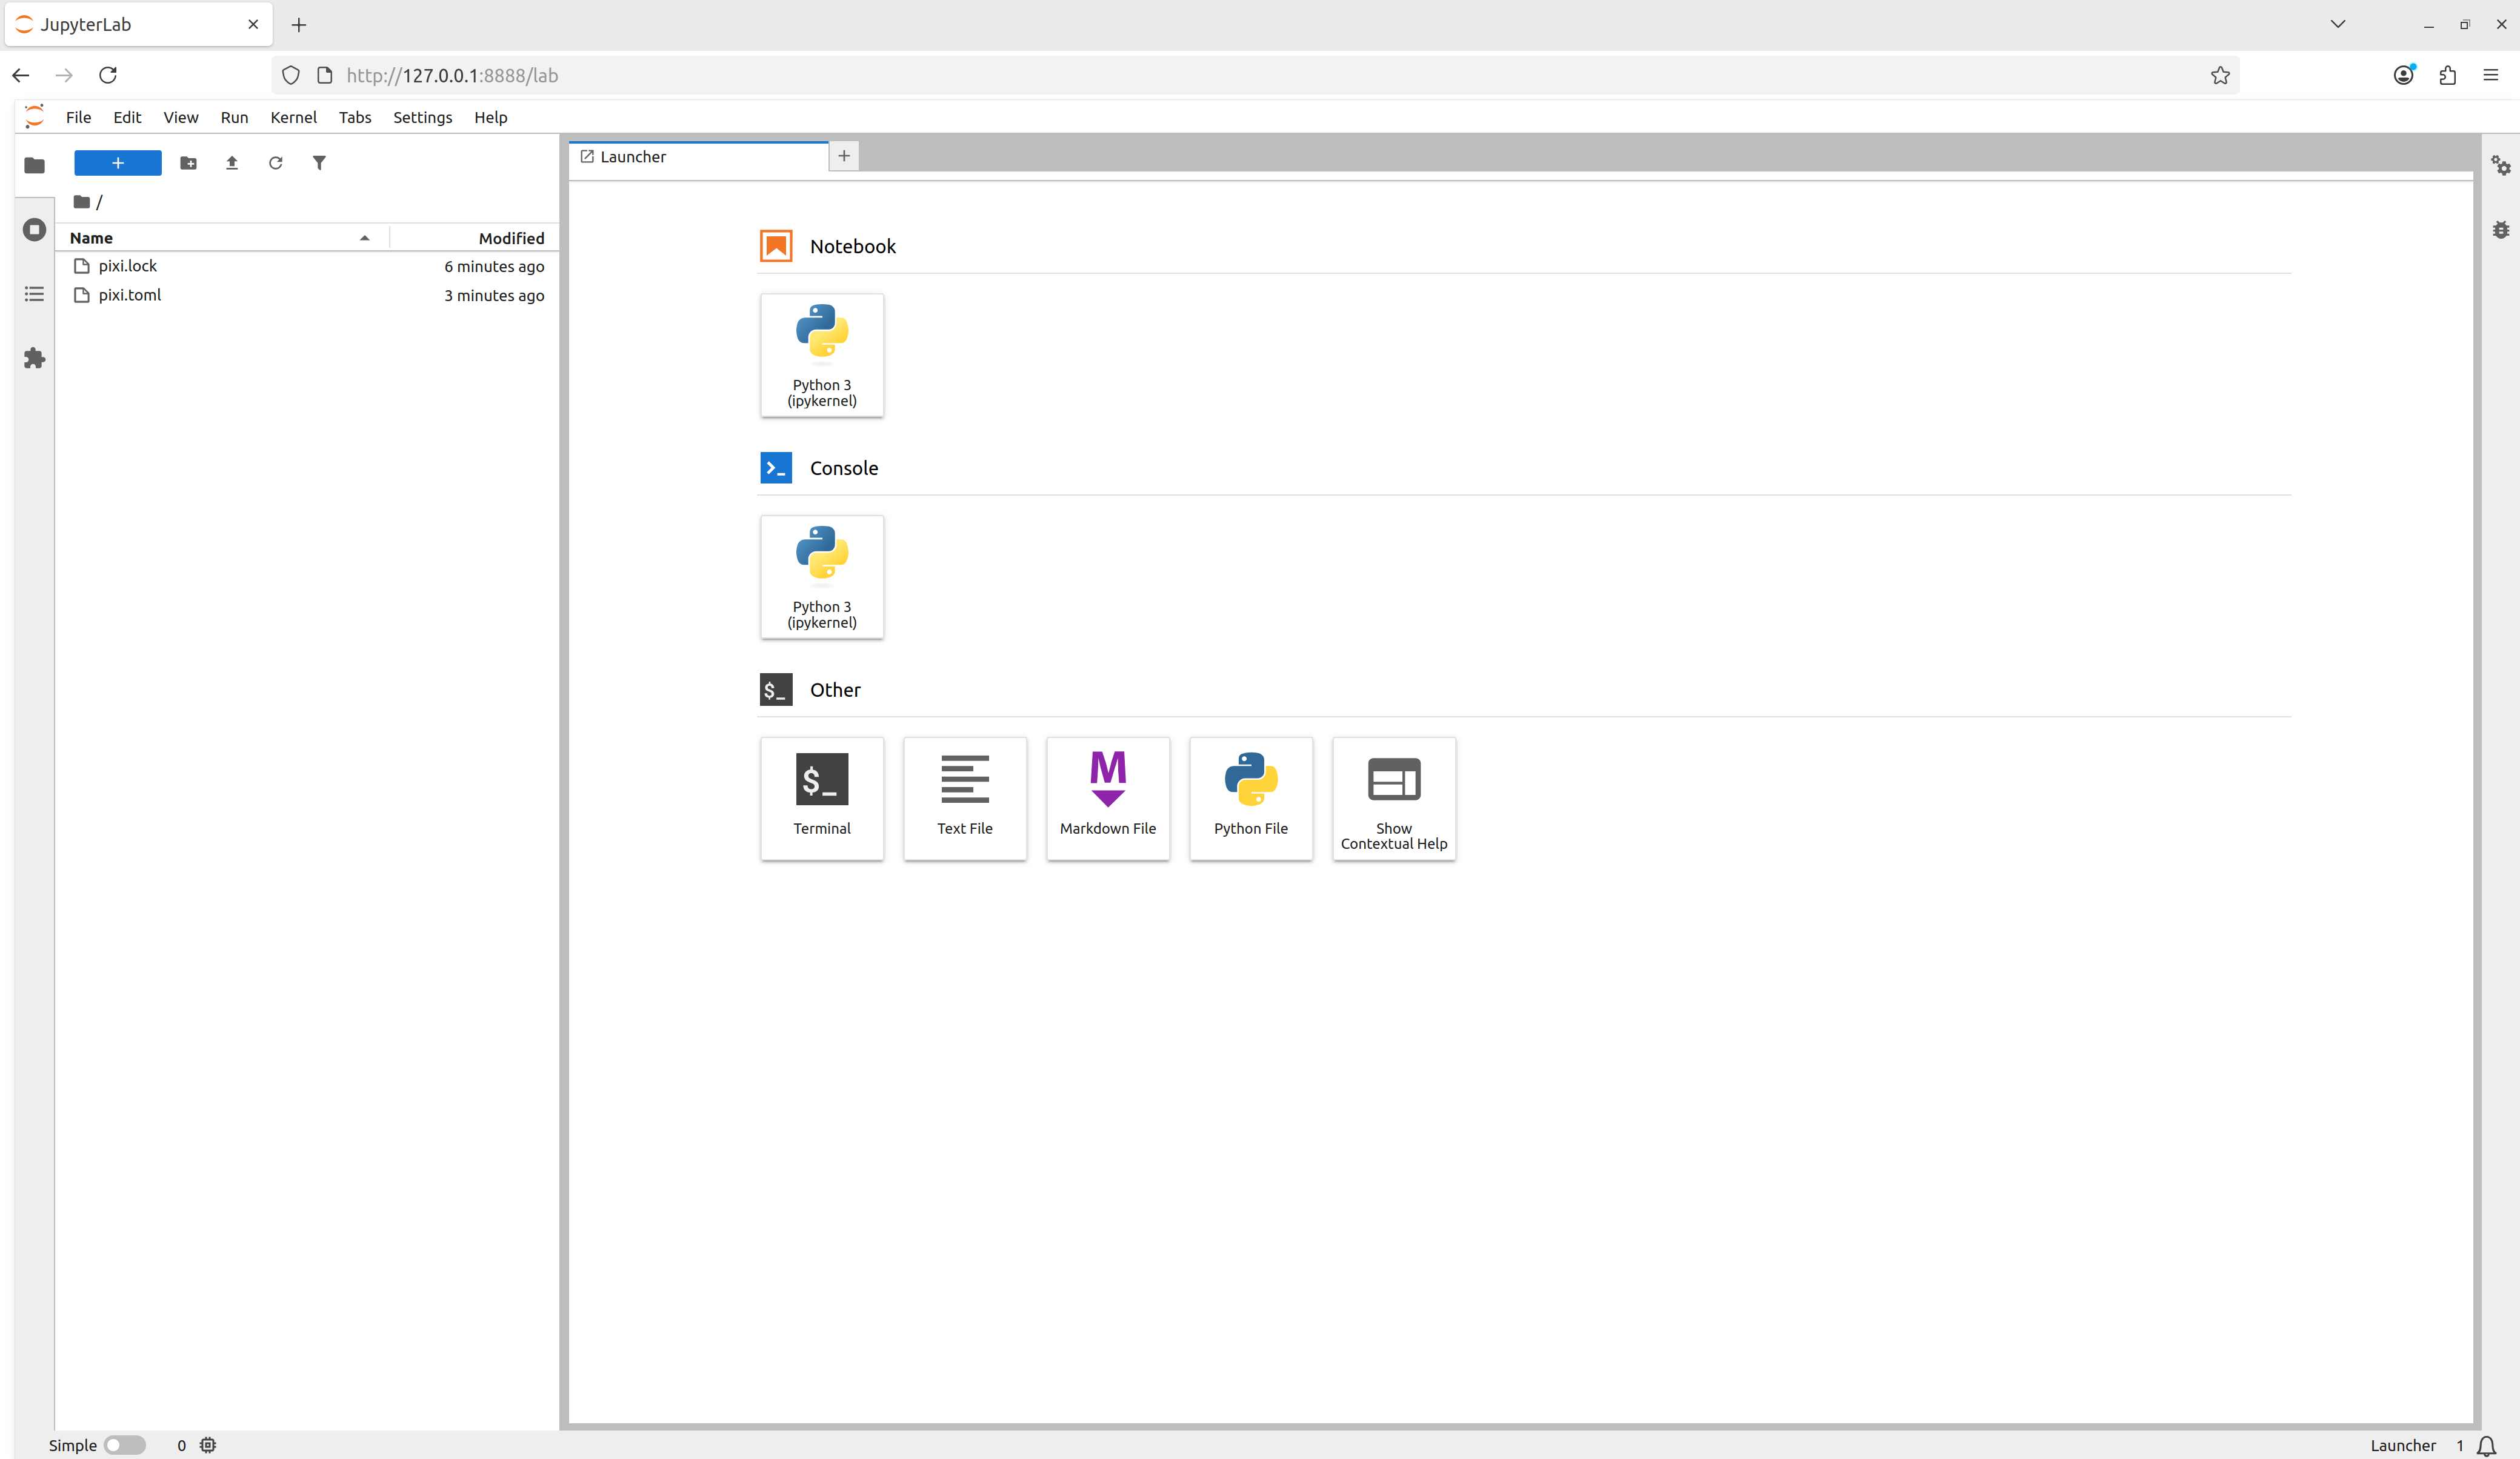
lab task defined, let’s use all of them together by
launching our task using pixi run
and we see that Jupyter Lab launches!
Adding the canonical Pixi start
task
For Pixi projects, it is canonical to have a start task
so that for any Pixi project a user can navigate to the top level
directory of a project and run
and begin to explore the project. Add a task called
start that depends-on
the lab task.
Task overview
Here we used pixi run
to execute tasks in the workspace’s environments without ever explicitly
activating the environment. This is a different behavior compared to
tools like conda or Python virtual environments, where the assumption is
that you have activated an environment before using it. With Pixi we can
do the equivalent with pixi shell,
which starts a subshell in the current working directory with the Pixi
environment activated.
Notice how your shell prompt now has (example) (the
workspace name) preceding it, signaling to you that you’re in the
activated environment. You can now directly run commands that use the
environment.
OUTPUT
Python 3.13.5 | packaged by conda-forge | (main, Jun 16 2025, 08:27:50) [GCC 13.3.0] on linux
Type "help", "copyright", "credits" or "license" for more information.
>>>
As we’re in a subshell, to exit the environment and move back to the
shell that launched the subshell, just exit the shell.
Multi platform projects
Extend your project to additionally support the
linux-64, osx-arm64, and win-64
platforms.
Using the pixi workspace
command, one can add the platforms with
OUTPUT
✔ Added linux-64
✔ Added osx-arm64
✔ Added win-64
This both adds the platforms to the workspace
platforms list and solves for the platforms and updates the
lock file!
One can also manually edit the pixi.toml with a text
editor to add the desired platforms to the platforms
list.
The resulting pixi.toml manifest is
TOML
[workspace]
channels = ["conda-forge"]
name = "example"
platforms = ["linux-64", "osx-arm64", "win-64"]
version = "0.1.0"

[tasks.lab]
description = "Launch JupyterLab"
cmd = "jupyter lab"

[tasks.start]
description = "Start exploring the Pixi project"
depends-on = ["lab"]

[dependencies]
python = ">=3.15.2,<3.16"
numpy = ">=2.5.4,<3"
notebook = ">=7.6.3,<8"
jupyterlab = ">=4.6.4,<5"Pixi features
“Features” in Pixi are TOML tables that define a part of an environment, but by themselves are not usable. Features can be composed together to create an environment — think of how individual LEGO bricks (features) can be connected together to build a larger structure (an environment). Features can also be used across multiple environments, which allows for building complex environment structures without having to redefine sections.
Pseudo-example: The following Pixi manifest structure defines three
“features” (A, B, and C) and then
constructs four different environments (A,
two, three, alternative) by
composing the features together.
So far the Pixi project has only had one environment defined in it.
We can make the project
multi-environment by first defining a new “feature”
which provides all the fields necessary to define part of an
environment to extend the default environment. We can
create a new feature named dev and then create
an environment also named dev which uses the
dev feature to extend the default environment
TOML
[workspace]
channels = ["conda-forge"]
name = "example"
platforms = ["linux-64", "osx-arm64", "win-64"]
version = "0.1.0"

[tasks.lab]
description = "Launch JupyterLab"
cmd = "jupyter lab"

[tasks.start]
description = "Start exploring the Pixi project"
depends-on = ["lab"]

[dependencies]
python = ">=3.15.2,<3.16"
numpy = ">=2.5.4,<3"
notebook = ">=7.6.3,<8"
jupyterlab = ">=4.6.4,<5"

[feature.dev.dependencies]

[environments]
dev = ["dev"]
We can now add pre-commit to the dev
feature’s dependencies and have it be accessible in the
dev environment.
OUTPUT
✔ Added pre-commit >=4.7.0,<5
Added these only for feature: dev
TOML
[workspace]
channels = ["conda-forge"]
name = "example"
platforms = ["linux-64", "osx-arm64", "win-64"]
version = "0.1.0"

[tasks.lab]
description = "Launch JupyterLab"
cmd = "jupyter lab"

[tasks.start]
description = "Start exploring the Pixi project"
depends-on = ["lab"]

[dependencies]
python = ">=3.15.2,<3.16"
numpy = ">=2.5.4,<3"
notebook = ">=7.6.3,<8"
jupyterlab = ">=4.6.4,<5"

[feature.dev.dependencies]
pre-commit = ">=4.7.0,<5"

[environments]
dev = ["dev"]
This now allows us to specify the environment we want tasks to run in
with the --environment flag
Global Tools
With the pixi global
command, users can manage globally installed tools in a way that
makes them available from any directory on their machine.
As an example, we can install the bat program — a
cat clone with syntax highlighting and Git integration — as
a global utility from conda-forge using pixi global.
OUTPUT
└── bat: 0.25.0 (installed)
    └─ exposes: bat
Pixi has now installed bat for us in a custom
environment under ~/.pixi/envs/bat/ and then exposed the
bat command globally by placing bat on our
shell’s PATH at ~/.pixi/bin/bat. This now
means that for any new terminal shell we open, bat will be
available to use.
Using pixi global has also created a
~/.pixi/manifests/pixi-global.toml file that tracks all of
the software that is globally installed by Pixi
TOML
version = 1

[envs.bat]
channels = ["conda-forge"]
dependencies = { bat = "*" }
exposed = { bat = "bat" }
As new software is added to the system with pixi global
this global manifest is updated. If the global manifest is updated
manually, the next time pixi global update is run, the
environments defined in the global manifest will be installed on the
system. This means that by sharing a Pixi global manifest, a new machine
can be provisioned with an entire suite of command line tools in
seconds.
Version controlling our examples
As part of this lesson, we are building up a Git repository of the examples that we move through. On a new branch in your repository, add and commit the files from this episode.
Then push your branch to your remote on GitHub
and make a pull request to merge your changes into your remote’s default branch.
We’ll follow this pattern for every episode: * Create a new feature branch * Add and commit work to a pull request as we go * Merge the pull request at the end
- Pixi uses a project based workflow and a declarative project manifest file to define project operations.
- Pixi automatically creates or updates a hash level lock file anytime the project manifest or dependencies are mutated.
- Pixi allows for multi-platform and multi-environment projects to be defined in a single project manifest and be fully described in a single lock file.