All in One View
Content from Reproducible Research
Last updated on 2025-12-05 | Edit this page
Estimated time: 18 minutes
Overview
Questions
- What does it mean to be “reproducible”?
- How is “reproducibility” different than “reuse”?
Objectives
- Describe the terms “reproducibility” and “reuse” as they relate to research computing.
- Describe what is needed for a computational environment to be reproducible.
Introduction
Modern scientific analyses are complex software and logistical workflows that may span multiple software environments and require heterogenous software and computing infrastructure. Scientific researchers need to use these tools to be able to do their research, and to ensure the validity of their work, which can be difficult. Scientific software enables all of this work to happen, but software isn’t a static resource — software is continually developed, revised, and released, which can introduce breaking changes or subtle computational differences in outputs and results. Having the software you’re using change without you intending it from day-to-day, run-to-run, or on different machines is problematic when trying to do high quality research. These changes can cause software bugs, errors in scientific results, and make findings unreproducible. All of these things are not desirable!
When discussing “software” in this lesson we will primarily be meaning open source software that is openly developed. However, there are situations in which software might (for good reason) be:
- Closed development with open source release artifacts
- Closed development and closed source with public binary distributions
- Closed development and closed source with proprietary licenses
Challenges to reproducible research?
Take 3 minutes to discuss the following questions in small groups.
What are other challenges to doing reproducible research?
Think about all aspects of research computing — data, hardware, and software — from collecting and cleaning the data through analysis and visualization to publishing your methods and results?
Have you even inherited a project from a previous contributor? Or gone back to a previous project more than couple months later and struggled to get back into it? What issues did you come across?
There are many! Here are some you might have thought of:
- (Not having) Access to data
- Required software packages be removed from mutable package indexes
- Unreproducible builds of software that isn’t packaged and distributed on public package indexes
- Analysis code not being under version control
- Not having any environment definition configuration files
Computational reproducibility
“Reproducible” research can mean many things and is a multipronged problem. This lesson will focus primarily on computational reproducibility. Like all forms of reproducibility, there are multiple “levels” of reproducibility. For this lesson we will focus on “full” reproducibility, meaning that reproducible software environments will:
- Be defined through user readable and writable configuration files.
- Have machine produced “lock files” with a full definition of all software in the environment.
- Specify the target computer platforms (operating system and architecture) for all environments solved.
- Have the resolution of a platform’s environments be machine agnostic (e.g. macOS platform machines can solve environments for Linux platforms).
- Have the software packages defined in the environments be published on immutable public package indexes.
Hardware accelerated environments
Challenges with reproducible hardware accelerated environments
What are possible challenges of reproducible hardware accelerated environments? If you have used GPUs for a machine learning application, what challenges have you run into with running your code?
Here are some you might have thought of:
- Installing hardware acceleration drivers and libraries on the machine with the GPU
- Knowing what drivers are supported for the available GPUs
- Providing instructions to install the same drivers and libraries on multiple computing platforms
- Having the “deployment” machine’s resources and environment where the analysis is done match the “development” machine’s environment
Software that involves hardware acceleration on computing resources like GPUs requires additional information to be provided for full computational reproducibility. In addition to the computer platform, information about the hardware acceleration device, its supported drivers, and compatible hardware accelerated versions of the software in the environment (GPU enabled builds) are required. Traditionally this has been very difficult to do, but multiple recent technological advancements (made possible by social agreements and collaborations) in the scientific open source world now provide solutions to these problems.
What is computational reproducibility?
Do you think “computational reproducibility” means that the exact same numeric results should be achieved every time? Discuss with your table.
Not necessarily. Even though the computational software environment is identical there are things that can change between runs of software that could slightly change numerical results (e.g. random number generation seeds, file read order, machine entropy). This isn’t necessarily a problem, and in general one should be more concerned with getting answers that make sense within application uncertainties than matching down to machine precision.
Did your the individuals in your group agree?
Computational reproducibility vs. scientific reuse
Aiming for computational reproducibility is the first step to making scientific research more beneficial to us. For the purposes of a single analysis this should be the primary goal. However, just because a software environment is fully reproducible does not mean that the research is automatically reusable. Imagine an analysis that has been fully documented but with use assumptions (e.g. the data used, configuration options) hard-coded into the software. The analysis can be reproduced, but needs to be refactored for different analysis choices.
Reuse allows for the tools and components of the scientific workflow to be composable tools that can interoperate together to create a workflow. The steps of the workflow might exist in radically different computational environments and require different software, or different versions of the same software tools. Given these demands, reproducible computational software environments are a first step towards fully reusable scientific workflows.
This lesson will focus on computational reproducibility of hardware accelerated scientific workflows (e.g. machine learning). Scientifically reusable analysis workflows are a more extensive topic, but this lesson will link to references on the topic.
The challenges of creating reproducible and reusable workflows
What personal challenges have you encountered to making your own research practices reproducible and reusable?
- Technical expertise in reproducibility technologies
- Time to learn new tools
- Balancing reproducibility concerns with using tools the entire research team can understand
In addition to the computational issues that arise while creating reproducible and reusable workflows, it takes time and effort to design analyses with these in mind. This lesson aims to teach you tools that will make creating reproducible and reusable workflows easier.
- Modern scientific research is complex and requires software environments.
- Computational reproducibility helps to enable reproducible science.
- Reproducible computational software environments that use hardware acceleration require additional information.
- New technologies make all of these processes easier.
- Reproducible computational software environments are a first step toward fully reusable scientific workflows.
Content from Introduction to Pixi
Last updated on 2025-12-05 | Edit this page
Estimated time: 45 minutes
Overview
Questions
- What is Pixi?
- How does Pixi enable fully reproducible software environments?
- What are Pixi’s semantics?
Objectives
- Outline Pixi’s workflow design
- Summarize the relationship between a Pixi manifest and a lock file
- Create a multi-platform and multi-environment Pixi workspace
Pixi
As described in the previous section on computational reproducibility, to have reproducible software environments we need tools that can take high level human writeable environment configuration files and produce machine-readable, digest-level lock files that exactly specify every piece of software that exists in an environment.
Pixi is a cross-platform package and environment manager that can handle complex development workflows. Importantly, Pixi automatically and non-optionally will produce or update a lock file for the software environments defined by the user whenever any actions mutate the environment. Pixi is written in Rust, and leverages the language’s speed and technologies to solve environments fast.
Pixi addresses the concept of computational reproducibility by focusing on a set of main features:
- Virtual environment management: Pixi can create environments that contain conda packages and Python packages and use or switch between environments easily.
-
Package management: Pixi enables the user to
install, update, and remove packages from these environments through the
pixicommand line. - Task management: Pixi has a task runner system built-in, which allows for tasks with custom logic and dependencies on other tasks to be created.
It also combines these features with robust behaviors:
- Automatic lock files: Any changes to a Pixi workspace that can mutate the environments defined in it will automatically and non-optionally result in the Pixi lock file for the workspace being updated. This ensures that any and every state of a Pixi project is trivially computationally reproducible.
- Solving environments for other platforms: Pixi allows the user to solve environment for platforms other than the current user machine’s. This allows for users to solve and share environment to any collaborator with confidence that all environments will work with no additional setup.
- Pairity of conda and Python packages: Pixi allows for conda packages and Python packages to be used together seamlessly, and is unique in its ability to handle overlap in dependencies between them. Pixi will first solve all conda package requirements for the target environment, lock the environment, and then solve all the dependencies of the Python packages for the environment, determine if there are any overlaps with the existing conda environment, and the only install the missing Python dependencies. This ensures allows for fully reproducible solves and for the two package ecosystems to compliment each other rather than potentially cause conflicts.
- Efficient caching: Pixi uses an extremely efficient global caching scheme. This means that the first time a package is installed on a machine with Pixi is the slowest is will ever be to install it for any future project on the machine while the cache is still active.
Project-based workflows
Pixi uses a “project-based” workflow which scopes a workspace and the installed tooling for a project to the project’s directory tree.
Pros
- Environments in the workspace are isolated to the project and can not cause conflicts with any tools or projects outside of the project.
- A high level declarative syntax allows for users to state only what they need, making even complex environments easy to understand and share.
- Environments can be treated as transient and be fully deleted and then rebuilt within seconds without worry about breaking other projects. This allows for much greater freedom of exploration and development without fear.
Cons
- As each project has its own version of its packages installed, and does not share a copy with other projects, the total amount of disk space on a machine can be larger than other forms of development workflows. This can be mitigated for disk limited machines by cleaning environments not in use while keeping their lock files and cleaning the system cache periodically.
- Each project needs to be set up by itself and does not reuse components of previous projects.
Pixi project files and the CLI API basics
Every Pixi project begins with creating a manifest file. A manifest file is a declarative configuration file that list what the high level requirements of a project are. Pixi then takes those requirements and constraints and solves for the full dependency tree.
Let’s create our first Pixi project. First, to have a uniform
directory tree experience, clone the pixi-cuda-lesson
GitHub repository (which you made as part of the setup) under your home
directory on your machine and navigate to it.
Then use pixi init to create a new project directory and
initialize a Pixi manifest with your machine’s configuration.
OUTPUT
Created /home/<username>/pixi-cuda-lesson/example/pixi.tomlNavigate to the example directory and check the
directory structure
We see that Pixi has setup Git configuration files for the project as
well as a Pixi manifest pixi.toml file. Checking the
default manifest file, we see three TOML tables: workspace,
tasks, and dependencies.
TOML
[workspace]
authors = ["Your Name <your email from your global Git config>"]
channels = ["conda-forge"]
name = "example"
# This will be whatever your machine's platform is
platforms = ["linux-64"]
version = "0.1.0"

[tasks]

[dependencies]-
workspace: Defines metadata and properties for the entire project. -
tasks: Defines tasks for the task runner system to execute from the command line and their dependencies. -
dependencies: Defines the conda package dependencies from thechannelsin yourworkspacetable.
For the rest of the lesson we’ll ignore the authors list
in our discussions as it is optional and will be specific to you.
At the moment there are no dependencies defined in the manifest, so
let’s add Python using the pixi add
CLI API.
OUTPUT
✔ Added python >=3.13.5,<3.14What happened? We saw that python got added, and we can
see that the pixi.toml manifest now contains
python as a dependency
TOML
[workspace]
channels = ["conda-forge"]
name = "example"
# This will be whatever your machine's platform is
platforms = ["linux-64"]
version = "0.1.0"

[tasks]

[dependencies]
python = ">=3.13.5,<3.14"
Further, we also now see that a pixi.lock lock file has
been created in the project directory as well as a .pixi/
directory.
The .pixi/ directory contains the installed
environments. We can see that at the moment there is just one
environment named default
Inside the .pixi/envs/default/ directory are all the
libraries, header files, and executables that are needed by the
environment.
The pixi.lock lock file is a YAML file that contains two
definition groups: environments and packages.
The environments group lists every environment in the
workspace for every platform with a complete listing of all packages in
the environment. The packages group lists a full definition
of every package that appears in the environments lists,
including the package’s URL on the conda package index and digests
(e.g. sha256, md5).
Here’s an example of what the environments and
packages groups look like in the pixi.toml
file we created for a linux-64 platform machine.
version: 6
environments:
  default:
    channels:
    - url: https://conda.anaconda.org/conda-forge/
    packages:
      linux-64:

...

      - conda: https://conda.anaconda.org/conda-forge/linux-64/python-3.13.5-hec9711d_102_cp313.conda
      - conda: https://conda.anaconda.org/conda-forge/noarch/python_abi-3.13-8_cp313.conda
      - conda: https://conda.anaconda.org/conda-forge/linux-64/readline-8.2-h8c095d6_2.conda
      - conda: https://conda.anaconda.org/conda-forge/linux-64/tk-8.6.13-noxft_hd72426e_102.conda
      - conda: https://conda.anaconda.org/conda-forge/noarch/tzdata-2025b-h78e105d_0.conda
...

packages:

...

- conda: https://conda.anaconda.org/conda-forge/linux-64/python-3.13.5-hec9711d_102_cp313.conda
  build_number: 102
  sha256: c2cdcc98ea3cbf78240624e4077e164dc9d5588eefb044b4097c3df54d24d504
  md5: 89e07d92cf50743886f41638d58c4328
  depends:
  - __glibc >=2.17,<3.0.a0
  - bzip2 >=1.0.8,<2.0a0
  - ld_impl_linux-64 >=2.36.1
  - libexpat >=2.7.0,<3.0a0
  - libffi >=3.4.6,<3.5.0a0
  - libgcc >=13
  - liblzma >=5.8.1,<6.0a0
  - libmpdec >=4.0.0,<5.0a0
  - libsqlite >=3.50.1,<4.0a0
  - libuuid >=2.38.1,<3.0a0
  - libzlib >=1.3.1,<2.0a0
  - ncurses >=6.5,<7.0a0
  - openssl >=3.5.0,<4.0a0
  - python_abi 3.13.* *_cp313
  - readline >=8.2,<9.0a0
  - tk >=8.6.13,<8.7.0a0
  - tzdata
  license: Python-2.0
  size: 33273132
  timestamp: 1750064035176
  python_site_packages_path: lib/python3.13/site-packages

...
These groups provide a full description of every package described in the Pixi workspace and its dependencies and constraints on other packages. This means that for each package specified, that version, and only that version, will be downloaded and installed in the future.
We can even test that now by deleting the installed environment fully
with pixi clean
and then getting it back (bit for bit) in a few seconds with pixi install.
OUTPUT
removed /home/<username>/pixi-cuda-lesson/example/.pixi/envsOUTPUT
✔ The default environment has been installed.We can also see all the packages that were installed and are now
available for us to use with pixi list
Extending the manifest
Let’s extend this manifest to add the Python library
numpy and the Jupyter tools notebook and
jupyterlab as dependencies and add a task called
lab that will launch Jupyter Lab in the current working
directory.
Hint: Look at the Pixi manifest table structure to think how a
task might be added. It is fine to read the docs too!
Let’s start at the command line and add the additional dependencies
with pixi add
We can manually edit the pixi.toml with a text editor to
add a task named lab that when called executes
jupyter lab. This is sometimes the easiest thing to do, but
we can also use the pixi CLI.
OUTPUT
✔ Added task `lab`: jupyter lab, description = "Launch JupyterLab"The resulting pixi.toml manifest is
With our new dependencies added to the project manifest and our
lab task defined, let’s use all of them together by
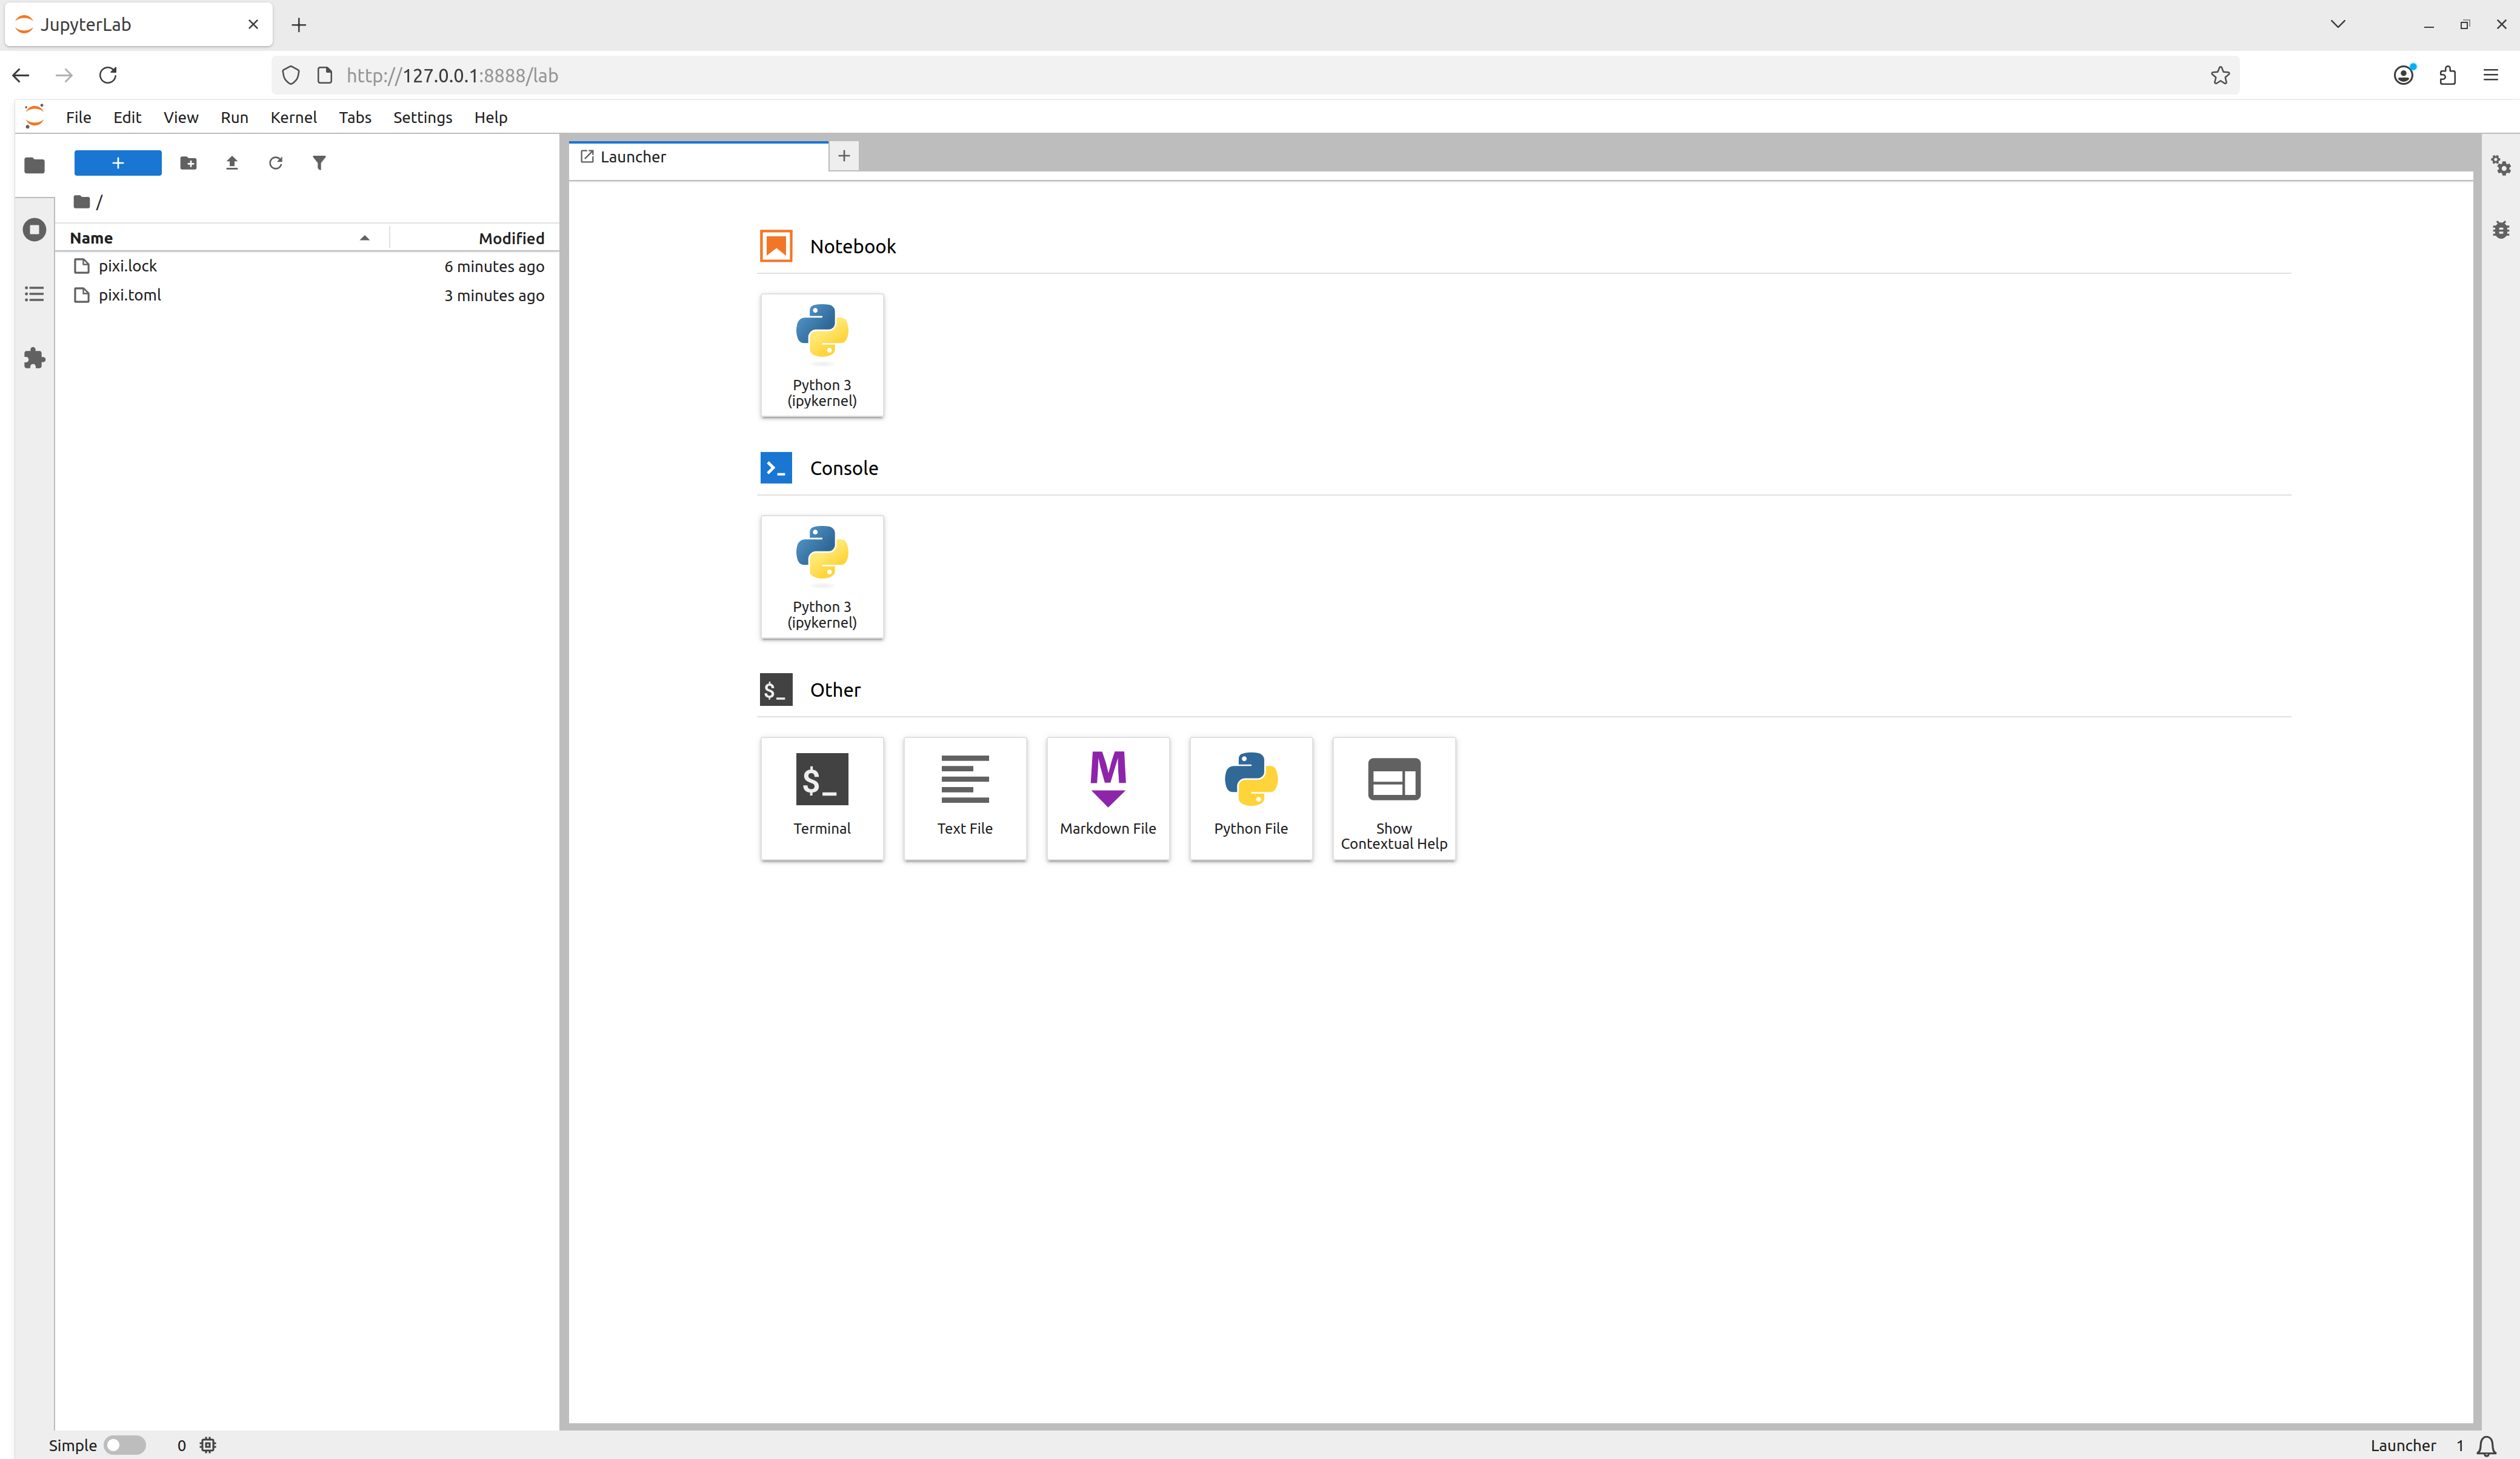
launching our task using pixi run
and we see that Jupyter Lab launches!
Adding the canonical Pixi start
task
For Pixi projects, it is canonical to have a start task
so that for any Pixi project a user can navigate to the top level
directory of a project run
and begin to explore the project. Add a task called
start that depends-on
the lab task.
Task overview
Here we used pixi run
to execute tasks in the workspace’s environments without ever explicitly
activating the environment. This is a different behavior compared to
tools like conda of Python virtual environments, where the assumption is
that you have activated an environment before using it. With Pixi we can
do the equivalent with pixi shell,
which starts a subshell in the current working directory with the Pixi
environment activated.
Notice how your shell prompt now has (example) (the
workspace name) preceding it, signaling to you that you’re in the
activated environment. You can now directly run commands that use the
environment.
OUTPUT
Python 3.13.5 | packaged by conda-forge | (main, Jun 16 2025, 08:27:50) [GCC 13.3.0] on linux
Type "help", "copyright", "credits" or "license" for more information.
>>>
As we’re in a subshell, to exit the environment and move back to the
shell that launched the subshell, just exit the shell.
Multi platform projects
Extend your project to additionally support the
linux-64, osx-arm64, and win-64
platforms.
Using the pixi workspace
CLI API, one can add the platforms with
OUTPUT
✔ Added linux-64
✔ Added osx-arm64
✔ Added win-64
This both adds the platforms to the workspace
platforms list and solves for the platforms and updates the
lock file!
One can also manually edit the pixi.toml with a text
editor to add the desired platforms to the platforms
list.
The resulting pixi.toml manifest is
TOML
[workspace]
channels = ["conda-forge"]
name = "example"
platforms = ["linux-64", "osx-arm64", "win-64"]
version = "0.1.0"

[tasks.lab]
description = "Launch JupyterLab"
cmd = "jupyter lab"

[tasks.start]
description = "Start exploring the Pixi project"
depends-on = ["lab"]

[dependencies]
python = ">=3.13.5,<3.14"
numpy = ">=2.3.2,<3"
notebook = ">=7.4.5,<8"
jupyterlab = ">=4.4.5,<5"Pixi features
“Features” in Pixi are TOML tables that define a part of an environment, but by itself is not useable. Features can be composed together to create an environment — think of how individual LEGO bricks (features) can be connected together to build a larger structure (an environment). Features can also be used across multiple environments, which allows for building complex environment structures without having to redefine sections.
Pseudo-example: The following Pixi manifest structure defines three
“features” (A, B, and C) and then
constructs four different environments (A,
two, three, alternative) by
composing the features together.
So far the Pixi project has only had one environment defined in it.
We can make the project
multi-environment by first defining a new “feature”
which provides all the fields necessary to define part of an
environment to extend the default environment. We can
create a new feature named dev and then create
an environment also named dev which uses the
dev feature to extend the default environment
TOML
[workspace]
channels = ["conda-forge"]
name = "example"
platforms = ["linux-64", "osx-arm64", "win-64"]
version = "0.1.0"

[tasks.lab]
description = "Launch JupyterLab"
cmd = "jupyter lab"

[tasks.start]
description = "Start exploring the Pixi project"
depends-on = ["lab"]

[dependencies]
python = ">=3.13.5,<3.14"
numpy = ">=2.3.0,<3"
notebook = ">=7.4.3,<8"
jupyterlab = ">=4.4.3,<5"

[feature.dev.dependencies]

[environments]
dev = ["dev"]
We can now add pre-commit to the dev
feature’s dependencies and have it be accessible in the
dev environment.
OUTPUT
✔ Added pre-commit >=4.2.0,<5
Added these only for feature: dev
TOML
[workspace]
channels = ["conda-forge"]
name = "example"
platforms = ["linux-64", "osx-arm64", "win-64"]
version = "0.1.0"

[tasks.lab]
description = "Launch JupyterLab"
cmd = "jupyter lab"

[tasks.start]
description = "Start exploring the Pixi project"
depends-on = ["lab"]

[dependencies]
python = ">=3.13.5,<3.14"
numpy = ">=2.3.2,<3"
notebook = ">=7.4.5,<8"
jupyterlab = ">=4.4.5,<5"

[feature.dev.dependencies]
pre-commit = ">=4.3.0,<5"

[environments]
dev = ["dev"]
This now allows us to specify the environment we want tasks to run in
with the --environment flag
Global Tools
With the pixi global
CLI API, users can manage globally installed tools in a way that
makes them available from any directory on their machine.
As an example, we can install the bat program — a
cat clone with syntax highlighting and Git integration — as
a global utility from conda-forge using pixi global.
OUTPUT
└── bat: 0.25.0 (installed)
    └─ exposes: bat
Pixi has now installed bat for us in a custom
environment under ~/.pixi/envs/bat/ and then exposed the
bat command globally by placing bat on our
shell’s PATH at ~/.pixi/bin/bat. This now
means that for any new terminal shell we open, bat will be
available to use.
Using pixi global has also created a
~/.pixi/manifests/pixi-global.toml file that tracks all of
the software that is globally installed by Pixi
TOML
version = 1

[envs.bat]
channels = ["conda-forge"]
dependencies = { bat = "*" }
exposed = { bat = "bat" }
As new software is added to the system with pixi global
this global manifest is updated. If the global manifest is updated
manually, the next time pixi global update is run, the
environments defined in the global manifest will be installed on the
system. This means that by sharing a Pixi global manifest, a new machine
can be provisioned with an entire suite of command line tools in
seconds.
Version controlling our examples
As part of this lesson, we are building up a Git repository of the examples that we move through. On a new branch in your repository, add and commit the files from the this episode.
Then push your branch to your remote on GitHub
and make a pull request to merge your changes into your remote’s default branch.
We’ll follow this pattern for every episode: * Create a new feature branch * Add and commit work to a pull request as we go * Merge the pull request at the end
- Pixi uses a project based workflow and a declarative project manifest file to define project operations.
- Pixi automatically creates or updates a hash level lock file anytime the project manifest or dependencies are mutated.
- Pixi allows for multi-platform and multi-environment projects to be defined in a single project manifest and be fully described in a single lock file.
Content from Backwards compatibility with conda
Last updated on 2025-12-05 | Edit this page
Estimated time: 15 minutes
Overview
Questions
- Can Pixi environments be backported to conda formats?
Objectives
- Learn how to export Pixi workspace environments as conda environment definition files
- Learn how to export Pixi workspace environments as conda explicit spec files
Backporting to conda environments
While Pixi is currently unique in its abilities, there may be
situations in which given technical debt, migration effort in large
collaborations, or collaborator preferences that switching all
infrastructure to use Pixi might not yet be feasible. It would still be
useful to take advantage of Pixi’s technology and features as an
individual but be able to export Pixi workspace environments and lock
files to the “legacy system” of conda. 1 Luckily, we can do
this with the pixi workspace export
commands.
Exporting workspace environments to conda environment definition files
If you want to export a Pixi workspace environment’s high level
dependencies to a conda environment definition file
(environment.yaml) you can use the pixi workspace export conda-environment
subcommand
BASH
pixi workspace export conda-environment --environment <environment> --platform <platform> environment.yamlwhere if no environment or platform options
are given the default environment and the system’s platform will be
used.
Export one of your Pixi workspace environments to a conda environment
Exporting workspace environments to conda explicit spec files
We’d like to ideally go further than the high level conda environment
definition file and aim for computational reproducibility with a conda
explicit spec file. Conda explicit spec files are a form of platform
specific lock files that consist of a text file with an
@EXPLICIT header followed by a list of conda package URLs,
optionally followed by their MD5 or SHA256 digest (aka, “hash”).
Example:
TXT
@EXPLICIT
https://conda.anaconda.org/conda-forge/noarch/python_abi-3.13-7_cp313.conda#e84b44e6300f1703cb25d29120c5b1d8
Explicit spec files can be created from locked Pixi workspace
environments with the pixi workspace export conda-explicit-spec
subcommand
where if no environment or platform options
are given the default environment and the system’s platform will be
used. The explicit spec file will be automatically named with the form
<environment>_<platform>_conda_spec.txt. So if
you are on a linux-64 machine and didn’t specify an
environment name, your generated explicit spec file will be named
default_linux-64_conda_spec.txt.
Conda spec files only support conda packages and do not support Python packages or source packages.
Export one of your Pixi workspace environment lock files as a conda explicit spec file
Hint: Check the --help output.
OUTPUT
# Generated by `pixi workspace export`
# platform: linux-64
@EXPLICIT
https://conda.anaconda.org/conda-forge/linux-64/libgomp-15.1.0-h767d61c_4.conda#3baf8976c96134738bba224e9ef6b1e5
https://conda.anaconda.org/conda-forge/linux-64/_libgcc_mutex-0.1-conda_forge.tar.bz2#d7c89558ba9fa0495403155b64376d81
https://conda.anaconda.org/conda-forge/linux-64/_openmp_mutex-4.5-2_gnu.tar.bz2#73aaf86a425cc6e73fcf236a5a46396d
https://conda.anaconda.org/conda-forge/linux-64/libgcc-15.1.0-h767d61c_4.conda#f406dcbb2e7bef90d793e50e79a2882b
https://conda.anaconda.org/conda-forge/linux-64/xorg-libxdmcp-1.1.5-hb9d3cd8_0.conda#8035c64cb77ed555e3f150b7b3972480
https://conda.anaconda.org/conda-forge/linux-64/xorg-libxau-1.0.12-hb9d3cd8_0.conda#f6ebe2cb3f82ba6c057dde5d9debe4f7
https://conda.anaconda.org/conda-forge/linux-64/pthread-stubs-0.4-hb9d3cd8_1002.conda#b3c17d95b5a10c6e64a21fa17573e70e
https://conda.anaconda.org/conda-forge/linux-64/libxcb-1.17.0-h8a09558_0.conda#92ed62436b625154323d40d5f2f11dd7
https://conda.anaconda.org/conda-forge/linux-64/xorg-libx11-1.8.12-h4f16b4b_0.conda#db038ce880f100acc74dba10302b5630
https://conda.anaconda.org/conda-forge/linux-64/xorg-libice-1.1.2-hb9d3cd8_0.conda#fb901ff28063514abb6046c9ec2c4a45
https://conda.anaconda.org/conda-forge/linux-64/libgcc-ng-15.1.0-h69a702a_4.conda#28771437ffcd9f3417c66012dc49a3be
https://conda.anaconda.org/conda-forge/linux-64/libuuid-2.38.1-h0b41bf4_0.conda#40b61aab5c7ba9ff276c41cfffe6b80b
https://conda.anaconda.org/conda-forge/linux-64/xorg-libsm-1.2.6-he73a12e_0.conda#1c74ff8c35dcadf952a16f752ca5aa49
https://conda.anaconda.org/conda-forge/linux-64/xorg-libxt-1.3.1-hb9d3cd8_0.conda#279b0de5f6ba95457190a1c459a64e31
https://conda.anaconda.org/conda-forge/noarch/tzdata-2025b-h78e105d_0.conda#4222072737ccff51314b5ece9c7d6f5a
https://conda.anaconda.org/conda-forge/linux-64/libzlib-1.3.1-hb9d3cd8_2.conda#edb0dca6bc32e4f4789199455a1dbeb8
https://conda.anaconda.org/conda-forge/linux-64/tk-8.6.13-noxft_hd72426e_102.conda#a0116df4f4ed05c303811a837d5b39d8OUTPUT
# Generated by `pixi workspace export`
# platform: osx-arm64
@EXPLICIT
https://conda.anaconda.org/conda-forge/noarch/tzdata-2025b-h78e105d_0.conda#4222072737ccff51314b5ece9c7d6f5a
https://conda.anaconda.org/conda-forge/osx-arm64/libzlib-1.3.1-h8359307_2.conda#369964e85dc26bfe78f41399b366c435
https://conda.anaconda.org/conda-forge/osx-arm64/tk-8.6.13-h892fb3f_2.conda#7362396c170252e7b7b0c8fb37fe9c78
https://conda.anaconda.org/conda-forge/osx-arm64/tktable-2.10-h3c7de25_7.conda#7c2e2e25a80f1538b0dcee34026bec42
https://conda.anaconda.org/conda-forge/osx-arm64/ncurses-6.5-h5e97a16_3.conda#068d497125e4bf8a66bf707254fff5ae
https://conda.anaconda.org/conda-forge/osx-arm64/readline-8.2-h1d1bf99_2.conda#63ef3f6e6d6d5c589e64f11263dc5676
https://conda.anaconda.org/conda-forge/osx-arm64/bzip2-1.0.8-h99b78c6_7.conda#fc6948412dbbbe9a4c9ddbbcfe0a79ab
https://conda.anaconda.org/conda-forge/osx-arm64/pcre2-10.45-ha881caa_0.conda#a52385b93558d8e6bbaeec5d61a21cd7
https://conda.anaconda.org/conda-forge/osx-arm64/libpng-1.6.50-h280e0eb_1.conda#4d0f5ce02033286551a32208a5519884
https://conda.anaconda.org/conda-forge/osx-arm64/libiconv-1.18-hfe07756_1.conda#450e6bdc0c7d986acf7b8443dce87111
https://conda.anaconda.org/conda-forge/osx-arm64/libintl-0.25.1-h493aca8_0.conda#5103f6a6b210a3912faf8d7db516918c
https://conda.anaconda.org/conda-forge/osx-arm64/libffi-3.4.6-h1da3d7d_1.conda#c215a60c2935b517dcda8cad4705734d
https://conda.anaconda.org/conda-forge/osx-arm64/libglib-2.84.3-h587fa63_0.conda#bb98995c244b6038892fd59a694a93ed
https://conda.anaconda.org/conda-forge/osx-arm64/libfreetype6-2.13.3-h1d14073_1.conda#b163d446c55872ef60530231879908b9
https://conda.anaconda.org/conda-forge/osx-arm64/libfreetype-2.13.3-hce30654_1.conda#d06282e08e55b752627a707d58779b8f
https://conda.anaconda.org/conda-forge/osx-arm64/libexpat-2.7.1-hec049ff_0.conda#b1ca5f21335782f71a8bd69bdc093f67
https://conda.anaconda.org/conda-forge/osx-arm64/libcxx-20.1.8-hf598326_1.conda#a69ef3239d3268ef8602c7a7823fd982While conda spec files meet our criteria for computational reproducibility, they are essentially package list snapshots and lack the metadata to provide robust dependency graph inspection and targeted updates. They can be a useful tool, but are not robust lock file formats like those from Pixi and conda-lock.
Creating conda environments from the exports
To create a conda environment from the exported
environment.yaml conda environment definition file, you use
the normal conda environment creation command
but to create a conda environment from the exported conda explicit spec file, use the command
or to install the packages given in the explicit spec file into an existing conda environment, use
So by using Pixi, you can fully export your workspace environments to conda environments and then use them, even to get the exact hash level locked environment from your Pixi workspace installed on another machine!
Conda does not check that the platform is correct for the machine or the dependencies given when installing from an explicit spec file. Only use spec files when you are certain that you have the same platform machine as the machine that created the spec file.
- If you need to use conda, you can export Pixi workspace environment to formats conda can use.
- Exporting conda explicit spec files from Pixi locked environments provides the ability to create the same hash level locked environment with conda that Pixi solved.
Conda is still a very well supported tool and the dominant conda package environment manager by numbers of users.↩︎
Content from Conda packages
Last updated on 2025-12-05 | Edit this page
Estimated time: 45 minutes
Overview
Questions
- What is a conda package?
Objectives
- Learn about conda package structure
Conda packages
In a previous episode we learned that Pixi can control conda
packages, but what is a conda package? Conda
packages (.conda files) are language agnostic file
archives that contain built code distributions. This is quite powerful,
as it allows for arbitrary code to be built for any target platform and
then packaged with its metadata. When a conda package is downloaded and
then unpacked with a conda package management tool (e.g. Pixi, conda,
mamba) the only thing that needs to be done to “install” that package is
just copy the package’s file directory tree to the base of the
environment’s directory tree. Package contents are also simple; they can
only contain files and symbolic links.
Exploring package structure
To better understand conda packages and the environment directory tree structure they exist in, let’s make a new Pixi project and look at the project environment directory tree structure.
OUTPUT
✔ Created /home/<username>/pixi-cuda-lesson/dir-structure/pixi.tomlTo help visualize this on the command line we’ll use the
tree program (Linux and macOS), which we’ll install as a
global utility from conda-forge using pixi global.
At the moment our Pixi project manifest is empty
TOML
[workspace]
channels = ["conda-forge"]
name = "dir-structure"
platforms = ["linux-64"]
version = "0.1.0"

[tasks]

[dependencies]
and so is our directory tree
Let’s add a dependency to our project to change that
OUTPUT
✔ Added python >=3.13.5,<3.14which now gives us an updated Pixi manifest
TOML
[workspace]
channels = ["conda-forge"]
name = "dir-structure"
platforms = ["linux-64"]
version = "0.1.0"

[tasks]

[dependencies]
python = ">=3.13.5,<3.14"
and the start of a directory tree with the .pixi/
directory
Let’s now use tree to look at the directory structure of
the Pixi project starting at the same directory where the
pixi.toml manifest file is.
We see that the default environment that Pixi created
has the standard directory tree layout for operating systems following
the Filesystem
Hierarchy Standard (FHS) (e.g. Unix machines)
-
bin: for binary executables -
include: for include files (e.g. header files in C/C++) -
lib: for binary libraries -
share: for files and data that other libraries or applications might need from the installed programs
as well as some less common ones related to system administration
-
man:for manual pages -
sbin: for system binaries -
ssl: for SSL (Secure Sockets Layer) certificates to provide secure encryption when connecting to websites
as well as other directories that are specific to conda packages
-
conda-meta: for metadata for all installed conda packages -
x86_64-conda-linux-gnu: for platform specific tools (like linkers) — this will vary depending on your operating system
How did this directory tree get here? It is a result of all the files that were in the conda packages we downloaded and installed as dependencies of Python.
We can download an individual conda package manually using a tool
like curl. Let’s download the particular python conda
package from where it is hosted on conda-forge’s Anaconda.org
organization
.conda is probably not a file extension that you’ve seen
before, but you are probably very familiar with the actual archive
compression format. .conda files are .zip
files that have been renamed, but we can use the same utilities to
interact with them as we would with .zip files.
We see that the .conda archive contained package format
metadata (metadata.json) as well as two other tar archives
compressed with the Zstandard compression algorithm
(.tar.zst). We can uncompress them manually with
tar
and then look at the uncompressed directory tree with
tree
So we can see that the directory structure of the conda package
is reflected in the directory tree of the Pixi environment with the package installed
Hopefully this seems straightforward and unmagical — because it is! Conda package structure is simple and easy to understand because it builds off of basic file system structures and doesn’t try to invent new systems. It is important to demystify what is happening with the directory tree structure though so that we keep in our minds that our tools are just manipulating files.
Exploring conda-forge
As of August 2025 conda-forge has over 29,000 packages on it. Go to the conda-forge package list website (https://conda-forge.org/packages/) and try to find three packages that you use in your research, and three packages from your scientific field that are more niche.
Further conda package references
Wolf Vollprecht of prefix.dev GmbH has written blog posts on topics covered in this section that provide an excellent overview and summary. You are highly encouraged to read them!
- What is a Conda package, actually? (2025-06-11)
- Virtual Packages in the Conda ecosystem (2025-06-18)
- What linking means when installing a Conda package (2025-07-17)
- Conda packages are specially named
.zipfiles that contain files and symbolic links structured in a directory tree.
Content from CUDA conda packages
Last updated on 2025-12-05 | Edit this page
Estimated time: 45 minutes
Overview
Questions
- What is CUDA?
- How can I use CUDA enabled conda packages?
Objectives
- Understand how CUDA can be used with conda packages
- Create a hardware accelerated environment
CUDA
CUDA (Compute Unified Device Architecture) is a parallel computing platform and programming model developed by NVIDIA for general computing on graphical processing units (GPUs). The CUDA ecosystem provides software developer software development kits (SDK) with APIs to CUDA that allow for software developers to write hardware accelerated programs with CUDA in various languages for NVIDIA GPUs. CUDA supports a number of languages including C, C++, Fortran, Python, and Julia. While there are other types of hardware acceleration development platforms, as of 2025 CUDA is the most abundant platform for scientific computing that uses GPUs and effectively the default choice for major machine learning libraries and applications.
CUDA is closed source and proprietary to NVIDIA, which means that NVIDIA has historically limited the download access of the CUDA toolkits and drivers to registered NVIDIA developers (while keeping the software free (monetarily) to use). CUDA then required a multi-step installation process with manual steps and decisions based on the target platform and particular CUDA version. This meant that when CUDA enabled environments were setup on a particular machine they were powerful and optimized, but brittle to change and could easily be broken if system wide updates (like for security fixes) occurred. CUDA software environments were bespoke and not many scientists understood how to construct and curate them.
CUDA on conda-forge
In late
2018 to better support the scientific developer community, NVIDIA
started to release components of the CUDA toolkits on the nvidia conda
channel. This provided the first access to start to create conda
environments where the versions of different CUDA tools could be
directly specified and downloaded. However, all of this work was being
done internally in NVIDIA and as it was on a separate channel it was
less visible and it still required additional knowledge to work with. In
2023,
NVIDIA’s open source team began to move the release of CUDA conda
packages from the nvidia channel to conda-forge, making it
easier to discover and allowing for community support. With significant
advancements in system driver specification support, CUDA 12 became the
first version of CUDA to be released as conda packages through
conda-forge and included all CUDA libraries from the CUDA compiler
nvcc to the CUDA
development libraries. They also released CUDA
metapackages that allowed users to easily describe the version of
CUDA they required (e.g. cuda-version=12.5) and the CUDA
conda packages they wanted (e.g. cuda). This significantly
improved the ability for researchers to easily create CUDA accelerated
computing environments.
This is all possible via use of the __cuda virtual
conda package, which is determined automatically by conda package
managers from the hardware information associated with the machine the
package manager is installed on.
With Pixi, a user can get this information with pixi info,
which could have output that looks something like
OUTPUT
System
------------
       Pixi version: 0.50.2
           Platform: linux-64
   Virtual packages: __unix=0=0
                   : __linux=6.8.0=0
                   : __glibc=2.35=0
                   : __cuda=12.9=0
                   : __archspec=1=skylake
          Cache dir: /home/<username>/.cache/rattler/cache
       Auth storage: /home/<username>/.rattler/credentials.json
   Config locations: No config files found

Global
------------
            Bin dir: /home/<username>/.pixi/bin
    Environment dir: /home/<username>/.pixi/envs
       Manifest dir: /home/<username>/.pixi/manifests/pixi-global.toml
CUDA use with Pixi
To be able to effectively use CUDA conda packages with Pixi, we make use of Pixi’s system requirement workspace table, which specifies the minimum system specifications needed to install and run a Pixi workspace’s environments.
To do this for CUDA, we just add the minimum supported CUDA version (based on the host machine’s NVIDIA driver API) we want to support to the table.
Example:
TOML
[system-requirements]
cuda = "12"  # Replace "12" with the specific CUDA version you intend to use
This ensures that packages depending on
__cuda >= {version} are resolved correctly.
To demonstrate this a bit more explicitly, we can create a minimal project
OUTPUT
✔ Created /home/<username>/pixi-cuda-lesson/cuda-example/pixi.tomlwhere we specify a cuda system requirement
TOML
[workspace]
channels = ["conda-forge"]
name = "cuda-example"
platforms = ["linux-64"]
version = "0.1.0"

[tasks]

[dependencies]

[system-requirements]
cuda = "12"
system-requirements table can’t
be target specific
As of Pixi
v0.50.2, the
system-requirements table can’t be target specific. To
work around this, if you’re on a platform that doesn’t support the
system-requirements it will ignore them without erroring
unless they are required for the platform specific packages or actions
you have. So, for example, you can have osx-arm64 as a
platform and a system-requirements of
cuda = "12" defined
Pixi will ignore that requirement unless you try to use CUDA packages
in osx-arm64 environments.
and then install the cuda-version
metapacakge
OUTPUT
✔ Added cuda-version 12.9.*TOML
[workspace]
channels = ["conda-forge"]
name = "cuda-example"
platforms = ["linux-64"]
version = "0.1.0"

[tasks]

[dependencies]
cuda-version = "12.9.*"

[system-requirements]
cuda = "12"
If we look at the metadata installed by the cuda-version
package (the only thing it does)
JSON
{
  "build": "h4f385c5_3",
  "build_number": 3,
  "constrains": [
    "cudatoolkit 12.9|12.9.*",
    "__cuda >=12"
  ],
  "depends": [],
  "license": "LicenseRef-NVIDIA-End-User-License-Agreement",
  "md5": "b6d5d7f1c171cbd228ea06b556cfa859",
  "name": "cuda-version",
  "noarch": "generic",
  "sha256": "5f5f428031933f117ff9f7fcc650e6ea1b3fef5936cf84aa24af79167513b656",
  "size": 21578,
  "subdir": "noarch",
  "timestamp": 1746134436166,
  "version": "12.9",
  "fn": "cuda-version-12.9-h4f385c5_3.conda",
  "url": "https://conda.anaconda.org/conda-forge/noarch/cuda-version-12.9-h4f385c5_3.conda",
  "channel": "https://conda.anaconda.org/conda-forge/",
  "extracted_package_dir": "/home/<username>/.cache/rattler/cache/pkgs/cuda-version-12.9-h4f385c5_3",
  "files": [],
  "paths_data": {
    "paths_version": 1,
    "paths": []
  },
  "link": {
    "source": "/home/<username>/.cache/rattler/cache/pkgs/cuda-version-12.9-h4f385c5_3",
    "type": 1
  }
}
we see that it now enforces constraints on the versions of
cudatoolkit that can be installed as well as the required
__cuda virtual package provided by the system
Use the feature table to solve
environment that your platform doesn’t support
CUDA is supported only by NVIDIA GPUs, which means that macOS
operating system platforms (osx-64, osx-arm64)
can’t support it. Similarly, if you machine doesn’t have an NVIDIA GPU,
then the __cuda virtual package won’t exist and installs of
CUDA packages will fail. However, there’s many situations in which you
want to solve and environment for a platform that you don’t
have and we can do this for CUDA as well.
If we make the Pixi workspace multiplatform
OUTPUT
✔ Added linux-64
✔ Added osx-arm64
✔ Added win-64
TOML
[workspace]
channels = ["conda-forge"]
name = "cuda-example"
platforms = ["linux-64", "osx-arm64", "win-64"]
version = "0.1.0"

[tasks]

[dependencies]
We can then use Pixi’s platform
specific target tables to add dependencies for an
environment to only a specific platform. So, if we know that a
dependency only exists for platform
This now means that if we ask for any CUDA enbabled packages, we will
get ones that are built to support cudatoolkit
v12.9.*
OUTPUT
✔ Added cuda >=12.9.1,<13
Added these only for platform(s): linux-64OUTPUT
Package                      Version  Build       Size       Kind   Source
cuda                         12.9.1   ha804496_0  26.7 KiB   conda  https://conda.anaconda.org/conda-forge/
cuda-cccl_linux-64           12.9.27  ha770c72_0  1.1 MiB    conda  https://conda.anaconda.org/conda-forge/
cuda-command-line-tools      12.9.1   ha770c72_0  20 KiB     conda  https://conda.anaconda.org/conda-forge/
cuda-compiler                12.9.1   hbad6d8a_0  20.2 KiB   conda  https://conda.anaconda.org/conda-forge/
cuda-crt-dev_linux-64        12.9.86  ha770c72_2  92 KiB     conda  https://conda.anaconda.org/conda-forge/
cuda-crt-tools               12.9.86  ha770c72_2  28.5 KiB   conda  https://conda.anaconda.org/conda-forge/
cuda-cudart                  12.9.79  h5888daf_0  22.7 KiB   conda  https://conda.anaconda.org/conda-forge/
cuda-cudart-dev              12.9.79  h5888daf_0  23.1 KiB   conda  https://conda.anaconda.org/conda-forge/
cuda-cudart-dev_linux-64     12.9.79  h3f2d84a_0  380 KiB    conda  https://conda.anaconda.org/conda-forge/
cuda-cudart-static           12.9.79  h5888daf_0  22.7 KiB   conda  https://conda.anaconda.org/conda-forge/
cuda-cudart-static_linux-64  12.9.79  h3f2d84a_0  1.1 MiB    conda  https://conda.anaconda.org/conda-forge/
cuda-cudart_linux-64         12.9.79  h3f2d84a_0  192.6 KiB  conda  https://conda.anaconda.org/conda-forge/
cuda-cuobjdump               12.9.82  hbd13f7d_0  237.5 KiB  conda  https://conda.anaconda.org/conda-forge/
cuda-cupti                   12.9.79  h9ab20c4_0  1.8 MiB    conda  https://conda.anaconda.org/conda-forge/
cuda-cupti-dev               12.9.79  h9ab20c4_0  4.4 MiB    conda  https://conda.anaconda.org/conda-forge/
cuda-cuxxfilt                12.9.82  hbd13f7d_0  211.4 KiB  conda  https://conda.anaconda.org/conda-forge/
cuda-driver-dev              12.9.79  h5888daf_0  22.5 KiB   conda  https://conda.anaconda.org/conda-forge/
cuda-driver-dev_linux-64     12.9.79  h3f2d84a_0  36.8 KiB   conda  https://conda.anaconda.org/conda-forge/
cuda-gdb                     12.9.79  ha677faa_0  378.2 KiB  conda  https://conda.anaconda.org/conda-forge/
cuda-libraries               12.9.1   ha770c72_0  20 KiB     conda  https://conda.anaconda.org/conda-forge/
cuda-libraries-dev           12.9.1   ha770c72_0  20.1 KiB   conda  https://conda.anaconda.org/conda-forge/
cuda-nsight                  12.9.79  h7938cbb_0  113.2 MiB  conda  https://conda.anaconda.org/conda-forge/
cuda-nvcc                    12.9.86  hcdd1206_1  24.3 KiB   conda  https://conda.anaconda.org/conda-forge/
cuda-nvcc-dev_linux-64       12.9.86  he91c749_2  27.5 KiB   conda  https://conda.anaconda.org/conda-forge/
cuda-nvcc-impl               12.9.86  h85509e4_2  26.6 KiB   conda  https://conda.anaconda.org/conda-forge/
cuda-nvcc-tools              12.9.86  he02047a_2  26.1 MiB   conda  https://conda.anaconda.org/conda-forge/
cuda-nvcc_linux-64           12.9.86  he0b4e1d_1  26.2 KiB   conda  https://conda.anaconda.org/conda-forge/
cuda-nvdisasm                12.9.88  hbd13f7d_0  5.3 MiB    conda  https://conda.anaconda.org/conda-forge/
cuda-nvml-dev                12.9.79  hbd13f7d_0  139.1 KiB  conda  https://conda.anaconda.org/conda-forge/
cuda-nvprof                  12.9.79  hcf8d014_0  2.5 MiB    conda  https://conda.anaconda.org/conda-forge/
cuda-nvprune                 12.9.82  hbd13f7d_0  69.3 KiB   conda  https://conda.anaconda.org/conda-forge/
cuda-nvrtc                   12.9.86  h5888daf_0  64.1 MiB   conda  https://conda.anaconda.org/conda-forge/
cuda-nvrtc-dev               12.9.86  h5888daf_0  35.7 KiB   conda  https://conda.anaconda.org/conda-forge/
cuda-nvtx                    12.9.79  h5888daf_0  28.6 KiB   conda  https://conda.anaconda.org/conda-forge/
cuda-nvvm-dev_linux-64       12.9.86  ha770c72_2  26.5 KiB   conda  https://conda.anaconda.org/conda-forge/
cuda-nvvm-impl               12.9.86  h4bc722e_2  20.4 MiB   conda  https://conda.anaconda.org/conda-forge/
cuda-nvvm-tools              12.9.86  h4bc722e_2  23.1 MiB   conda  https://conda.anaconda.org/conda-forge/
cuda-nvvp                    12.9.79  hbd13f7d_0  104.3 MiB  conda  https://conda.anaconda.org/conda-forge/
cuda-opencl                  12.9.19  h5888daf_0  30 KiB     conda  https://conda.anaconda.org/conda-forge/
cuda-opencl-dev              12.9.19  h5888daf_0  95.1 KiB   conda  https://conda.anaconda.org/conda-forge/
cuda-profiler-api            12.9.79  h7938cbb_0  23 KiB     conda  https://conda.anaconda.org/conda-forge/
cuda-runtime                 12.9.1   ha804496_0  19.9 KiB   conda  https://conda.anaconda.org/conda-forge/
cuda-sanitizer-api           12.9.79  hcf8d014_0  8.6 MiB    conda  https://conda.anaconda.org/conda-forge/
cuda-toolkit                 12.9.1   ha804496_0  20 KiB     conda  https://conda.anaconda.org/conda-forge/
cuda-tools                   12.9.1   ha770c72_0  19.9 KiB   conda  https://conda.anaconda.org/conda-forge/
cuda-version                 12.9     h4f385c5_3  21.1 KiB   conda  https://conda.anaconda.org/conda-forge/
cuda-visual-tools            12.9.1   ha770c72_0  19.9 KiB   conda  https://conda.anaconda.org/conda-forge/
To “prove” that this works, we can ask for the CUDA enabled version of PyTorch
OUTPUT
✔ Added pytorch-gpu >=2.7.1,<3
Added these only for platform(s): linux-64OUTPUT
Package      Version  Build                           Size       Kind   Source
libtorch     2.7.1    cuda129_mkl_h9562ed8_304        836.3 MiB  conda  https://conda.anaconda.org/conda-forge/
pytorch      2.7.1    cuda129_mkl_py313_h1e53aa0_304  28.1 MiB   conda  https://conda.anaconda.org/conda-forge/
pytorch-gpu  2.7.1    cuda129_mkl_h43a4b0b_304        46.9 KiB   conda  https://conda.anaconda.org/conda-forge/
TOML
[workspace]
channels = ["conda-forge"]
name = "cuda-example"
platforms = ["linux-64", "osx-arm64", "win-64"]
version = "0.1.0"

[tasks]

[dependencies]
cuda-version = "12.9.*"

[system-requirements]
cuda = "12"

[target.linux-64.dependencies]
cuda = ">=12.9.1,<13"
pytorch-gpu = ">=2.7.1,<3"Redundancy in example
Note that we added the cuda package here for
demonstraton purposes, but we didn’t need to as it would
already be installed as a dependency of pytorch-gpu.
JSON
{
  "build": "cuda129_mkl_h43a4b0b_304",
  "build_number": 304,
  "depends": [
    "pytorch 2.7.1 cuda*_mkl*304"
  ],
  "license": "BSD-3-Clause",
  "license_family": "BSD",
  "md5": "e374ee50f7d5171d82320bced8165e85",
  "name": "pytorch-gpu",
  "sha256": "af54e6535619f4e484d278d015df6ea67622e2194f78da2c0541958fc3d83d18",
  "size": 48008,
  "subdir": "linux-64",
  "timestamp": 1753886159800,
  "version": "2.7.1",
  "fn": "pytorch-gpu-2.7.1-cuda129_mkl_h43a4b0b_304.conda",
  "url": "https://conda.anaconda.org/conda-forge/linux-64/pytorch-gpu-2.7.1-cuda129_mkl_h43a4b0b_304.conda",
  "channel": "https://conda.anaconda.org/conda-forge/",
  "extracted_package_dir": "/home/<username>/.cache/rattler/cache/pkgs/pytorch-gpu-2.7.1-cuda129_mkl_h43a4b0b_304",
  "files": [],
  "paths_data": {
    "paths_version": 1,
    "paths": []
  },
  "link": {
    "source": "/home/<username>/.cache/rattler/cache/pkgs/pytorch-gpu-2.7.1-cuda129_mkl_h43a4b0b_304",
    "type": 1
  }
}
and if on the supported linux-64 platform with a
valid __cuda virtual pacakge check that it can see
and find GPUs
PYTHON
# torch_detect_GPU.py
import torch
from torch import cuda

if __name__ == "__main__":
    if torch.backends.cuda.is_built():
        print(f"PyTorch build CUDA version: {torch.version.cuda}")
        print(f"PyTorch build cuDNN version: {torch.backends.cudnn.version()}")
        print(f"PyTorch build NCCL version: {torch.cuda.nccl.version()}")

        print(f"\nNumber of GPUs found on system: {cuda.device_count()}")

    if cuda.is_available():
        print(f"\nActive GPU index: {cuda.current_device()}")
        print(f"Active GPU name: {cuda.get_device_name(cuda.current_device())}")
    elif torch.backends.mps.is_available():
        mps_device = torch.device("mps")
        print(f"PyTorch has active GPU: {mps_device}")
    else:
print(f"PyTorch has no active GPU")OUTPUT
PyTorch build CUDA version: 12.9
PyTorch build cuDNN version: 91100
PyTorch build NCCL version: (2, 27, 7)

Number of GPUs found on system: 1

Active GPU index: 0
Active GPU name: NVIDIA GeForce RTX 4060 Laptop GPUMulti-environment Pixi workspaces
Create a new Pixi workspace that:
- Contains an environment for
linux-64,osx-arm64, andwin-64that supports the CPU version of PyTorch - Contains an environment for
linux-64andwin-64that supports the GPU version of PyTorch - Supports CUDA
v12
Create a new workspace
OUTPUT
✔ Created /home/<username>/pixi-cuda-lesson/cuda-exercise/pixi.tomlAdd support for all the target platforms
OUTPUT
✔ Added linux-64
✔ Added osx-arm64
✔ Added win-64
TOML
[workspace]
channels = ["conda-forge"]
name = "cuda-exercise"
platforms = ["linux-64", "osx-arm64", "win-64"]
version = "0.1.0"

[tasks]

[dependencies]
Let’s first add pytorch-cpu to a cpu
feature
OUTPUT
✔ Added pytorch-cpu
Added these only for feature: cpu
and then create a cpu environment that contains the
cpu feature
OUTPUT
✔ Added environment cpuand then instantiate the pytorch-cpu package with a
particular version and solve through pixi upgrade
(or could readd the package to the feature)
TOML
[workspace]
channels = ["conda-forge"]
name = "cuda-exercise"
platforms = ["linux-64", "osx-arm64", "win-64"]
version = "0.1.0"

[tasks]

[dependencies]

[feature.cpu.dependencies]
pytorch-cpu = ">=2.8.0,<3"

[environments]
cpu = ["cpu"]
Now, for the GPU environment, add CUDA system-requirements for
linux-64 for the gpu feature
TOML
[workspace]
channels = ["conda-forge"]
name = "cuda-exercise"
platforms = ["linux-64", "osx-arm64", "win-64"]
version = "0.1.0"

[tasks]

[dependencies]

[feature.cpu.dependencies]
pytorch-cpu = ">=2.8.0,<3"

[feature.gpu.system-requirements]
cuda = "12"

[environments]
cpu = ["cpu"]
and create a gpu environment with the gpu
feature
OUTPUT
✔ Added environment gpuTOML
[workspace]
channels = ["conda-forge"]
name = "cuda-exercise"
platforms = ["linux-64", "osx-arm64", "win-64"]
version = "0.1.0"

[tasks]

[dependencies]

[feature.cpu.dependencies]
pytorch-cpu = ">=2.8.0,<3"

[feature.gpu.system-requirements]
cuda = "12"

[environments]
cpu = ["cpu"]
gpu = ["gpu"]
then add the pytorch-gpu pacakge for
linux-64 and win-64 to the gpu
feature
OUTPUT
✔ Added pytorch-gpu >=2.8.0,<3
Added these only for platform(s): linux-64, win-64
Added these only for feature: gpu
TOML
[workspace]
channels = ["conda-forge"]
name = "cuda-exercise"
platforms = ["linux-64", "osx-arm64", "win-64"]
version = "0.1.0"

[tasks]

[dependencies]

[feature.cpu.dependencies]
pytorch-cpu = ">=2.8.0,<3"

[feature.gpu.system-requirements]
cuda = "12"

[feature.gpu.target.linux-64.dependencies]
pytorch-gpu = ">=2.8.0,<3"

[feature.gpu.target.win-64.dependencies]
pytorch-gpu = ">=2.8.0,<3"

[environments]
cpu = ["cpu"]
gpu = ["gpu"]
One can check the environment differences
and activate shells with different environments loaded
So in 26 lines of TOML
OUTPUT
26 pixi.tomlwe created separate CPU and GPU computational environments that are
now fully reproducible with the associated pixi.lock!
Version Control
On a new branch in your repository, add and commit the files from this episode.
BASH
git add cuda-example/pixi.* cuda-example/git.*
git add cuda-exercise/pixi.* cuda-exercise/git.*
Then push your branch to your remote on GitHub
and make a pull request to merge your changes into your remote’s default branch.
Further CUDA and GPU references
If you would also like a useful summary of different things related to CUDA, check out Modal’s summary website of CUDA focused GPU concepts.
- GPU Glossary, by Modal
- The
cuda-versionmetapackage can be used to specify constrains on the versions of the__cudavirtual package andcudatoolkit. - Pixi can specify a minimum required CUDA version with the
[system-requirements]table. - Pixi can solve environments for platforms that are not the system platform.
- NVIDIA’s open source team and the conda-forge community support the CUDA conda packages on conda-forge.
- The
cudametapackage is the primary place to go for user documetnation on the CUDA conda packages.
Content from Deploying Pixi environments with Linux containers
Last updated on 2025-12-05 | Edit this page
Estimated time: 45 minutes
Overview
Questions
- How can Pixi environment be deployed to production compute facilities?
- What tools can be used to achieve this?
Objectives
- Version control Pixi environments with Git.
- Create a Linux container that has a production environment.
- Create an automated GitHub Actions workflow to build and deploy environments.
Deploying Pixi environments
We now know how to create Pixi workspaces that contain environments that can support CUDA enabled code. However, unless your production machine learning environment is a lab desktop with GPUs and lots of disk 1 that you can install Pixi on and run your code then we still need to be able to get our Pixi environments to our production machines.
There is one very straightforward solution:
- Version control your Pixi manifest and Pixi lock files with your analysis code with a version control system (e.g. Git).
- Clone your repository to the machine that you want to run on.
- Install Pixi onto that machine.
- Install the locked Pixi environment that you want to use.
- Execute your code in the installed environment.
That’s a nice and simple story, and it can work! However, in most realistic scenarios the worker compute nodes that are executing code share resource pools of storage and memory and are regulated to smaller allotments of both. CUDA binaries are relatively large files and amount of memory and storage to just unpack them can easily exceed a standard 2 GB memory limit on most high throughput computing (HTC) facility worker nodes. This also requires direct access to the public internet, or for you to setup a S3 object store behind your compute facility’s firewall with all of your conda packages mirrored into it. In many scenarios, public internet access at HTC and high performance computing (HPC) facilities is limited to only a select “allow list” of websites or it might be fully restricted for users.
Building Linux containers with Pixi environments
A more standard and robust way of distributing computing environments is the use of Linux container technology — like Docker or Apptainer.
Conceptualizing the role of Linux containers
Linux containers are powerful technologies that allow for arbitrary software environments to be distributed as a single binary. However, it is important to not think of Linux containers as packaging technologies (like conda packages) but as distribution technologies. When you build a Linux container you provide a set of imperative commands as a build script that constructs different layers of the container. When the build is finished, all layers of the build are compressed together to form a container image binary that can be distributed through Linux container image registries.
Packaging technologies allow for defining requirements and constraints on a unit of software that we call a “package”. Packages can be installed together and their metadata allows them to be composed programmatically into software environments.
Linux containers take defined software environments and instantiate them by installing them into the container image during the build and then distribute that entire computing environment for a single platform.
Resources on Linux containers
Linux containers are a full topic unto themselves and we won’t cover them in this lesson. If you’re not familiar with Linux containers, here are introductory resources:
- Reproducible Computational Environments Using Containers: Introduction to Docker, a The Carpentries Incubator lesson
- Introduction to Docker and Podman by the High Energy Physics Software Foundation
- Reproducible computational environments using containers: Introduction to Apptainer, a The Carpentries Incubator lesson
If you don’t have a Linux container runtime on your machine don’t worry — for the first part of this episode you can follow along reading and then we’ll transition to automation.
Building Docker containers with Pixi environments
Docker is a very common Linux container runtime technology and Linux
container builder. We can use docker build to
build a Linux container from a Dockerfile instruction file.
Luckily, to install Pixi environments into Docker container images there
is effectively only one Dockerfile recipe
that needs to be used, and then can be reused across projects.
Moving files
To use it later, we’ll place the torch_detect_GPU.py
code from the end of the CUDA conda packages episode at
./app/torch_detect_GPU.py.
DOCKERFILE
# Declare build ARGs in global scope
ARG CUDA_VERSION="12"
ARG ENVIRONMENT="gpu"

FROM ghcr.io/prefix-dev/pixi:noble AS build

# Redeclaring ARGs in a stage without a value inherits the global default
ARG CUDA_VERSION
ARG ENVIRONMENT

WORKDIR /app
COPY . .
ENV CONDA_OVERRIDE_CUDA=$CUDA_VERSION
RUN pixi install --locked --environment $ENVIRONMENT
RUN echo "#!/bin/bash" > /app/entrypoint.sh && \
    pixi shell-hook --environment $ENVIRONMENT -s bash >> /app/entrypoint.sh && \
    echo 'exec "$@"' >> /app/entrypoint.sh

FROM ghcr.io/prefix-dev/pixi:noble AS final

ARG ENVIRONMENT

WORKDIR /app
COPY --from=build /app/.pixi/envs/$ENVIRONMENT /app/.pixi/envs/$ENVIRONMENT
COPY --from=build /app/pixi.toml /app/pixi.toml
COPY --from=build /app/pixi.lock /app/pixi.lock
# The ignore files are needed for 'pixi run' to work in the container
COPY --from=build /app/.pixi/.gitignore /app/.pixi/.gitignore
COPY --from=build /app/.pixi/.condapackageignore /app/.pixi/.condapackageignore
COPY --from=build --chmod=0755 /app/entrypoint.sh /app/entrypoint.sh

# This bit is needed only if you have code you _want_ to deploy in the container.
# This is rare as you normally want your code to be able to get brought into a container later.
COPY ./app /app/src

ENTRYPOINT [ "/app/entrypoint.sh" ]Let’s step through this to understand what’s happening.
Dockerfiles (intentionally) look very shell script like,
and so we can read most of it as if we were typing the commands directly
into a shell (e.g. Bash).
The
Dockerfileassumes it is being built from a version control repository where any code that it will need to execute later exists under the repository’ssrc/directory and the Pixi workspace’spixi.tomlmanifest file andpixi.locklock file exist at the top level of the repository.Dockerfile
ARGs are declared before thebuildstage’s base imageFROMdeclaration, meaning they have global scope. Declaring theARGs again with no value in the local scope of thebuildstage inherits the global scope values.
DOCKERFILE
# Declare build ARGS in global scope
ARG CUDA_VERSION="12"
ARG ENVIRONMENT="gpu"

FROM ghcr.io/prefix-dev/pixi:noble AS build

# Redeclaring ARGs in a stage without a value inherits the global default
ARG CUDA_VERSION
ARG ENVIRONMENT- The entire repository contents are
COPYed from the container build context into the/appdirectory of the container build.
- It is not reasonable to expect that the container image build
machine contains GPUs. To have Pixi still be able to install an
environment that uses CUDA when there is no virtual package set the
__cudaoverride environment variableCONDA_OVERRIDE_CUDA.
- The
Dockerfileuses a multi-stage build where it first installs the target environment$ENVIRONMENTand then creates anENTRYPOINTscript usingpixi shell-hookto automatically activate the environment when the container image is run.
DOCKERFILE
RUN pixi install --locked --environment $ENVIRONMENT
RUN echo "#!/bin/bash" > /app/entrypoint.sh && \
pixi shell-hook --environment $ENVIRONMENT -s bash >> /app/entrypoint.sh && \
echo 'exec "$@"' >> /app/entrypoint.sh- The next stage of the build starts from a new container instance and
then
COPYs the installed environment and files from the build container image into the production container image. This can reduce the total size of the final container image if there were additional build tools that needed to get installed in the build phase that aren’t required for runtime in production.
DOCKERFILE
FROM ghcr.io/prefix-dev/pixi:noble AS final
ARG ENVIRONMENT
WORKDIR /app
COPY --from=build /app/.pixi/envs/$ENVIRONMENT /app/.pixi/envs/$ENVIRONMENT
COPY --from=build /app/pixi.toml /app/pixi.toml
COPY --from=build /app/pixi.lock /app/pixi.lock
# The ignore files are needed for 'pixi run' to work in the container
COPY --from=build /app/.pixi/.gitignore /app/.pixi/.gitignore
COPY --from=build /app/.pixi/.condapackageignore /app/.pixi/.condapackageignore
COPY --from=build --chmod=0755 /app/entrypoint.sh /app/entrypoint.sh- Code that is specific to application purposes (e.g. environment
diagnostics) from the repository is
COPYed into the final container image as well
Knowing what code to copy
Generally you do not want to containerize your development source code, as you’d like to be able to quickly iterate on it and have it be transferred into a Linux container to be evaluated.
You do want to containerize your development source code if you’d like to archive it as an executable into the future.
- The
ENTRYPOINTscript is set for activation
With this Dockerfile the container image can then be
built with docker build.
docker build --file Dockerfile --tag <container image name:tag> .and can optionally have the ARG variables set at build
time with
docker build --build-arg CUDA_VERSION=12 --build-arg ENVIRONMENT=gpu --file Dockerfile --tag <container image name:tag> .Automation with GitHub Actions workflows
In the personal GitHub repository that we’ve been working in, create a GitHub Actions workflow directory from the top level of the repository
and then add the following workflow file as
.github/workflows/docker.yaml
YAML
name: Docker Images
on:
push:
branches:
- main
tags:
- 'v*'
paths:
- 'cuda-exercise/pixi.toml'
- 'cuda-exercise/pixi.lock'
- 'cuda-exercise/Dockerfile'
- 'cuda-exercise/.dockerignore'
- 'cuda-exercise/app/**'
pull_request:
paths:
- 'cuda-exercise/pixi.toml'
- 'cuda-exercise/pixi.lock'
- 'cuda-exercise/Dockerfile'
- 'cuda-exercise/.dockerignore'
- 'cuda-exercise/app/**'
release:
types: [published]
workflow_dispatch:
concurrency:
group: ${{ github.workflow }}-${{ github.ref }}
cancel-in-progress: true
permissions: {}
jobs:
docker:
name: Build and publish images
runs-on: ubuntu-latest
permissions:
contents: read
packages: write
steps:
- name: Checkout
uses: actions/checkout@v4
with:
fetch-depth: 0
- name: Docker meta
id: meta
uses: docker/metadata-action@v5
with:
images: |
ghcr.io/${{ github.repository }}
# generate Docker tags based on the following events/attributes
tags: |
type=raw,value=gpu-noble-cuda-12.9
type=raw,value=latest
type=sha
type=sha,prefix=gpu-noble-cuda-12.9-sha-
- name: Set up QEMU
uses: docker/setup-qemu-action@v3
- name: Set up Docker Buildx
uses: docker/setup-buildx-action@v3
- name: Login to GitHub Container Registry
if: github.event_name != 'pull_request'
uses: docker/login-action@v3
with:
registry: ghcr.io
username: ${{ github.repository_owner }}
password: ${{ secrets.GITHUB_TOKEN }}
- name: Test build
id: docker_build_test
uses: docker/build-push-action@v6
with:
context: cuda-exercise
file: cuda-exercise/Dockerfile
tags: ${{ steps.meta.outputs.tags }}
labels: ${{ steps.meta.outputs.labels }}
pull: true
- name: Deploy build
id: docker_build_deploy
uses: docker/build-push-action@v6
with:
context: cuda-exercise
file: cuda-exercise/Dockerfile
tags: ${{ steps.meta.outputs.tags }}
labels: ${{ steps.meta.outputs.labels }}
pull: true
push: ${{ github.event_name != 'pull_request' }}This will build your Dockerfile in GitHub Actions CI into a linux/amd64
platform Docker container image and then deploy it to the GitHub
Container Registry (ghcr) associated with your
repository.
Version Control
We now want to use these tools to build our Pixi environment into a Docker Linux container.
On a new branch in your repository, add and commit the files from this episode.
Then push your branch to your remote on GitHub
and make a pull request to merge your changes into your remote’s default branch.
Building Apptainer containers with Pixi environments
Most HTC and HPC systems do not allow users to use Docker given
security risks and instead use Apptainer. In most situations, Apptainer
is able to automatically convert a Docker image, or other Open Container
Initiative (OCI) container image format, to Apptainer’s Singularity Image Format
.sif container image format, and so no additional work is
required. However, the overlay system of Apptainer is different from
Docker, which means that the ENTRYPOINT of a Docker
container image might not get correctly translated into an Apptainer
runscript and startscript. In might be
advantageous, depending on your situation, to instead write an Apptainer
.def definition file, giving full control over the
commands, and then build that .def file into an
.sif Apptainer container image.
We can build a very similar apptainer.def Apptainer
container image definition file to the Dockerfile we wrote
Bootstrap: docker
From: ghcr.io/prefix-dev/pixi:noble
Stage: build
# %arguments have to be defined at each stage
%arguments
CUDA_VERSION=12
ENVIRONMENT=gpu
%files
./pixi.toml /app/
./pixi.lock /app/
./.gitignore /app/
%post
#!/bin/bash
export CONDA_OVERRIDE_CUDA={{ CUDA_VERSION }}
cd /app/
pixi info
pixi install --locked --environment {{ ENVIRONMENT }}
echo "#!/bin/bash" > /app/entrypoint.sh && \
pixi shell-hook --environment {{ ENVIRONMENT }} -s bash >> /app/entrypoint.sh && \
echo 'exec "$@"' >> /app/entrypoint.sh
Bootstrap: docker
From: ghcr.io/prefix-dev/pixi:noble
Stage: final
%arguments
ENVIRONMENT=gpu
%files from build
/app/.pixi/envs/{{ ENVIRONMENT }} /app/.pixi/envs/{{ ENVIRONMENT }}
/app/pixi.toml /app/pixi.toml
/app/pixi.lock /app/pixi.lock
/app/.gitignore /app/.gitignore
# The ignore files are needed for 'pixi run' to work in the container
/app/.pixi/.gitignore /app/.pixi/.gitignore
/app/.pixi/.condapackageignore /app/.pixi/.condapackageignore
/app/entrypoint.sh /app/entrypoint.sh
%files
./app /app/src
%post
#!/bin/bash
cd /app/
pixi info
chmod +x /app/entrypoint.sh
%runscript
#!/bin/bash
/app/entrypoint.sh "$@"
%startscript
#!/bin/bash
/app/entrypoint.sh "$@"
%test
#!/bin/bash -e
. /app/entrypoint.sh
pixi info
pixi list
Let’s break this down too.
The Apptainer definition file is broken out into specific operation sections prefixed by
%(e.g.files,post).The Apptainer definition file assumes it is being built from a version control repository where any code that it will need to execute later exists under the repository’s
src/directory and the Pixi workspace’spixi.tomlmanifest file andpixi.locklock file exist at the top level of the repository.The
argumentssection allows for variables — which appear as{{ variable }}in the rest of the file — to be set at the stage scope that can be set with the build options--build-argor--build-arg-file.
%arguments
CUDA_VERSION=12
ENVIRONMENT=gpu- The
filessection allows for a mapping of what files should be copied from a build context (e.g. the local file system) to the container file system
%files
./pixi.toml /app/
./pixi.lock /app/
./.gitignore /app/- The
postsection runs commands listed in it as a shell script executed in a clean shell environment that does not have any pre-existing build environment context. It is not reasonable to expect that the container image build machine contains GPUs. To have Pixi still be able to install an environment that uses CUDA when there is no virtual package set the__cudaoverride environment variableCONDA_OVERRIDE_CUDA.
%post
#!/bin/bash
export CONDA_OVERRIDE_CUDA={{ CUDA_VERSION }}
...- The definition files uses a multi-stage
build where it first installs the target environment
<environment>and then creates anentrypoint.shscript script that will be used as arunscriptusingpixi shell-hookto automatically activate the environment when the container image is run.
...
cd /app/
pixi info
pixi install --locked --environment {{ ENVIRONMENT }}
echo "#!/bin/bash" > /app/entrypoint.sh && \
pixi shell-hook --environment {{ ENVIRONMENT }} -s bash >> /app/entrypoint.sh && \
echo 'exec "$@"' >> /app/entrypoint.sh- The next stage of the build starts from a new container instance and
then copies the installed environment and files from
the
buildstage into thefinalcontainer image. This can reduce the total size of the final container image if there were additional build tools that needed to get installed in the build phase that aren’t required for runtime in production.
Bootstrap: docker
From: ghcr.io/prefix-dev/pixi:noble
Stage: final
%arguments
ENVIRONMENT=gpu
%files from build
/app/.pixi/envs/{{ ENVIRONMENT }} /app/.pixi/envs/{{ ENVIRONMENT }}
/app/pixi.toml /app/pixi.toml
/app/pixi.lock /app/pixi.lock
/app/.gitignore /app/.gitignore
# The ignore files are needed for 'pixi run' to work in the container
/app/.pixi/.gitignore /app/.pixi/.gitignore
/app/.pixi/.condapackageignore /app/.pixi/.condapackageignore
/app/entrypoint.sh /app/entrypoint.sh- By repeating the
filessection we can also copy in the source code
%files
./app /app/src- The
postsection then verifies that the Pixi workspace is valid and makes the/app/entrypoint.shexecutable
%post
#!/bin/bash
cd /app/
pixi info
chmod +x /app/entrypoint.sh- The
runscriptsection defines a shell script that will get executed when the container image is run (either via theapptainer runcommand or by executing the container directly as a command).
%runscript
#!/bin/bash
/app/entrypoint.sh "$@"- We also define a
startscriptsection that is the same as therunscript’s contents that is executed when theinstance startcommand is executed (which creates a container instances that starts running in the background).
%startscript
#!/bin/bash
/app/entrypoint.sh "$@"- Finally, the
testsection defines a script that will be executed in the built container at the end of the build process. This allows for validation of the container functionality before it is distributed.
%test
#!/bin/bash -e
. /app/entrypoint.sh
pixi info
pixi listWith this Apptainer defintion file the container image can then be
built with apptainer build
and can optionally have the stage scoped variables set with
BASH
apptainer build <container image name>.sif --build-arg CUDA_VERSION=12 --build-arg ENVIRONMENT_NAME=gpu <definition file name>.defAutomation with GitHub Actions workflows
In the personal GitHub repository that we’ve been working in, create a GitHub Actions workflow directory from the top level of the repository
and then add the following workflow file as
.github/workflows/apptainer.yaml
YAML
name: Apptainer Images
on:
push:
branches:
- main
tags:
- 'v*'
paths:
- 'cuda-exercise/pixi.toml'
- 'cuda-exercise/pixi.lock'
- 'cuda-exercise/apptainer.def'
- 'cuda-exercise/app/**'
pull_request:
paths:
- 'cuda-exercise/pixi.toml'
- 'cuda-exercise/pixi.lock'
- 'cuda-exercise/apptainer.def'
- 'cuda-exercise/app/**'
release:
types: [published]
workflow_dispatch:
concurrency:
group: ${{ github.workflow }}-${{ github.ref }}
cancel-in-progress: true
permissions: {}
jobs:
apptainer:
name: Build and publish images
runs-on: ubuntu-latest
permissions:
contents: read
packages: write
steps:
- name: Free disk space
uses: AdityaGarg8/remove-unwanted-software@v5
with:
remove-android: 'true'
remove-dotnet: 'true'
remove-haskell: 'true'
- name: Checkout
uses: actions/checkout@v4
with:
fetch-depth: 0
- name: Get commit SHA
id: meta
run: |
# Get the short commit SHA (first 7 characters)
SHA=$(git rev-parse --short HEAD)
echo "sha=sha-$SHA" >> $GITHUB_OUTPUT
- name: Install Apptainer
uses: eWaterCycle/setup-apptainer@v2
- name: Build container from definition file
working-directory: ./cuda-exercise
run: apptainer build gpu-noble-cuda-12.9.sif apptainer.def
- name: Test container
working-directory: ./cuda-exercise
run: apptainer test gpu-noble-cuda-12.9.sif
- name: Login to GitHub Container Registry
if: github.event_name != 'pull_request'
uses: docker/login-action@v3
with:
registry: ghcr.io
username: ${{ github.repository_owner }}
password: ${{ secrets.GITHUB_TOKEN }}
- name: Deploy built container
if: github.event_name != 'pull_request'
working-directory: ./cuda-exercise
run: |
apptainer push gpu-noble-cuda-12.9.sif oras://ghcr.io/${{ github.repository }}:apptainer-gpu-noble-cuda-12.9
apptainer push gpu-noble-cuda-12.9.sif oras://ghcr.io/${{ github.repository }}:apptainer-gpu-noble-cuda-12.9-${{ steps.meta.outputs.sha }}This will build your Apptainer definition file in GitHub Actions CI
into a .sif container image and then deploy it to the GitHub
Container Registry (ghcr) associated with your
repository.
Version Control
We now want to use these tools to build our Pixi environment into an Apptainer Linux container.
On a new branch in your repository, add and commit the files from this episode.
Then push your branch to your remote on GitHub
and make a pull request to merge your changes into your remote’s default branch.
- Pixi environments can be easily installed into Linux containers.
- As Pixi environments contain the entire software environment, the Linux container build script can simply install the Pixi environment.
- Using GitHub Actions workflows allows for the build process to happen automatically through CI/CD.
Which is a valid and effective solution.↩︎
Content from Using Pixi environments on HTC Systems
Last updated on 2025-12-05 | Edit this page
Estimated time: 90 minutes
Overview
Questions
- How can you run workflows that use GPUs with Pixi CUDA environments using HTCondor?
- What solutions exist for the resources you have?
Objectives
- Learn how to submit containerized workflows to HTC systems.
High Throughput Computing (HTC)
One of the most common forms of production computing is high-throughput computing (HTC), where computational problems as distributed across multiple computing resources to parallelize computations and reduce total compute time. HTC resources are quite dynamic, but usually focus on smaller memory and disk requirements on each individual worker compute node. This is in contrast to high-performance computing (HPC) where there are comparatively fewer compute nodes but the capabilities and associated memory, disk, and bandwidth resources are much higher.
The most common HTC workflow management system is HTCondor.
Setting up a problem
First let’s create a computing problem to apply these compute systems to.
Let’s first create a new project in our Git repository
OUTPUT
✔ Created ~/<username>/pixi-cuda-lesson/htcondor/pixi.tomlTraining a PyTorch model on the MNIST dataset
Let’s write a very standard tutorial example of training a deep neral network on the MNIST dataset with PyTorch and then run it on GPUs in an HTCondor worker pool.
Mea culpa, more interesting examples exist
More exciting examples will be used in the future, but MNIST is perhaps one of the most simple examples to illustrate a point.
The neural network code
We’ll download Python code that uses a convocational neural network
written in PyTorch to learn to identify the handwritten number of the
MNIST dataset and place it under a src/ directory. This is
a modified
example from the PyTorch documentation which is licensed
under the BSD 3-Clause license.
BASH
mkdir -p src
curl -sL https://github.com/matthewfeickert/nvidia-gpu-ml-library-test/raw/c7889222544928fb6f9fdeb1145767272b5cfec8/torch_MNIST.py -o ./src/torch_MNIST.py
curl -sL https://github.com/matthewfeickert/nvidia-gpu-ml-library-test/raw/36c725360b1b1db648d6955c27bd3885b29a3273/torch_detect_GPU.py -o ./src/torch_detect_GPU.pyThe Pixi environment
Now let’s think about what we need to use this code. Looking at the
imports of src/torch_MNIST.py we can see that
torch and torchvision are the only imported
libraries that aren’t part of the Python standard library, so we will
need to depend on PyTorch and torchvision. We also know
that we’d like to use CUDA accelerated code, so that we’ll need CUDA
libraries and versions of PyTorch that support CUDA.
Create the environment
Create a Pixi workspace that:
- Has PyTorch and
torchvisionin it. - Has the ability to support CUDA v12.
- Has an environment that has the CPU version of PyTorch and
torchvisionthat can be installed onlinux-64,osx-arm64, andwin-64. - Has an environment that has the GPU version of PyTorch and
torchvisionthat can be installed onlinux-64, andwin-64.
This is just expanding the exercises from the CUDA conda packages episode.
Let’s first add all the platforms we want to work with to the workspace
OUTPUT
✔ Added linux-64
✔ Added osx-arm64
✔ Added win-64Let’s add the CPU requirements to a feature named
cpu
OUTPUT
✔ Added pytorch-cpu
✔ Added torchvision
Added these only for feature: cpuand then create an environment named cpu with that
feature
OUTPUT
✔ Added environment cpuand insatiate it with particular versions
TOML
[workspace]
channels = ["conda-forge"]
name = "htcondor"
platforms = ["linux-64", "osx-arm64", "win-64"]
version = "0.1.0"
[tasks]
[dependencies]
[feature.cpu.dependencies]
pytorch-cpu = ">=2.7.1,<3"
torchvision = ">=0.24.0,<0.25"
[environments]
cpu = ["cpu"]Now let’s add the GPU environment and dependencies. Let’s start with the CUDA system requirements
and create an environment from the feature
OUTPUT
✔ Added environment gpuand then add the GPU dependencies for the target platform of
linux-64 (where we’ll run in production).
OUTPUT
✔ Added pytorch-gpu >=2.7.1,<3
✔ Added torchvision >=0.24.0,<0.25
Added these only for platform(s): linux-64, win-64
Added these only for feature: gpuTOML
[workspace]
channels = ["conda-forge"]
name = "htcondor"
platforms = ["linux-64", "osx-arm64", "win-64"]
version = "0.1.0"
[tasks]
[dependencies]
[feature.cpu.dependencies]
pytorch-cpu = ">=2.7.1,<3"
torchvision = ">=0.24.0,<0.25"
[feature.gpu.system-requirements]
cuda = "12"
[feature.gpu.target.linux-64.dependencies]
pytorch-gpu = ">=2.7.1,<3"
torchvision = ">=0.24.0,<0.25"
[feature.gpu.target.win-64.dependencies]
pytorch-gpu = ">=2.7.1,<3"
torchvision = ">=0.24.0,<0.25"
[environments]
cpu = ["cpu"]
gpu = ["gpu"]To validate that things are working with the CPU code, let’s do a
short training run for only 2 epochs in the
cpu environment.
OUTPUT
100.0%
100.0%
100.0%
100.0%
Train Epoch: 1 [0/60000 (0%)] Loss: 2.329474
Train Epoch: 1 [640/60000 (1%)] Loss: 1.425185
Train Epoch: 1 [1280/60000 (2%)] Loss: 0.826808
Train Epoch: 1 [1920/60000 (3%)] Loss: 0.556883
Train Epoch: 1 [2560/60000 (4%)] Loss: 0.483756
...
Train Epoch: 2 [57600/60000 (96%)] Loss: 0.146226
Train Epoch: 2 [58240/60000 (97%)] Loss: 0.016065
Train Epoch: 2 [58880/60000 (98%)] Loss: 0.003342
Train Epoch: 2 [59520/60000 (99%)] Loss: 0.001542
Test set: Average loss: 0.0351, Accuracy: 9874/10000 (99%)Running multiple ways
What’s another way we could have run this other than with
pixi run?
The Linux container
Apptainer
Let’s write an Apptainer definition file that installs the
gpu environment, and nothing else, into the container image
when built.
Bootstrap: docker
From: ghcr.io/prefix-dev/pixi:noble
Stage: build
# %arguments have to be defined at each stage
%arguments
CUDA_VERSION=12
ENVIRONMENT=gpu
%files
./pixi.toml /app/
./pixi.lock /app/
./.gitignore /app/
%post
#!/bin/bash
export CONDA_OVERRIDE_CUDA={{ CUDA_VERSION }}
cd /app/
pixi info
pixi install --locked --environment {{ ENVIRONMENT }}
echo "#!/bin/bash" > /app/entrypoint.sh && \
pixi shell-hook --environment {{ ENVIRONMENT }} -s bash >> /app/entrypoint.sh && \
echo 'exec "$@"' >> /app/entrypoint.sh
Bootstrap: docker
From: ghcr.io/prefix-dev/pixi:noble
Stage: final
%arguments
ENVIRONMENT=gpu
%files from build
/app/.pixi/envs/{{ ENVIRONMENT }} /app/.pixi/envs/{{ ENVIRONMENT }}
/app/pixi.toml /app/pixi.toml
/app/pixi.lock /app/pixi.lock
/app/.gitignore /app/.gitignore
# The ignore files are needed for 'pixi run' to work in the container
/app/.pixi/.gitignore /app/.pixi/.gitignore
/app/.pixi/.condapackageignore /app/.pixi/.condapackageignore
/app/entrypoint.sh /app/entrypoint.sh
%post
#!/bin/bash
cd /app/
pixi info
chmod +x /app/entrypoint.sh
%runscript
#!/bin/bash
/app/entrypoint.sh "$@"
%startscript
#!/bin/bash
/app/entrypoint.sh "$@"
%test
#!/bin/bash -e
. /app/entrypoint.sh
pixi info
pixi listDocker
Let’s write a Dockerfile that installs the
gpu environment into the container image when built.
Write the Dockerfile
Write a Dockerfile that will install the
gpu environment and only the gpu environment
into the container image.
DOCKERFILE
ARG CUDA_VERSION="12"
ARG ENVIRONMENT="gpu"
FROM ghcr.io/prefix-dev/pixi:noble AS build
ARG CUDA_VERSION
ARG ENVIRONMENT
WORKDIR /app
COPY . .
ENV CONDA_OVERRIDE_CUDA=$CUDA_VERSION
RUN pixi install --locked --environment $ENVIRONMENT
RUN echo "#!/bin/bash" > /app/entrypoint.sh && \
    pixi shell-hook --environment $ENVIRONMENT -s bash >> /app/entrypoint.sh && \
    echo 'exec "$@"' >> /app/entrypoint.sh
FROM ghcr.io/prefix-dev/pixi:noble AS final
ARG ENVIRONMENT
WORKDIR /app
COPY --from=build /app/.pixi/envs/$ENVIRONMENT /app/.pixi/envs/$ENVIRONMENT
COPY --from=build /app/pixi.toml /app/pixi.toml
COPY --from=build /app/pixi.lock /app/pixi.lock
COPY --from=build /app/.pixi/.gitignore /app/.pixi/.gitignore
COPY --from=build /app/.pixi/.condapackageignore /app/.pixi/.condapackageignore
COPY --from=build --chmod=0755 /app/entrypoint.sh /app/entrypoint.sh
ENTRYPOINT [ "/app/entrypoint.sh" ]Building and deploying the container image
Now let’s add a GitHub Actions pipeline to build the container image definition files (apptainer.def and Dockerfile) and deploy it to a Linux container registry.
Build and deploy Linux container image to registry
Add a GitHub Actions pipeline that will build both the apptainer.def
and Dockerfile files deploy them to GitHub Container Registry
(ghcr). Have the image tags include the text
mnist as this will be the identifying problem.
Create the GitHub Actions workflow directory tree
and then write a YAML file at
.github/workflows/containers.yaml that contains the
following:
YAML
name: Build and publish Linux container images
on:
push:
branches:
- main
tags:
- 'v*'
paths:
- 'htcondor/pixi.toml'
- 'htcondor/pixi.lock'
- 'htcondor/apptainer.def'
- 'htcondor/Dockerfile'
- 'htcondor/.dockerignore'
pull_request:
paths:
- 'htcondor/pixi.toml'
- 'htcondor/pixi.lock'
- 'htcondor/apptainer.def'
- 'htcondor/Dockerfile'
- 'htcondor/.dockerignore'
release:
types: [published]
workflow_dispatch:
concurrency:
group: ${{ github.workflow }}-${{ github.ref }}
cancel-in-progress: true
permissions: {}
jobs:
docker:
name: Build and publish Docker images
runs-on: ubuntu-latest
permissions:
contents: read
packages: write
steps:
- name: Checkout
uses: actions/checkout@v4
with:
fetch-depth: 0
- name: Docker meta
id: meta
uses: docker/metadata-action@v5
with:
images: |
ghcr.io/${{ github.repository }}
# generate Docker tags based on the following events/attributes
tags: |
type=raw,value=mnist-gpu-noble-cuda-12.9
type=raw,value=latest
type=sha
type=sha,prefix=mnist-gpu-noble-cuda-12.9-sha-
- name: Set up QEMU
uses: docker/setup-qemu-action@v3
- name: Set up Docker Buildx
uses: docker/setup-buildx-action@v3
- name: Login to GitHub Container Registry
if: github.event_name != 'pull_request'
uses: docker/login-action@v3
with:
registry: ghcr.io
username: ${{ github.repository_owner }}
password: ${{ secrets.GITHUB_TOKEN }}
- name: Test build
id: docker_build_test
uses: docker/build-push-action@v6
with:
context: htcondor
file: htcondor/Dockerfile
tags: ${{ steps.meta.outputs.tags }}
labels: ${{ steps.meta.outputs.labels }}
pull: true
- name: Deploy build
id: docker_build_deploy
uses: docker/build-push-action@v6
with:
context: htcondor
file: htcondor/Dockerfile
tags: ${{ steps.meta.outputs.tags }}
labels: ${{ steps.meta.outputs.labels }}
pull: true
push: ${{ github.event_name != 'pull_request' }}
apptainer:
name: Build and publish Apptainer images
runs-on: ubuntu-latest
permissions:
contents: read
packages: write
steps:
- name: Free disk space
uses: AdityaGarg8/remove-unwanted-software@v5
with:
remove-android: 'true'
remove-dotnet: 'true'
remove-haskell: 'true'
- name: Checkout
uses: actions/checkout@v4
with:
fetch-depth: 0
- name: Get commit SHA
id: meta
run: |
# Get the short commit SHA (first 7 characters)
SHA=$(git rev-parse --short HEAD)
echo "sha=sha-$SHA" >> $GITHUB_OUTPUT
- name: Install Apptainer
uses: eWaterCycle/setup-apptainer@v2
- name: Build container from definition file
working-directory: ./htcondor
run: apptainer build gpu-noble-cuda-12.9.sif apptainer.def
- name: Test container
working-directory: ./htcondor
run: apptainer test gpu-noble-cuda-12.9.sif
- name: Login to GitHub Container Registry
if: github.event_name != 'pull_request'
uses: docker/login-action@v3
with:
registry: ghcr.io
username: ${{ github.repository_owner }}
password: ${{ secrets.GITHUB_TOKEN }}
- name: Deploy built container
if: github.event_name != 'pull_request'
working-directory: ./htcondor
run: apptainer push gpu-noble-cuda-12.9.sif oras://ghcr.io/${{ github.repository }}:apptainer-mnist-gpu-noble-cuda-12.9-${{ steps.meta.outputs.sha }}Version Control
We now want to make sure that we can build container images with these defention files and workflows.
On a new branch in your repository, add and commit the files from this episode.
BASH
git add htcondor/pixi.*
git add htcondor/.git*
git add htcondor/apptainer.def
git add htcondor/Dockerfile.def
git add .github/workflows/containers.yamlThen push your branch to your remote on GitHub
and make a pull request to merge your changes into your remote’s default branch.
To verify that things are visible to other computers, install the
Linux container utility crane
└── crane: 0.20.5 (installed)
└─ exposes: craneand then use crane ls
to list all of the Docker container images in your container registry
for the particular image
HTCondor
This episode will be on a remote system
All the computation in the rest of this episode will take place on a remote system with a HTC workflow manager.
To provide a very high level overview of HTCondor in this episode we’ll focus on only a few of its many resources and capabilities.
- Writing HTCondor execution scripts to define what the HTCondor worker nodes will actually do.
- Writing HTCondor submit description files to send our jobs to the HTCondor worker pool.
- Submitting those jobs with
condor_submitand monitoring them withcondor_q.
Connection between execution scripts and submit description files
As HTCondor execution scripts are given as the
executable field in HTCondor submit description files, they
are tightly linked and can not be written fully independently. Though
they are presented as separate steps above, you will in practice write
these together.
Write the HTCondor execution script
Let’s first start to write the execution script
mnist_gpu_apptainer.sh, as we can think about how that
relates to our code.
- We’ll be running in the
gpuenvironment that we defined with Pixi and built into our Apptainer container image. - For security reasons the HTCondor worker nodes don’t have full connection to all of the internet. So we’ll need to transfer out input data and source code rather than download it on demand.
- We’ll need to activate the environment using the
/app/entrypoint.shscript we built into the Apptainer container image.
BASH
#!/bin/bash
# mnist_gpu_apptainer.sh
# detailed logging to stderr
set -x
echo -e "# Hello from Job ${1} running on $(hostname)\n"
echo -e "# GPUs assigned: ${CUDA_VISIBLE_DEVICES}\n"
echo -e "# Activate Pixi environment\n"
# The last line of the entrypoint.sh file is 'exec "$@"'. If this shell script
# receives arguments, exec will interpret them as arguments to it, which is not
# intended. To avoid this, strip the last line of entrypoint.sh and source that
# instead.
. <(sed '$d' /app/entrypoint.sh)
echo -e "# Check to see if the NVIDIA drivers can correctly detect the GPU:\n"
nvidia-smi
echo -e "\n# Check that the training code exists:\n"
ls -1ap ./src/
echo -e "\n# Check if PyTorch can detect the GPU:\n"
python ./src/torch_detect_GPU.py
echo -e "\n# Extract the training data:\n"
if [ -f "MNIST_data.tar.gz" ]; then
tar -vxzf MNIST_data.tar.gz
else
echo "The training data archive, MNIST_data.tar.gz, is not found."
echo "Please transfer it to the worker node in the HTCondor jobs submission file."
exit 1
fi
echo -e "\n# Train MNIST with PyTorch:\n"
time python ./src/torch_MNIST.py --data-dir ./data --epochs 14 --save-modelWrite the HTCondor submit description file
This is pretty standard boiler plate taken from the HTCondor documentation
# mnist_gpu_apptainer.sub
# Submit file to access the GPU via apptainer
universe = container
container_image = oras://ghcr.io/<github user name>/pixi-cuda-lesson:apptainer-mnist-gpu-noble-cuda-12.9-sha-<sha>
# set the log, error and output files
log = mnist_gpu_apptainer_$(Cluster)_$(Process).log.txt
error = mnist_gpu_apptainer_$(Cluster)_$(Process).err.txt
output = mnist_gpu_apptainer_$(Cluster)_$(Process).out.txt
# set the executable to run
executable = mnist_gpu_apptainer.sh
arguments = $(Process)
+JobDurationCategory = "Medium"
# transfer training data files and runtime source files to the compute node
transfer_input_files = MNIST_data.tar.gz,src
# transfer the serialized trained model back
transfer_output_files = mnist_cnn.pt
should_transfer_files = YES
when_to_transfer_output = ON_EXIT
# Require a machine with a modern version of the CUDA driver
requirements = (GPUs_DriverVersion >= 12.0)
# We must request 1 CPU in addition to 1 GPU
request_cpus = 1
request_gpus = 1
# select some memory and disk space
request_memory = 2GB
# Apptainer jobs take more disk than Docker jobs for some reason
request_disk = 7GB
# Optional: specify the GPU hardware architecture required
# Check against the CUDA GPU Compute Capability for your software
# e.g. python -c "import torch; print(torch.cuda.get_arch_list())"
# The listed 'sm_xy' values show the x.y gpu capability supported
gpus_minimum_capability = 5.0
# Optional: required GPU memory
gpus_minimum_memory = 2GB
# Tell HTCondor to run 1 instances of our job:
queue 1Write the submission script
To make it easy for us, we can write a small job submission script
submit.sh that will prepare the data for us and submit the
submit description file to HTCondor for us with condor_submit.
BASH
#!/bin/bash
# submit.sh
# Download the training data locally to transfer to the worker node
if [ ! -f "MNIST_data.tar.gz" ]; then
# c.f. https://github.com/CHTC/templates-GPUs/blob/450081144c6ae0657123be2a9a357cb432d9d394/shared/pytorch/MNIST_data.tar.gz
curl -sLO https://raw.githubusercontent.com/CHTC/templates-GPUs/450081144c6ae0657123be2a9a357cb432d9d394/shared/pytorch/MNIST_data.tar.gz
fi
# Ensure existing models are backed up
if [ -f "mnist_cnn.pt" ]; then
mv mnist_cnn.pt mnist_cnn_"$(date '+%Y-%m-%d-%H-%M')".pt.bak
fi
condor_submit mnist_gpu_apptainer.subSubmitting the job
Before we actually submit code to run, we can submit an interactive job from the HTCondor system’s login nodes to check that things work as expected.
BASH
#!/bin/bash
# interact.sh
# Download the training data locally to transfer to the worker node
if [ ! -f "MNIST_data.tar.gz" ]; then
# c.f. https://github.com/CHTC/templates-GPUs/blob/450081144c6ae0657123be2a9a357cb432d9d394/shared/pytorch/MNIST_data.tar.gz
curl -sLO https://raw.githubusercontent.com/CHTC/templates-GPUs/450081144c6ae0657123be2a9a357cb432d9d394/shared/pytorch/MNIST_data.tar.gz
fi
# Ensure existing models are backed up
if [ -f "mnist_cnn.pt" ]; then
mv mnist_cnn.pt mnist_cnn_"$(date '+%Y-%m-%d-%H-%M')".pt.bak
fi
condor_submit -interactive mnist_gpu_apptainer.subSubmitting the job for the first time will take a bit as it needs to pull down the container image, so be patient. The container image will be cached in the future and so this will be faster.
OUTPUT
Submitting job(s).
1 job(s) submitted to cluster 2127828.
Waiting for job to start...
...
Welcome to interactive3_1@vetsigian0001.chtc.wisc.edu!
Your condor job is running with pid(s) 2368233.
groups: cannot find name for group ID 24433
groups: cannot find name for group ID 40092
I have no name!@vetsigian0001:/var/lib/condor/execute/slot3/dir_2367762$We can now activate our environment manually and look around
OUTPUT
(htcondor:gpu) I have no name!@vetsigian0001:/var/lib/condor/execute/slot3/dir_2367762$OUTPUT
/app/.pixi/envs/gpu/bin/pythonOUTPUT
Python 3.13.9OUTPUT
Environment: gpu
Package Version Build Size Kind Source
libtorch 2.7.1 cuda129_mkl_h9562ed8_304 836.3 MiB conda https://conda.anaconda.org/conda-forge/
pytorch 2.7.1 cuda129_mkl_py313_h1e53aa0_304 28.1 MiB conda https://conda.anaconda.org/conda-forge/
pytorch-gpu 2.7.1 cuda129_mkl_h43a4b0b_304 46.9 KiB conda https://conda.anaconda.org/conda-forge/
torchvision 0.24.0 cuda129_py313_h6be0d2c_0 3.1 MiB conda https://conda.anaconda.org/conda-forge/
torchvision-extra-decoders 0.0.2 py313hf1e760e_3 62.9 KiB conda https://conda.anaconda.org/conda-forge/OUTPUT
Environment: gpu
Package Version Build Size Kind Source
cuda-crt-tools 12.9.86 ha770c72_2 28.5 KiB conda https://conda.anaconda.org/conda-forge/
cuda-cudart 12.9.79 h5888daf_0 22.7 KiB conda https://conda.anaconda.org/conda-forge/
cuda-cudart_linux-64 12.9.79 h3f2d84a_0 192.6 KiB conda https://conda.anaconda.org/conda-forge/
cuda-cuobjdump 12.9.82 hffce074_1 239.3 KiB conda https://conda.anaconda.org/conda-forge/
cuda-cupti 12.9.79 h676940d_1 1.8 MiB conda https://conda.anaconda.org/conda-forge/
cuda-nvcc-tools 12.9.86 he02047a_2 26.1 MiB conda https://conda.anaconda.org/conda-forge/
cuda-nvdisasm 12.9.88 hffce074_1 5.3 MiB conda https://conda.anaconda.org/conda-forge/
cuda-nvrtc 12.9.86 hecca717_1 64.1 MiB conda https://conda.anaconda.org/conda-forge/
cuda-nvtx 12.9.79 hecca717_1 28.7 KiB conda https://conda.anaconda.org/conda-forge/
cuda-nvvm-tools 12.9.86 h4bc722e_2 23.1 MiB conda https://conda.anaconda.org/conda-forge/
cuda-version 12.9 h4f385c5_3 21.1 KiB conda https://conda.anaconda.org/conda-forge/OUTPUT
Thu Aug 14 06:36:21 2025
+-----------------------------------------------------------------------------------------+
| NVIDIA-SMI 555.42.06 Driver Version: 555.42.06 CUDA Version: 12.5 |
|-----------------------------------------+------------------------+----------------------+
| GPU Name Persistence-M | Bus-Id Disp.A | Volatile Uncorr. ECC |
| Fan Temp Perf Pwr:Usage/Cap | Memory-Usage | GPU-Util Compute M. |
| | | MIG M. |
|=========================================+========================+======================|
| 0 NVIDIA A100-PCIE-40GB On | 00000000:81:00.0 Off | 0 |
| N/A 25C P0 35W / 250W | 4MiB / 40960MiB | 0% Default |
| | | Disabled |
+-----------------------------------------+------------------------+----------------------+
+-----------------------------------------------------------------------------------------+
| Processes: |
| GPU GI CI PID Type Process name GPU Memory |
| ID ID Usage |
|=========================================================================================|
| No running processes found |
+-----------------------------------------------------------------------------------------+We can interactively run our code as well
BASH
tar -vxzf MNIST_data.tar.gz
time python ./src/torch_MNIST.py --data-dir ./data --epochs 2 --save-modelTo return to the login node we just exit the interactive
session
Now to submit our job normally, we run the submit.sh
script
OUTPUT
Submitting job(s).
1 job(s) submitted to cluster 12651114.and its submission and state can be monitored with condor_q.
OUTPUT
-- Schedd: ap40.uw.osg-htc.org : <128.105.68.62:9618?... @ 08/14/25 08:20:12
OWNER BATCH_NAME SUBMITTED DONE RUN IDLE TOTAL JOB_IDS
matthew.feickert ID: 12651114 8/14 08:18 _ 1 _ 1 12651114.0
1 jobs; 0 completed, 0 removed, 0 idle, 1 running, 0 held, 0 suspended
When the job finishes we see that HTCondor has returned to us the following files:
-
mnist_gpu_apptainer_$(Cluster)_$(Process).log.txt: the HTCondor log file for the job -
mnist_gpu_apptainer_$(Cluster)_$(Process).out.txt: the stdout of all actions executed in the job -
mnist_gpu_apptainer_$(Cluster)_$(Process).err.txt: the stderr of all actions executed in the job -
mnist_cnn.pt: the serialized trained PyTorch model
- You can use containerized Pixi environments with HTC systems to be able to run CUDA accelerated code that you defined.
Content from Using Pixi environments on HPC Systems
Last updated on 2025-12-05 | Edit this page
Estimated time: 40 minutes
Overview
Questions
- How can you run workflows that use GPUs with Pixi CUDA environments using Slurm?
- What solutions exist for the resources you have?
Objectives
- Learn how to submit containerized workflows to HPC systems.
High-Performance Computing (HPC)
As mentioned in the HTC lesson, high-performance computing (HPC) focuses on using large computing resources, like supercomputers and high memory queues, to address large scale and compute intensive jobs that can not be weakly parallelized. The most common HPC workflow management system is Slurm.
Given the nature of HPC systems acting like “big computers”, you can use Pixi with HPCs and Slurm in effectively the same manner as you would on a local machine, but just driven through Slurm.
Setting up a problem
To demonstrate this, we’ll use the same problem as we did in the HTC example. Let’s first create a new project in our Git repository
OUTPUT
✔ Created ~/<username>/pixi-cuda-lesson/slurm/pixi.tomland use the same example code
BASH
mkdir -p src
curl -sL https://github.com/matthewfeickert/nvidia-gpu-ml-library-test/raw/c7889222544928fb6f9fdeb1145767272b5cfec8/torch_MNIST.py -o ./src/torch_MNIST.py
curl -sL https://github.com/matthewfeickert/nvidia-gpu-ml-library-test/raw/36c725360b1b1db648d6955c27bd3885b29a3273/torch_detect_GPU.py -o ./src/torch_detect_GPU.pyand the same Pixi workspace
TOML
[workspace]
channels = ["conda-forge"]
name = "slurm"
platforms = ["linux-64", "osx-arm64", "win-64"]
version = "0.1.0"

[tasks]

[dependencies]

[feature.cpu.dependencies]
pytorch-cpu = ">=2.7.1,<3"
torchvision = ">=0.24.0,<0.25"

[feature.gpu.system-requirements]
cuda = "12"

[feature.gpu.target.linux-64.dependencies]
pytorch-gpu = ">=2.7.1,<3"
torchvision = ">=0.24.0,<0.25"

[environments]
cpu = ["cpu"]
gpu = ["gpu"]
Slurm
This episode will be on a remote system
All the computation in the rest of this episode will take place on a remote system with a HPC workflow manager.
To provide a very high level overview of Slurm in this episode we’ll focus on only a few of its many resources and capabilities.
- Writing SLRUM execution scripts to define what the Slurm worker nodes will actually do.
- Writing a batch script to send our jobs to Slurm.
- Submitting those jobs with
sbatchand monitoring them withsqueue.
Write the Slurm execution script
Let’s first start to write the execution script
mnist_gpu.sh, as we can think about how that relates to our
code.
- We’ll be running in the
gpuenvironment that we defined with Pixi. - The workers will have access to the shared files system that the login node has, so we can write our execution script as if it was local.
BASH
#!/usr/bin/env bash

# detailed logging to stderr
set -x

echo -e "# Hello from Job ${1} running on $(hostname)\n"
echo -e "# GPUs assigned: ${CUDA_VISIBLE_DEVICES}\n"

echo -e "# Check to see if the NVIDIA drivers can correctly detect the GPU:\n"
nvidia-smi

nvidia-smi --query-gpu=name,compute_cap

echo -e "\n# Check if PyTorch can detect the GPU:\n"
pixi run --environment gpu python ./src/torch_detect_GPU.py

echo -e "\n# Check that the training code exists:\n"
ls -1ap ./src/

echo -e "\n# Train MNIST with PyTorch:\n"
time pixi run --environment gpu python ./src/torch_MNIST.py --epochs 14 --data-dir ./data --save-modelWrite the batch script
The batch script allows us to execute our jobs with srun when
submitted to Slurm with sbatch.
Configuration options for sbatch can be provided through
#SBATCH comments in the batch script header. Note that in
the mnist_gpu_slurm.sh there will be cluster specific
information that needs to be adjusted such as:
-
partition: Name of the partition available fromsinfo. -
account: Match to an “Account” returned by theaccountscommand. -
constraint: Constraint list on required node features, if any.
BASH
#!/usr/bin/env bash
# mnist_gpu_slurm.sh
#SBATCH --job-name="mnist_gpu"
#SBATCH --partition=<PARTITITON NAME>
#SBATCH --mem=2G
#SBATCH --nodes=1
#SBATCH --ntasks-per-node=1
#SBATCH --cpus-per-task=1
#SBATCH --constraint="<CONSTRAINT IF ANY>"
#SBATCH --gpus-per-node=1
#SBATCH --gpu-bind=closest  # select a cpu close to gpu on pci bus topology
#SBATCH --account=<ACCOUNT NAME>  # match to an "Account" returned by the 'accounts' command
#SBATCH --exclusive  # dedicated node for this job
#SBATCH --no-requeue
#SBATCH --time=01:00:00
#SBATCH --error mnist_gpu.slurm-%j.err
#SBATCH --output mnist_gpu.slurm-%j.out

# Ensure that no modules are loaded so starting from a clean environment
module reset

echo "job is starting on $(hostname)"

nvidia-smi

srun ./mnist_gpu.shComplete the batch script
Update the batch script above with the proper partition,
account, and constraint arguments for your HPC
system.
partition
Using sinfo -o "%R"
we can list all partitions available to us. For GPU jobs, consult your
HPC system’s administrators and documentation on what a reasonable
partition would be to use.
account
If the HPC system that you are on charges different accounts for
compute time, you will need to provide an account name in your
sbatch configuration. Consult your HPC system’s
administrators if you don’t know if you need an account or not. If you
do, the accounts command will give you a list of all the
accounts that you can charge.
constraint
The constraint argument allows you to require compute nodes to have different features. These constraints will be system specific, and should be documented.
Example: A system might have a "scratch" constraint that
means compute nodes have access to the scratch disk partition.
Write the submission script
To make it easy for us, we can write a small job submission script
submit.sh that will prepare the data for us and submit the
submit description file to Slurm for us with sbatch.
Submitting the job
To submit our job, we run the submit.sh script
OUTPUT
Submitted batch job 13422726and its submission and state can be monitored with squeue.
Example output: Pending state queued behind a higher priority job
OUTPUT
       JOBID    PARTITION         NAME           USER ST       TIME  NODES   NODELIST(REASON) FEATURES
    13422726     gpuA40x4    mnist_gpu       feickert PD       0:00      1         (Priority) scratch
Example output: Running job
OUTPUT
       JOBID    PARTITION         NAME           USER ST       TIME  NODES   NODELIST(REASON) FEATURES
    13422805     gpuA40x4    mnist_gpu       feickert  R       0:53      1            gpub043 scratch
When the job finishes we see that Slurm has returned to us the following files:
-
mnist_gpu.slurm-$(JOBID).out: the stdout of all actions executed in the job -
mnist_gpu.slurm-$(JOBID).err: the stderr of all actions executed in the job -
mnist_cnn.pt: the serialized trained PyTorch model
- You can use Pixi environments with HPC systems to be able to run CUDA accelerated code that you defined.