
Creating repositories using the web interface
Last updated on 2026-07-06 | Edit this page
Estimated time: 30 minutes
Overview
Questions
- How do I create a repository on GitHub?
- How do I record (commit) changes?
- How do I browse changes?
- What repository insights and settings are available?
Objectives
- Create a new repository using the GitHub web interface
- Create and edit files directly on GitHub
- Write clear, descriptive commit messages
- Browse a repository’s commit history
- Use Markdown to format text
We will practice creating a new repository using the web interface, committing changes to it, browsing the changes, creating branches, and more. This is everything you need to do basic file management, though you’ll probably want something faster to use. Still, it can be good for quick edits and contributions.
Step 1: Create a repository with a README and a license
You start off by creating a repository from the web. In fact, we usually end up doing this from the web, no matter how you do your daily work. The important questions are who is the owner and what is the name of the repository.
Make sure that you are logged into GitHub.
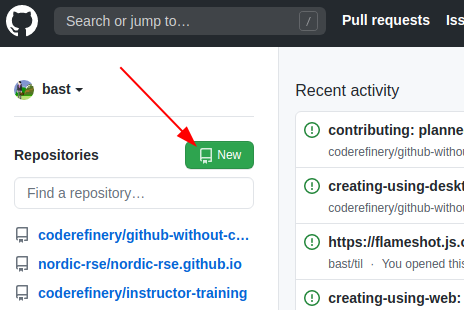
To create a repository we either click the green button “New” (top left corner):
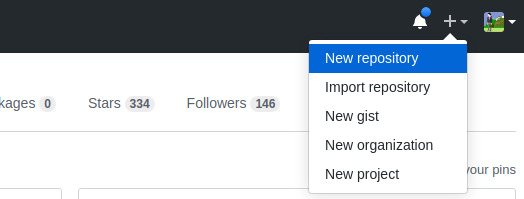
Or if you see your profile page, there is a “+” menu (top right corner):
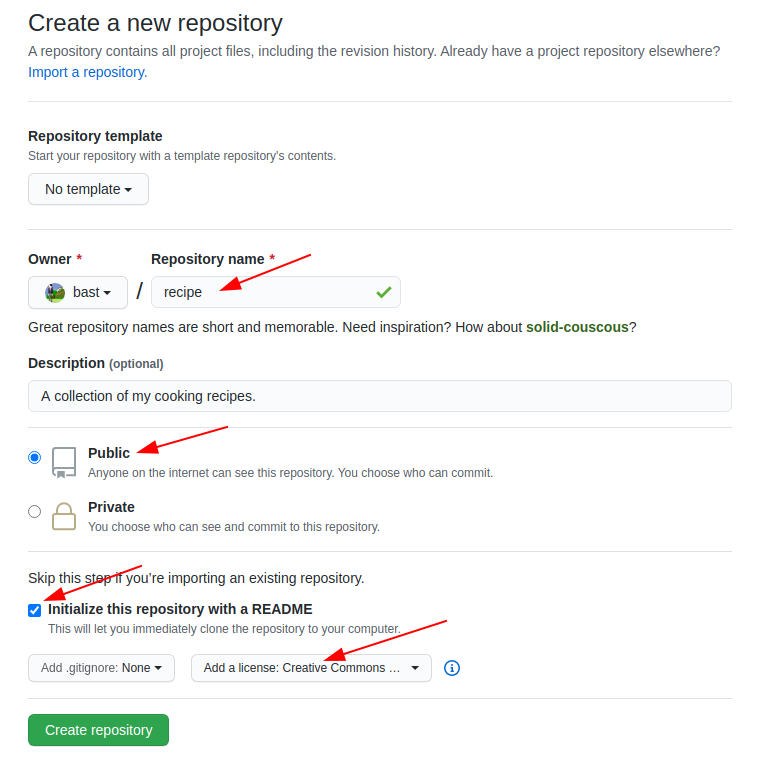
We then land at the following form. Please fill it out and set Initialize this repository with a README. Leave “Choose a License” as “None” for now — we will cover choosing a license in a later episode.
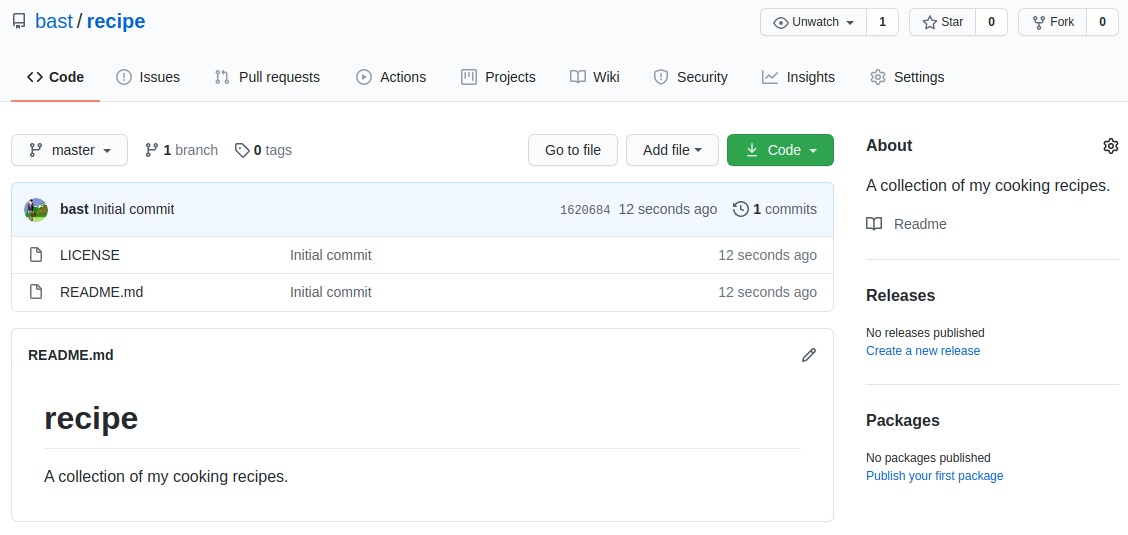
And now we have a repository with a README and LICENSE and one commit:
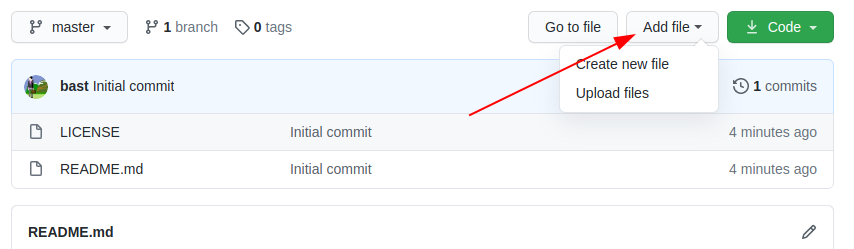
Step 2: Create a new file
We can easily add new files from the web interface.
Create a file, e.g. guacamole.md (the “md” ending
signals that this is in Markdown format):
In the new file you can share your favorite cooking recipe (or something else). You can also copy-paste this as a starting point:
Ingredients:
- 2 avocados
- 1 lime
- 2 tsp salt

Instructions:
- cut and mash avocados
- chop onion
- squeeze lime
- add salt
- and mix well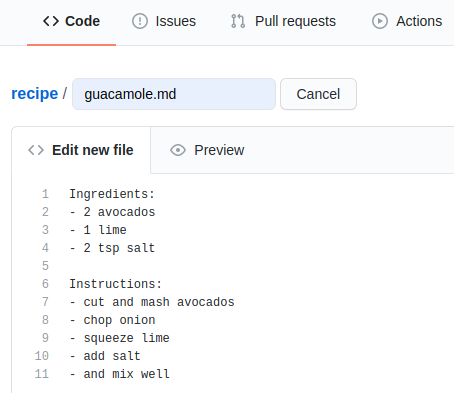
Then add a commit message and commit (save):
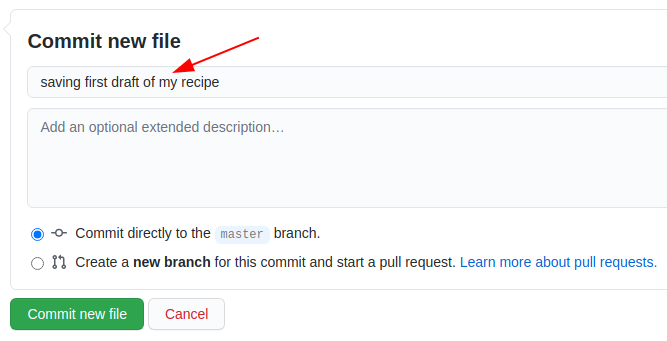
Discussion: Good commit messages
- What has changed is more useful than which file has changed
- Sometimes we forget to document why something was changed
- Many projects start out as projects “just for me” and end up to be successful projects that are developed by 50 people over decades.
- Write commit messages in English that will be understood 15 years from now by someone else than you.
- “My favourite Git commit”
- “On commit messages”
- “How to Write a Git Commit Message”
Step 3: Modify a file
We can also easily modify files from the web.
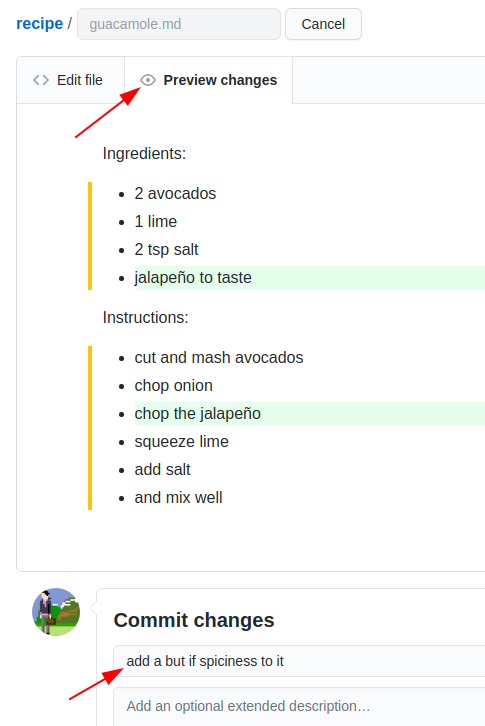
Now improve the recipe by adding an ingredient or an instruction step:
- Click on the file.
- Click the “pen” icon on top right (“edit this file”).
Make an improvement, write a commit message, commit:
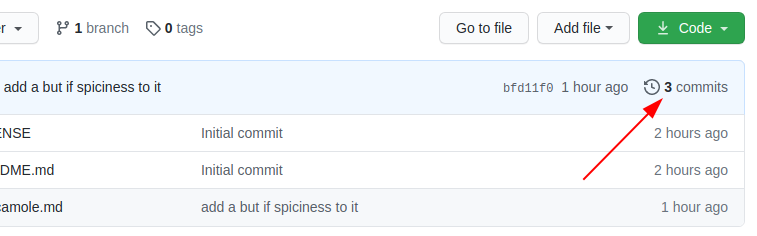
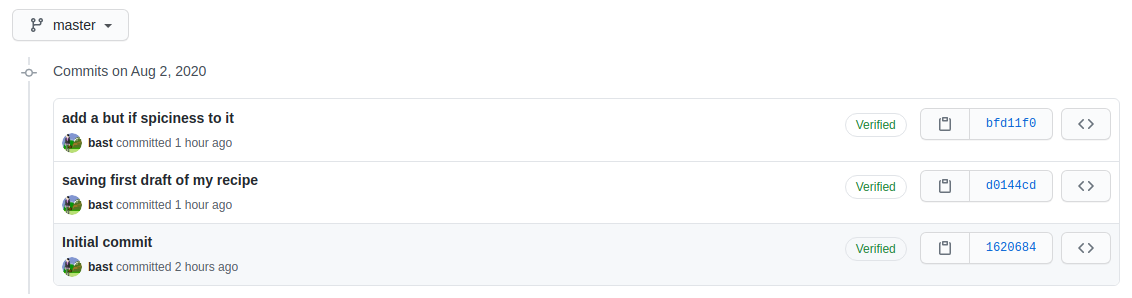
Once you have done that, browse your commits:
In this example, the commit history looked like:
In this episode, we saw how we could do basic file management from the web. It’s not the best for making lots of new content, but it’s pretty convenient for quick edits. We will now see more advanced ways to do the same things - you can always check back on the web to see the effect.
Markdown
Markdown is a lightweight markup language for creating formatted text using a plain-text editor. John Gruber and Aaron Swartz created Markdown in 2004 (Wikipedia).
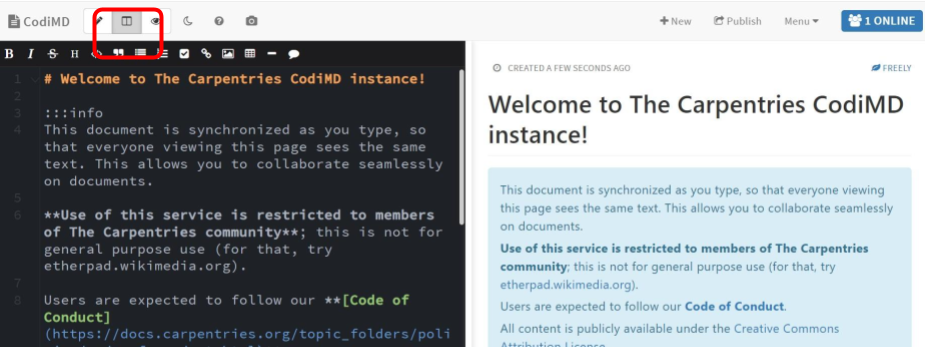
To practice using Markdown, and seeing how it is formatted, open up a new CodiMD document in your browser.
By default, the document will open in rendered view, but click on the middle split pane icon in the top left to show the Markdown and rendered views side-by-side.
Now using the CodiMD interface, we will learn the following Markdown equivalents:
- Headers
- Bold
- Italics
- Bullets
- Ordered Lists
- Images
- Links
Exercise: Practice Markdown
Use as many of the Markdown skills you just learned to edit either the README.md or guacamole.md files.
- You can create, edit, and commit files directly from the GitHub web interface.
- Good commit messages explain what changed and why.
- Markdown is a lightweight formatting language used throughout GitHub.