Content from Project-Level README.txt
Last updated on 2024-11-19 | Edit this page
Overview
Questions
- What is a
README.txtfile? - What is the bare minimum to include in a Project-Level README.txt file?
Objectives
- Learn what a Project-Level README.txt file is
- Be able to easily generate a Project-Level README.txt file for your project
Prerequisite
Download the Example README.txt
Introduction
A README file is the starting point for understanding the group of files it accompanies, stating in the name that it should be read first. README files are digital text files in a common format (often .txt or .md, but not exclusively) that provide information about a group of files. README’s are flexible and can be used for anything from describing a whole project (giving a project overview and general file layout) to providing nuanced documentation for a small subset of files. For those using a paper notebook, README’s can supplement written notes by keeping a copy of the documentation alongside digital data.
Project-Level (PLR) versus Dataset-level (DLR) README.txt
Data files living on a computer often need extra documentation for someone to understand what research they correspond to. In particular, it is useful to record the most basic project information and store it in the toplevel folder of each research project. The top level README discussed in this episode only pertains to the project-level data.
Callout
A project can contain multiple datasets, and each dataset should have it’s own associated README file describing that data. A README file is like the instruction manual for assembling furniture. It provides the necessary context and guidance to understand and use the accompanying pieces (digital content).
What to include in a PLR
In general, a PLR should include:
- Project description
- Project time period
- Project collaborators
- Storage locations for data, code, and files
- Project documentation methods
- File organization and naming conventions
- Any additional information necessary for understanding the files
Challenge
Make sure to download the example README.txt. Pick a research project and answer the included questions.
Key Points
- README files are crucial for understanding your data, especially a year later.
- The PLR contains is in the top level folder of the project and contains basic data about the project.
- Project would have one PLR and a DLR for all datasets.
Content from Dataset README and Data Dictionary
Last updated on 2024-11-19 | Edit this page
Overview
Questions
- What is a dataset-level README file?
- How is this different from a project-level README file?
- What is a data dictionary and how is it different from a data-level README file?
Objectives
- Be able to write a data-level README
- Be able to write out a data dictionary
Introduction
A data-level README (DLR) describes the dataset, the file structure, and the file naming scheme. Unlike a DLR, a data dictionary describes a single data file. Think of a data dictionary as a translator for a foreign language. It explains the meaning of each word (variable) in a dataset, making it understandable to others.
Let’s illustrate the differences between a DLR and a data dictionary
by using an example project. The following is a simple file structure
for our project with folder1 being a single dataset within
our project.
project
|   README.txt
|   file001.txt
|
|___folder1
|   |    README.txt
|   |    file011.txt
|   |    file011_dictionary.txt
|   |    file012.csv
|   |    file012_dictionary.txt
|   |    ...
|   |____subfolder1
|        |    file111.csv
|        |    file111_dictionary.txt
|        |    file112.csv
|        |    file112_dictionary.txt
We see from the example project that there is a PLR under the folder
project and a DLR in the top level of the first dataset,
signified by folder1.
Dataset-level README (DLR)
A DLR describes the data in each folder. Think of a researcher that
might pick up your data repository for the first time. They are looking
for a certain dataset that is described by the files under
subfolder1. The researcher will have two options here: they
can open data or data dictionary in each folder to see what type of data
is housed within, or they can look at the DLR that describes which data
is in each folder. For an example dataset, you can look at this one on
figshare: example
dataset.
Challenge
For the above folder structure, the dataset starts with
folder1 and all folders within. The data concerns
performance metrics of autonomous underwater vehicles (AUVs). Assume
that subfolder1 contains reference data from the following
reference:
Michael Coe, Stefanie Gutschmidt, Cost of Transport is not the whole story — A review, Ocean Engineering, Volume 313, Part 1, 2024, https://doi.org/10.1016/j.oceaneng.2024.119332.
file011.txt is text responses for a survey pertaining to
people’s views of AUVs.
file012.csv is comma-separated values (csv) of energy
requirements for AUVs.
file111.csv is data pertaining to the speed of different
AUV platforms.
file112.csv is data pertaining to the energy consumption
of different AUV platforms.
This example solution is written for a text (.txt) format, but could easily be used for a markdown (.md). Both of these formats can be open universally. Note that your solution can be different and this is just an example.
folder1 includes data for all figures included in this publication
file011.txt contains text responses of people view of AUVs used to generate figure 1
file012.csv contains new energy requirements for AUVs used to generate figure 2
subfolder2 houses all the reference data from the following reference:
Michael Coe, Stefanie Gutschmidt, Cost of Transport is not the whole story — A review, Ocean Engineering, Volume 313, Part 1, 2024, https://doi.org/10.1016/j.oceaneng.2024.119332.
file111.csv is data from the reference on the speed of different AUV platforms used in the generation of figure 3.
file112.csv is data from the reference on energy consumption of different AUV platforms, also included in figure 2.
Data Dictionary
Ideally, a spreadsheet is formatted with a row of variable names at the top, followed by rows of data going down. This makes easy for data to be used in any data analysis software (interoperability is a good thing) but makes it impossible to document a spreadsheet within the file itself. For this reason, it’s useful to create a data dictionary to describe the spreadsheet so that others can interpret the data. A data dictionary describes the variables in a spreadsheet, aiding in data interpretation. It should include:
- Variable name
- Variable description
- Variable units
- Relationships to other variables
- Coding values and their meanings
- Data issues
- Additional relevant information
You can download a blank example dictionary. Note: that this can be formatted in a spreadsheet for multiple variables or formatted for multiple variables in the text file.
The following callout is an example of a data dictionary.
Callout
| Question | Example |
|---|---|
| Variable name | site |
| Variable description | Two-letter abbreviation describing the name of the overall site where the sample was collected. |
| Variable units | N/A |
| Relationship to other variables | Partner to variable “sampleNum”, which together define the sample ID (site name + sample number at that site). Related to variables “latitude” and “longitude”, which record exact coordinate location and are more specific than the larger site code. |
| Variable coding values and meanings | Coding values and meanings: BL = Badlands NP; DV = Death Valley NP; GT = Grand Teton NP; JT = Joshua Tree NP; ZN = Zion NP |
| Known issues with the data | Some Badlands samples were collected outsideof the park boundaries; see latitude and longitude variables for specific locations. |
| Anything else to know about the data? | Older data (pre-2013) used one-letter abbreviations for site code but this was updated for clarity and ease of identification. |
Challenge
Let’s assume that we have a csv where the first row is all the variable names and each row after is a data point. In keeping with our previous challenge, the first three variables are t, L, and U which correspond to time, length, and speed. How would you write a data dictionary for these three variables?
| Question | t | L | U |
|---|---|---|---|
| Variable name | time | Length | Velocity |
| Variable description | timestep | length of the AUV | Velocity of the AUV |
| Variable units | second | meter | meter per second |
| Relationship to other variables | N/A | Partner variable to time | Partner variable to time |
| Variable coding values and meanings | N/A | N/A | N/A |
| Known issues with the data | N/A | Some lengths had to be estimated from figures | N/A |
| Anything else to know about the data? | N/A | N/A | N/A |
Key Points
- Data-level README can help a researcher quickly understand which data is which and where that data is stored in your dataset.
- Data-level README is a quick description of how your dataset is structured.
- Data dictionaries are a decoding of the variables used in a single file of your dataset.
Content from File Orgainization and Naming
Last updated on 2024-11-19 | Edit this page
Overview
Questions
- What is the best file organization scheme for you?
- What is the best file naming convention for you?
Objectives
- Determine how to create and implement a file organization scheme.
- Understand what some common file naming conventions are.
- Implement a file naming convention scheme for yourself.
Introduction
Implementing a file organization system is the first step toward creating order for your research data. Well-organized files make it easier to find the data you need without spending lots of time searching your computer. Every researcher organizes their files slightly differently, but the actual organizational system is less important that having a place where all of your files should logically go.
Card Sorting Exercise
This is a card-sorting exercise, meaning you will need a stack of note cards or post-it notes to do this activity, ideally in three different colors. There is no one correct way to do this so feel free to play around, add new cards, and move cards however you want! Once you put your new organizational system into place, be sure to always put your files where they’re supposed to go.
-
Take a stack of note cards or post-it notes in the first color and write the following labels on one card each, omitting any file types that you do not use in your research:
- Raw data
- Analyzed data
- Code
- Protocols
- Article drafts
- Figures
- My publications
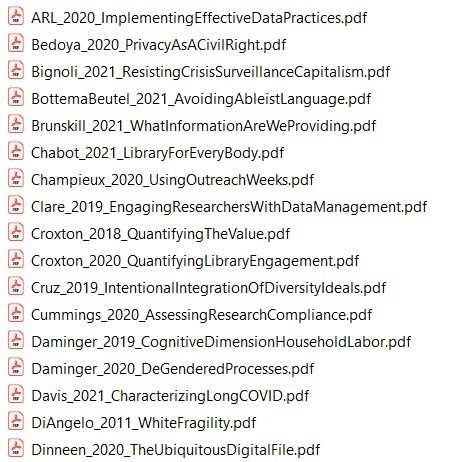
- Literature PDFs
- Grant documents
- Research notes
Move cards around and group together file-type cards that you want to store together. Files that will be stored near each other in a folder hierarchy, but not together, should be placed near each other while file types expected to be stored completely separately should be away from other cards.
-
Create hierarchies in file organization by adding new “folder” cards in one of two types; use different colored cards for each folder type:
- Cards in the second color represent a single folder. These should be labeled with the folder name in quotations (e.g. “Literature” or “My publications”).
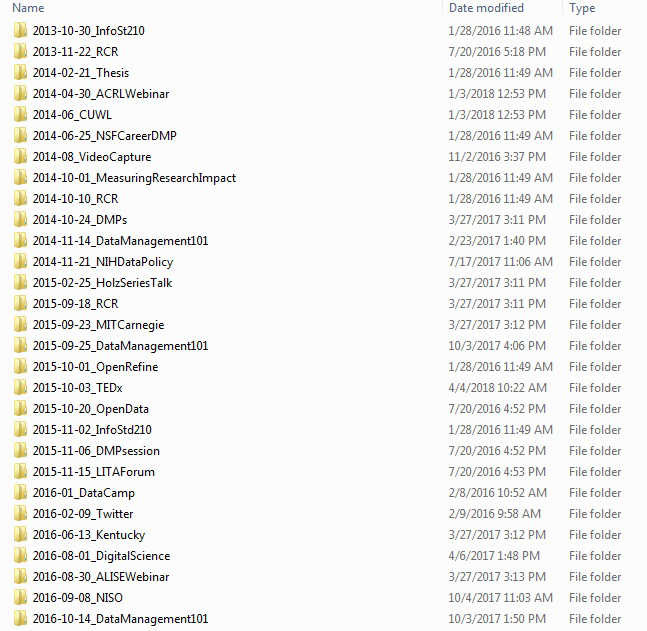
- Cards in the third color represent a group of folders, such as for folders organized by date or by project. Use only one card to represent the organizational pattern that will be repeated. These cards should be labeled with the organizational system in square brackets (e.g. [By date] or [By project]). Note: folders organized by date should, in real life, be labelled using the convention YYYYMMDD or YYYY-MM-DD to facilitate chronological sorting.
Move existing file-type cards/groups of file-type cards underneath the new folder cards to show the hierarchy of how a file type will be saved in a specific folder or group of folders. Organizational-group folders (cards in the third color) only need to be represented once in the card sorting, as they are assumed to represent multiple folders on a computer.
Make copies of any type of card and add folder levels, as needed. Adjust placement and hierarchies until you are happy with the organizational system you developed.
Record your organizational system in your lab notebook and/or a README.txt.

Create a File Naming Convention
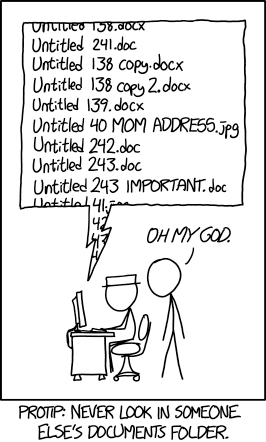
File naming conventions are a simple way to add order to your files and help to find them later. Rich and descriptive file names make it easier to search for files, understand at a glance what they contain, and tell related files apart. When creating a file naming convention, consider:
- The group of files covered by the convention.
- Important metadata that distinguishes files.
- Abbreviation or encoding of metadata.
- The order of metadata in the file name (prioritize date in ISO 8601 format for chronological sorting).
- Characters for separating metadata (use underscores, dashes, and capitalization).
- Version control (append version information or date).
- Documentation of the naming convention in a README.txt file.
Concerning Date Formats
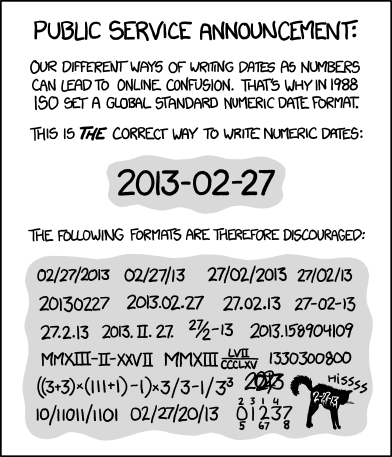
Indeed, ISO 8601 is an international standard that discusses date and time-related data. More information can be found on the corresponding wikepedia page.
File nameing Convention Exercise
Fill in each section for a group of related files following the instructions; an example for microscopy files is provided. This exercise may be redone as needed, as different groups of files require different naming conventions.
1. What group of files will this naming convention cover? You can use different conventions for different file sets.
Example: This convention will apply to all of my microscopy files, from raw image through processed image.
2. What information (metadata) is important about these files and makes each file distinct? Ideally, pick three pieces of metadata; use no more than five. This metadata should be enough for you to visually scan the file names and easily understand what’s in each one.
Example: For my images, I want to know date, sample ID, and image number for that sample on that date.
3. Do you need to abbreviate any of the metadata or encode it? If any of the metadata from step 2 is described by lots of text, decide what shortened information to keep. If any of the metadata from step 2 has regular categories, standardize the categories and/or replace them with 2- or 3-letter codes; be sure to document these codes.
Example: Sample ID will use a code made up of: a 2-letter project abbreviation (project 1 = P1, project 2 = P2); a 3-letter species abbreviation (mouse = “MUS”, fruit fly = “DRS”); and 3-digit sample ID (assigned in my notebook).
4. What is the order for the metadata in the file name? Think about how you want to sort and search for your files to decide what metadata should appear at the beginning of the file name. If date is important, use ISO 8601-formatted dates (YYYYMMDD or YYYY-MM-DD) at the beginning of the file names so dates sort chronologically.
Example: My sample ID is most important so I will list it first, followed by date, then image number.
5. What characters will you use to separate each piece of metadata in the file name? Many computer systems cannot handle spaces in file names. To make file names both computer- and human-readable, use dashes (-), underscores (_), and/or capitalize the first letter of each word in the file names. A good convention is to use underscores to separate unrelated pieces of metadata and dashes to separate related pieces of metadata for parsing and readability.
Example: I will use underscores to separate metadata and dashes between parts of my sample ID.
7. Write down your naming convention pattern. Make sure the convention only uses alphanumeric characters, dashes, and underscores. Ideally, file names will be 32 characters or less.
Example: My file naming convention is “SA-MPL-EID_YYYYMMDD_###_status.tif” Examples are “P1-MUS-023_20200229_051_raw.tif” and “P2-DRS- 285_20191031_062_composite.tif”.
8. Document this convention in a README.txt (or save this worksheet) and keep it with your files.
Simple version control
There is a plethora of version control systems for files, with the most popular being Git used with Microsoft’s github. For simple file version control, the following scheme could be used:
- File version numbers
- mydata_v01.csv
- mydata_v02.csv
- mydata_v03.csv
- mydata_FINAL.csv
- Files with dates
- myprotocol_2022-12-13.txt
- myprotocol_2023-01-07.txt
- myprotocol_2023-03-25.txt
Content from Data Storage
Last updated on 2024-11-19 | Edit this page
Overview
Questions
- Where at UC would you want to store your research data?
- What is the basic information you should have about where your research data is stored?
- What is the importance of backing up your research data?
Objectives
- Understand the types of storage options available at UC
- Figure out where you will store your research data and associated metadata
- Understand the importance of backing up your data
- Demonstrate the ability to restore data that has been lost
Introduction
Research data needs to be stored and backed up reliably so that important data is not lost. But storage is commonly a challenge, as institutions don’t always offer uniform options for storage and backup. At UC, we have a few storage options available for your research data that are outlined in the following table:
| Storage Limit | UC Managed | Collaboration Available | Data Classification Suitability | Location of Storage | |
|---|---|---|---|---|---|
| Research Drive | 1 TB (Additonal storage on request) | Yes | Internal | In-confidence, Sensitive, Special | UC Campus (NZ) |
| Dropbox Enterprise (UC) | Unlimited (seats are limited) | Yes | Internal and External | In-confidence, Sensitive | Overseas (Australia) |
| Intitutional OneDrive | 1 TB | Yes | Internal and External | In-confidence | Overseas (Australia) |
| Intitutional Sharepoint (Vault) / MS Teams | 5 TB (additional storage on request) | Yes | Internal and External | In-confidence, sensitive | Overseas (Australia) |
| P Drive | 50 GB (additional storage on request) | Yes | Not Available | Not recommended | UC Campus (NZ) |
| Local Machine or USB | variable | No | Not Available | Not Recommended | N/A |
| Figshare | 1 TB | Yes | Internal and External | Public | Overseas (Australia) |
Challenge
Answer the questions and then fill out the table of information about each possible storage and backup systems. Examine all of the options, evaluating them based on the criteria listed below. Then select primary storage and backup systems and, optionally, an alternate backup.
What is the estimated total data storage you will need over the next five years?
Example: I estimate that I will generate 100 GB of data over the next five years of my project.
Does your data require meeting any specific security standards? If so, what level of security?
Example: My data will include some human subjects data, so my storage systems must have restrictions on access but it’s not medical data so they don’t have to be HRC compliant.
What storage and backup systems are available to you, such as through your institution, workplace, or elsewhere?
Example: I have the following systems available to me: my computer, a Time Machine backup, a departmental server, institution-licensed Box account, and Google Drive.
An example table in .txt format is provided in the following link: Example Data Storage Table
Fill out the information in the table for each storage and backup system you are considering:
| Question | System |
|---|---|
| System name | |
| Is it storage or backup? | |
| What is the cost? | |
| What is the hardware type? | |
| Is the system backed up? | |
| For backup systems, is backup automatic? | |
| What level of security does the system provide? | |
| Is the system local or remote? | |
| Is there a limit to storage capacity? | |
| Who manages the system? | |
| Is it easy or difficult to use? |
Example table of answers
| Question | Example |
|---|---|
| System name | Departmental server |
| Is it storage or backup? | Storage |
| What is the cost? | No cost for 10 GB and under. Cost is $5 per 10 GB per year after that. |
| What is the hardware type? | Server, exact hardware type unknown. |
| Is the system backed up? | No backup. |
| For backup systems, is backup automatic? | N/A |
| What level of security does the system provide? | Storage is password protected. |
| Is the system local or remote? | System is local. |
| Is there a limit to storage capacity? | Storage limit is 500 GB per research group. |
| Who manages the system? | Departmental IT manages the server. |
| Is it easy or difficult to use? | Very easy to use once set up. |
Optimize storage
When optimizing storage and backups, the following should be considered:
- You need a primary storage system that:
- will hold all of your data files,
- meets your needed level of security.
- You need one backup that:
- will hold all of your data files,
- meets your needed level of security,
- is reliable/managed by someone you trust,
- is easy to use,
- backs up automatically.
- At least one backup should be in a different location than your main
storage system for disaster resiliency. If your main backup is nearby
your primary storage and/or if your primary storage system is not
reliable, you need a second backup that:
- will hold all of your files,
- meets your needed level of security,
- is reliable/managed by someone you trust.
Challenge
Pick your storage and backup systems
Example: My primary storage will be my computer with added security restrictions. I will use Time Machine as my first automatic backup and institutional Box, which is controlled access, as my second backup because it is remote.
Test Your backup
Backups are super important for your data, so it’s always good to test that your backups are still working. Nothing is worse than losing your data from your primary storage and then realizing that your backup isn’t working either. Beyond checking that your backup is working, it’s also good to know how to recover your files so that you don’t have to learn this for the first time while panicking about lost data. This short exercise walks you through getting a file off your backup to test that it is working and to learn how the data-recovery process works.
Challenge
Pick a backup system and a file to recover and work through the steps. The hard part of this exercise is finding instructions for file recovery and recovering the file, which vary by backup system.
- Identify where your data is backed up.
- Find instructions for recovering data from your backup system.
- Pick a data file from your computer.
- Follow the instructions from step 2 to get a copy of the data file from step 3 out of your backup system.
- If this process didn’t work, fix your backup system. If this process did work, congrats your backup is working and you know how to recover your files!
Key Points
- It’s important to determinine a data storage location that fits with your security
- Optimizing your storage solution will help you in the long run
- Always backup your data
Content from Data Management
Last updated on 2024-11-19 | Edit this page
Overview
Questions
- What are the benefits of writing a living Data Management Plan?
- Why is it a good idea to think of data stewardship?
Objectives
- Demonstrate writing a living DMP using a word processor or DMPTool.org.
- Understand the importance of talking about data stewardship.
Introduction
While this whole training encompasses data management activities, this section will introduce you to two useful areas: A living Data Management Plan and the roles and responsibilites around data management with research collaborators, known as Data Stewardship.
Living Data Management Plan (DMP)
Many researchers are aware of the two-page data management plan (DMP) for a grant application, but you may not be aware of the more useful type of DMP: a living DMP. This document describes how data will be actively managed during a project and may be updated whenever necessary to reflect current data practices. A living DMP is a useful touchstone for understanding where data lives, how it’s labelled, how it moves through the research process, and who will oversee the data management.
For DMPs, UC has partnered with DMPTool. This is a free service for researchers and you can log in with your UC credentials through SSO. The internet has many resources and videos going over how to use DMPTool. The following link is 13 min. video by Carnegie Mellon University Libraries showing DMPTool and how to fill out the forms is provided.
Challenge
Pick a project and answer the following questions to build your living DMP. This DMP may be changed at any time to improve practices. If you are doing collaborative research, work through this exercise with your collaborators to agree on shared conventions. Feel free to use the DMPTool service and you can check that the DMP made is a test in the initial screen.
Write a short summary of the project this DMP is for:
Example: This project uses mass spectrometry to identify isotopic composition of soil samples.
Where will data be stored? How will data be backed up? (See Exercise 4.1: Pick Storage and Backup Systems.)
Example: The data is generated on the mass spectrometer then copied to a shared lab server. The server is backed up by departmental IT.
How will you document your research? Where will your research notes be stored?
Example: Data collection and analysis is primarily documented in a laboratory notebook, organized by date. README.txt files add documentation to the digital files as needed.
How will your data be organized? (See Exercise 3.1: Set Up a File Organization System.)
Example: Each researcher has their own folder on the shared server. Data within my folder is organized in folders by sample site with subfolders labeled by sample ID. Sample ID consists of: two-letter sample site code, three-digit sample number, and date of sample collection formatted as YYYYMMDD (e.g. “MA006- 20230901” and “CB012-20100512”).
What naming convention(s) will you use for your data? (See Exercise 3.2: Create a File Naming Convention.)
Example: Files will be named with the sample ID, type of measurement, and stage in the analysis process; these pieces of information will be separated by underscores. Examples: “MA006-20230901_TIMS_raw” and “CB012-20100512_SIMS_analyzed”.
Do you need to do any version control on your files? How will that be done?
Example: Version control will be very simple through file naming, appending analysis information onto the end of file names to keep track of which version of the file it is.
How will data move through the collection and analysis pipelines?
Example: Once data is collected on the mass spectrometer, I will copy it to the correct folder on the shared server for analysis. Data will stay in its sample IDlabeled folder as it gets analyzed, with different file names to annotate analysis stage. Data that will be published will be copied into separate folders, organized by article.
Record any project roles and responsibilities around data management:
Example: It is each researcher’s responsibility to ensure that data moves through the analysis pipeline and is labeled correctly. The lab manager will ensure that the shared server stays organized and will periodically check that backups are working.
Record any other details on how data will be managed:
Example: Copies of this DMP will live in my top-level folder on the lab server so that others can find and use my data as needed.
Determine Data Stewardship
It is often helpful to be up front about requirements and permissions around research data. This exercise encourages you to discuss these issues with supervisors and peers to make sure that there are no misunderstandings about who has what rights to use, retain, and share data. Many of these will be addressed in the living DMP, but we will separate them into their own category here.
Challenge
Determine which research data should be discussed. Bring together the Principle Investigator, the researcher collecting the data, and anyone else who works with that data. As a group, answer the questions in the exercise, making sure that everyone agrees on the final decisions. Record the results of the discussion and save them with the project files.
Who is participating in this discussion?
Example: This discussion includes the graduate student who collected the data, the project Principle Investigator (PI), and the laboratory manager.
What data is being discussed? Example: This discussion covers all of the data collected by the graduate student during their time at the university.
Are there security or privacy restrictions on the data and, if so, what are they?
Example: Some of the research data includes human subjects data. This data must be held securely with limited data sharing, as outlined in the IRB protocols.
Are there intellectual property limitations on the data and, if so, what are they?
Example: There are no intellectual property concerns for the data.
Are there any requirements to publicly share the data and, if so, what are they?
Example: This research was funded by the NIH, which requires data sharing. The laboratory plans to share all data reproducing published results with the exception of the human subjects data.
Who will store the copy of record of the data and for how long?
Example: The project PI will retain the copy of record of the data for at least 3 years after the end of the grant award, with an ideal 10 year retention period.
Who is allowed to keep a copy of the data after the project ends? Which data?
Example: The graduate student may keep a copy of all data except the human subjects data after they leave the university.
Who is allowed to reuse the data after the project ends? Which data? Are there any requirements for reuse, such as co-authorship?
Example: The graduate student may reuse and publish with the data collected during their time at the university but must offer co-authorship of any papers using the data to the project PI and any relevant lab members.
Who keeps any physical research notebooks after the project ends?
Example: The PI will keep all physical laboratory notebooks but the graduate student may make copies to retain for their personal records.
Key Points
- A living DMP is useful for understanding where data lives, how it’s labelled, how it moves through the research process, and who will oversee the data management.
- Data stewardship lays out who has what rights to use, retain, and share data.
Content from Data Sharing
Last updated on 2024-11-19 | Edit this page
Overview
Questions
- What data repository would you publish your data in?
- What are the benefits of sharing you data?
- Do you need to include all your data in a repository?
Objectives
- Understand the benefits of sharing your research data and how to do that.
- Understand the different type’s of repositories available.
- Determine how to limit your dataset to be more usable.
Introduction
Sharing data that underlies research has become a common expectation within scholarly research. However, the landscape of data repositories is still uneven and many researchers are still learning best practices for data sharing.
Pick a Data Repository
It can be difficult to know where to share research data as so many sharing platforms are available. Current guidance is to deposit data in data repository that will give you a DOI or similar permanent identifier. For this purpose, the University of Canterbury offers Figshare as our recommended general repository. The following exercise guides you through the process of picking a data repository, starting with repositories for very specific types of data and defaulting to generalist data repositories.

Repository fees
Some repositories charge fees for deposit, most often for large data (500 GB or larger). Figshare is free to UC Researchers, but currently has a limit of 1 TB of data. For more information see the UC figshare libguides.
Pick a Data Repository
Identify the data that needs to be shared and work through repository selection from discipline-specific data repositories to more general data repositories. Once you have identified a repository for all of your data, deposit the data and record the corresponding permanent identifiers. Note that, depending on data types, you may need to deposit your data into multiple repositories (for example, a discipline-specific repository for one type of data and an institutional data repository for the rest of the data).
1. Identify all of the data that needs to be shared.
Example: My data to be shared includes: 1) genetic data for Drosophila; and 2) microscope images of flies.
2. Is there a known disciplinary data repository for some or all of the data? For example, is there a data repository used by everyone in your research area or required for your data type by your funding agency?
If so, deposit some or all of your data there. Go to step 7 if the repository will accept all of your data or go to the next question if there is still some data left to deposit.
Example: The database FlyBase is used for Drosophila genes and genomes. My genetic data will be shared there.
3. Review the list of recommended data repositories from PLOS1. Is there a logical disciplinary data repository for some or all of your data?
If so, deposit some or all of your data there. Go to step 7 if you have shared all of your data or go to the next question if there is still some data left to deposit.
Example: There isn’t a logical disciplinary data repository for microscope images of flies.
4. Does your institution have a data repository?
If so, deposit the remainder of your data there and go to step 7.
Example: University of Canterbury Figshare. I will deposit my microscope images in UC Figshare.
5. Do you have a preferred generalist data repository2?
If so, deposit the remainder of your data there and go to step 7.
Example: [All data has been shared already.]
6. Pick a generalist data repository3 and deposit the remainder of your data.
Deposit your data and go to step 7.
Example: [All data has been shared already.]
7. Record the permanent identifier, ideally a DOI, from each data deposit.
DOIs make data FAIR4 and aid with data sharing compliance. If you did not receive a permanent identifier (such as a DOI, permanent URL, etc.) during deposit, return to step 2 and pick a different data repository for your data.
Example: UC Figshare provides DOIs for all deposits; my permanent identifier is doi.org/10.22002/XXXXXXXXXXX.
Share Data
Data sharing is becoming common and expected by funding agencies and journals. While the process of depositing data into a data repository will vary between repositories, there are some common actions that should be taken to prepare data for sharing.
What data to include in a dataset
While sharing data for a paper in a public repository is good (and sometimes required), there is little guidance on what data should be uploaded. Data to include in a repository is field specific, but we will present some guidelines here following the policies of the Nature Portfolio journals6.
Authors should provide their data at a level ‘rawness’ that allows it to be re-used, in alignment with accepted norms within their community. It may be advantageous to release some types of data at multiple levels to enable wider reuse – for example, proteomics data may best be released as ‘raw’ spectra as well as more processed peptide- or protein-level data – however this is not mandated as long as the level of ‘rawness’ is sufficient for some potential use. Authors may submit supplementary information files – including code (also see our code availability policy), models, workflows and summary tables – however we strongly encourage deposition in repositories as a first preference, especially for primary data, which should not be submitted as supplementary information.
In short, you should upload data to the repository in the rawest format that allows for a reader to reproduce your results. This means the data shouldn’t be filtered or have any sort of operations done to it. To illustrate what this might look like, let’s go over a real-life case study.
Data Case Study - Computational Fluid Dynamics Simulations with OpenFOAM
Let’s suppose that we performed some Computational Fluid Dynamics (CFD) simulations using the open-source library OpenFOAM. This involves setting up a case with some initial conditions, running the simulations, post-processing the simulation data with a program like ParaView, and then post-processing that data with python.
Most research can be broken down into three processing stages: Pre-process, pProcess, Ppost-process. We will map the case study to these three as follows:
- Pre-process: generating the geometry, setting up the case files, determining which model to use, etc.
- Process: performing the simulation, generating the field data for each cell in the mesh, making sure the simulation converges, etc.
- Post-process: Convert all the field variables for each cell into a .csv file, use python to process .csv files to generate data and figures for publication, etc.
Let’s say we’ve run our simulations, generated our data and figures for publication, and now we need to make everything publicly available. There is a problem here though since our data is 1 TB, but our repository can only be 100 GB. Even after compressing our data to something like a .zip file, it is still 600 GB. On top of this requirement, there are physical limitations of the speed at which data can be downloaded so care must be taken to keep repositories as small as possible. So what data is important enough to keep in the repository. The data breakdown is as follows:
- Pre-processing: ~1 GB
- Processing: ~800 GB
- Post-processing: ~200 GB
We want to provide the readers with the raw data and the code that we used to post-process that raw data. This means we include all the data and code generated in the post-processing step. We can compress this down to ~50 GB. What about the pre-processing and processing steps?
Here we notice that the bulk of our data is in the processing step (~800 GB). But we note that by running the processing step with the data in the pre-processing step will generate the same data. In cases like this, we don’t need to include the data for the processing step, only the pre-processing data. A reader can regenerate our process data if they want. After compressing all this data, we get a repository from 1 TB down to ~50 GB.
A good data repository has enough data to reproduce the results. Your research data should be kept at an appropriate level of ‘rawness’ that allows it to be reused, and as small as possible to facilitate easy storage and data egress.
Only data that is needed to recreate the study and results should be included, and care must be taken to exclude data that may not be immediately needed to reproduce the results.
Key Points
- An important part of doing research is sharing it with others so that they can use it.
- Choose a repository that is field specific if you can, but generalist ones work too.
- Make sure to think about what data you actual need to share with other researchers so that they can recreate your results (does it need to be a 4 TB dataset?)
PLOS ONE. Recommended Repositories, 2023. URL https://journals.plos.org/ plosone/s/recommended-repositories.↩︎
NIH. Generalist Repositories, 2023. URL https://sharing.nih.gov/datamanagement- and-sharing-policy/sharing-scientific-data/generalistrepositories.↩︎
NIH. Generalist Repositories, 2023. URL https://sharing.nih.gov/datamanagement- and-sharing-policy/sharing-scientific-data/generalistrepositories.↩︎
Mark D. Wilkinson, Michel Dumontier, IJsbrand Jan Aalbersberg, Gabrielle Appleton, Myles Axton, Arie Baak, Niklas Blomberg, Jan-Willem Boiten, Luiz Bonino da Silva Santos, Philip E. Bourne, Jildau Bouwman, Anthony J. Brookes, Tim Clark, Mercè Crosas, Ingrid Dillo, Olivier Dumon, Scott Edmunds, Chris T. Evelo, Richard Finkers, Alejandra Gonzalez-Beltran, Alasdair J. G. Gray, Paul Groth, Carole Goble, Jeffrey S. Grethe, Jaap Heringa, Peter A. C. ’t Hoen, Rob Hooft, Tobias Kuhn, Ruben Kok, Joost Kok, Scott J. Lusher, Maryann E. Martone, Albert Mons, Abel L. Packer, Bengt Persson, Philippe Rocca-Serra, Marco Roos, Rene van Schaik, Susanna-Assunta Sansone, Erik Schultes, Thierry Sengstag, Ted Slater, George Strawn, Morris A. Swertz, Mark Thompson, Johan van der Lei, Erik van Mulligen, Jan Velterop, Andra Waagmeester, Peter Wittenburg, Katherine Wolstencroft, Jun Zhao, and Barend Mons. The FAIR Guiding Principles for scientific data management and stewardship. Scientific Data, 3(1):160018, March 2016. ISSN 2052-4463. doi: 10.1038/sdata.2016.18. URL https: //www.nature.com/articles/sdata201618. Number: 1 Publisher: Nature Publishing Group.↩︎
Creative Commons Wiki. CC0 use for data, 2014. URL https://wiki. creativecommons.org/wiki/CC0_use_for_data.↩︎
Scientific Data Data Policies. Nature 2024. URL https://www.nature.com/sdata/policies/ data-policies↩︎
Content from Ending the Research Project
Last updated on 2024-11-19 | Edit this page
Overview
Questions
- How do you write a lesson using R Markdown and sandpaper?
Objectives
- Explain how to use markdown with the new lesson template
- Demonstrate how to include pieces of code, figures, and nested challenge blocks
Introduction
The end of a project is a key time to perform data management activities in order to set yourself up for future data reuse. This is because you still remember all of the important details about your data and can make good decisions about preparing it for the future. This episode has three sections to work through for project wrap up: a section on converting data to more open file types; a checklist for populating a project Archive folder; and a checklist for preparing data for reuse, which leverages the previous episode.
This episode also covers project wrap up in the form of separating from your institution. This checklist challenge for the departing researcher is important to work through so that critical data does not get lost in the transition. A fuller version of this checklist, intended for both the departing personnel and a project administrator to work through together, is also available1.
Prepare Data for Future Use
The end of a project is a good time to prepare data for potential future reuse, as you still know the important details about the data to record and have access to any software used to create the data. This checklist challenge walks you through steps to gather your data into a central place and document the project. Working through the checklist results in project data being in one central location, well documented, and organized and formatted in a way to make future reuse easier.
Prepare Data Checklist
Gather all of the data from a project and work through the checklist to organize and document the data for future reuse. This challenge refers to several other challenges in the Workbook that should be completed during this process, if they have not been already. The following is adapted from2.
Prepare Data
[ ] Move all data into one central project folder; this folder may have sub-folders and should be organized however makes sense for your data.
[ ] As necessary, convert data file types to copy data into more open/common file formats.
Back Up Your Research Notes
[ ] If your notes are electronic, save a copy in the project folder
[ ] If your notes are physical, scan them and save a copy in the project folder.
Create a Project Archive Folder
[ ] Create an Archive Folder.
[ ] Put the Archive folder in the project folder.
Convert Data File Types
Data is often stored in a file type that can only be opened by specific, costly software – this is referred to as a “proprietary file type.” You can tell that you have data in a proprietary file type if you lose access to the data when you lose access to the software. When data is in a proprietary file type, it’s always a good idea to copy the data into a more common, open file type as a backup; you may lose a bit of functionality, but it’s better to have a backup than to not have your data at all! This challenge works through identifying possible alternative file types for the data’s proprietary file type before instructing you to make a copy of the data in the new file type.
Convert Data File Types
For any data in a proprietary file type, identify the data and answer the following questions. Once you have picked a more open, common file type, make a copy of the data in that file type but do not delete the original data. (Keeping a copy in the original file format means that, while you access to the necessary software, your data has full functionality. If you lose access to the software, you’ll still have your data in some format, which is better than not having your data at all.)
Is your data stored in a proprietary file type? What file type and how does this limit future data reuse?
Example: Data is stored in a .CZI file format, which is a proprietary Zeiss microscope image format. These files do not open in other software.
Is it possible to convert your data to other file types? If so, list the possible types:
Example: I can use the Bio-Formats tool to convert .CZI files to: .AVI, .CH5, .DCM/.DICOM, .EPS/.EPSI/.PS, .ICS/.IDS, .JPG, .JP2/.J2K/.JPF, .MOV, .OME.TIFF/.OME.TIF, .OME/.OME.XML, .PNG, or .TIFF/.TIF.
Which of the possible file types are in common use? Which of the possible file types can be opened by multiple software programs?
Example: JPG, PNG, and TIFF are all image formats in common use. OMETIFF is a common image format within microscopy; most software will read the TIFF portion of the file but only some software will read the extra OME metadata. Common movie file types are AVI and MOV.
Of the possible options above, do you have a preference for a specific file type?
Example: I prefer an image file over a movie file. TIFF is best because it doesn’t lose resolution due to compression and can store all of the 4-dimensional image layers. OME-TIFF gives all of the benefits of TIFF but with added metadata.
Pick one of the more open or common file types and copy your important data files into that file type. Do not delete the original files.
Example: I will convert my data to OME-TIFF files.
Create an Archive Folder
To save your future-self time spent digging through all of your research files, set aside the most important files into a separate “Archive” folder. Do this at the end of the project while you still remember which files are important and where they are located. The Archive folder should only contain a small subset of the most important documents that are likely to be reused; you may still need to go through all of your files but, in the majority of instances, you will save time by easily finding what you need in the Archive folder.
Create an Archive Folder
This challenge consists of a checklist of the key documents that are likely to be most useful in a research project archive. Create a separate folder within the larger project folder (or in a highly visible place within the storage system) labelled “Archive”. Copy – do not move – the files on this checklist into the Archive folder. Add copies other important research documents, as needed. Remember, the Archive folder does not need to be comprehensive, so focus on the subset of files that are most likely to be reused or referenced in the future. Adapted from3.
Serpate from the institution
Researchers regularly leave institutions in order to take new jobs. For how common this occurrence is, it represents a critical transition during which data may be lost. This checklist enumerates a number of important steps that researchers can take to ensure that they retain the appropriate data yet leave behind what belongs to the institution.
Seperating from your Institution
The researcher leaving the institution should work through this checklist to ensure they keep the proper information while returning what does not belong to them. The researcher and project administrator may also jointly work through the extended version of this exercise, the Data Departure Checklist4.
Retain Copies of Data that You Have Permission to Keep
[ ] If you have not done so already, under Data Stewardship, determine what data you may retain
[ ] Identify and keep pertinent research data from personal devices
[ ] Identify and keep pertinent research data from storage systems (e.g. AWS/Azure, Box, campus HPC, Dropbox, Electronic Lab Notebook, Globus, Google Drive, lab/department/college servers, Microsoft OneDrive, Microsoft Sharepoint, or shared collaborator drives)
[ ] When appropriate, make a copy of research notes
Delete Personal Information and Remove Personal Devices
[ ] Remove personal information from lab devices
[ ] Remove personal devices from lab
[ ] Remove personal access to shared accounts (e.g. lab Github, lab repository page, lab website, mailing lists, or social media)
Return Lab Hardware
[ ] Individual computer / workstation
[ ] Tablet(s)
[ ] Peripherals (e.g. keyboard, mouse, monitor)
[ ] External drives
[ ] Other lab equipment (e.g. cameras, recording devices)
Key Points
- Use
.mdfiles for episodes when you want static content - Use
.Rmdfiles for episodes when you need to generate output - Run
sandpaper::check_lesson()to identify any issues with your lesson - Run
sandpaper::build_lesson()to preview your lesson locally
Abigail Goben and Kristin A. Briney. Data Departure Checklist, August 2023. URL https://doi.org/10.7907/h314-4x51.↩︎
Kristin A. Briney. Project Close-Out Checklist for Research Data, May 2020b. URL https://doi.org/10.7907/yjph-sa32.↩︎
Kristin A. Briney. Project Close-Out Checklist for Research Data, May 2020b. URL https://doi.org/10.7907/yjph-sa32.↩︎
Abigail Goben and Kristin A. Briney. Data Departure Checklist, August 2023. URL https://doi.org/10.7907/h314-4x51.↩︎